2 data input, Data input, Operation – Lenze EPM-H510 User Manual
Page 64
1
4
7
2
5
8
0
3
6
9
Operation
L
64
EDBEPM-H510 DE/EN/FR 4.0
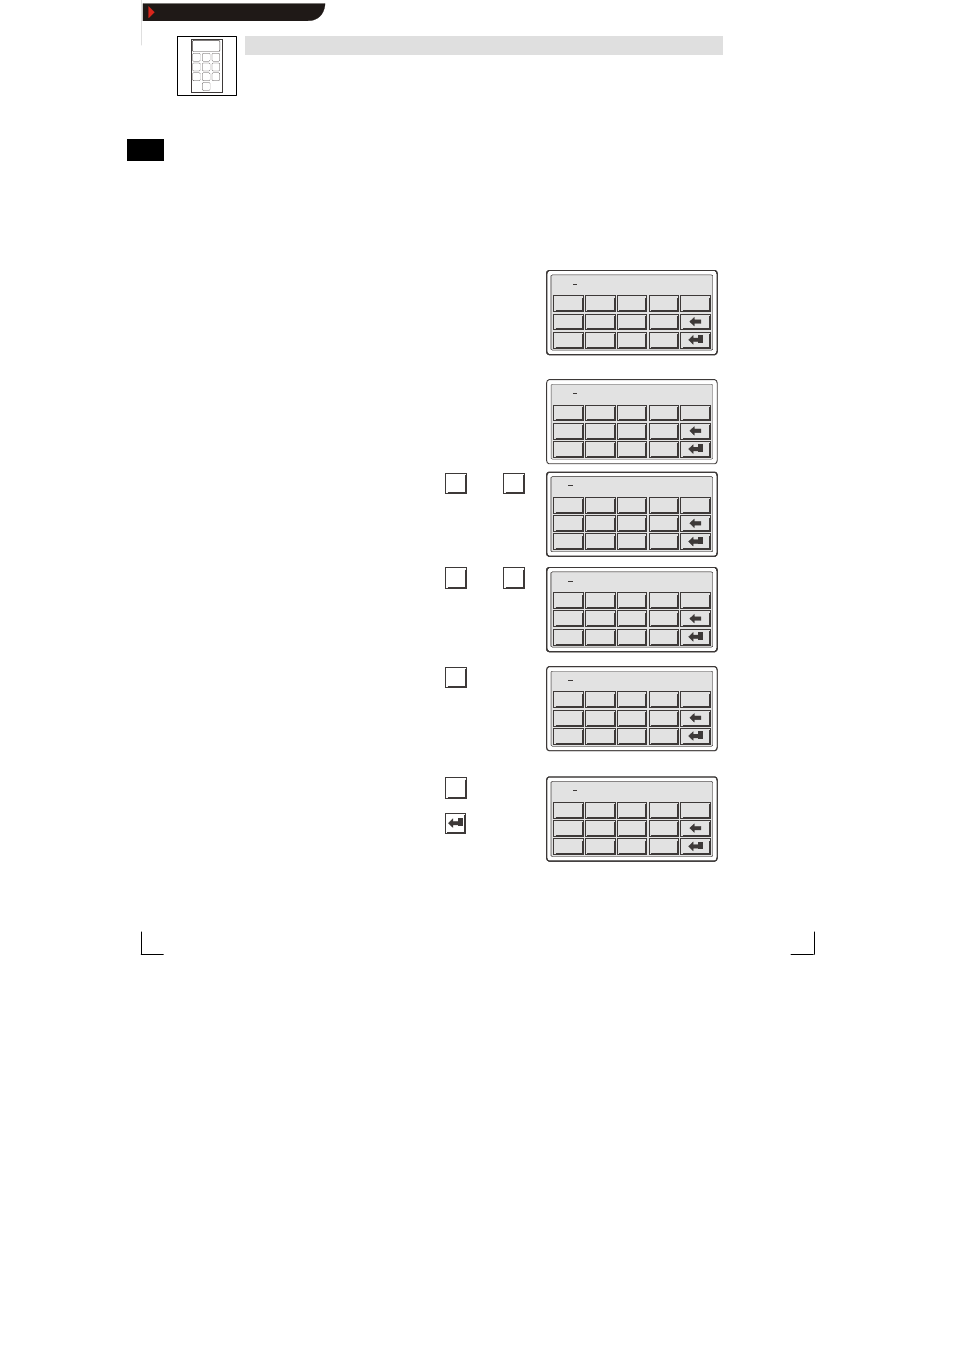
5.2
Data input
Data input and modification are described step-by-step using examples.
If you want to ...
Press keys...
Example
A)
select a menu/page.
•
Touch the corresponding button on the
touch pad.
B)
change to the parameter level.
•
Touch the parameter button on the
touch pad
+/-
.
0
7
4
1
8
5
2
9
6
3
ESC
-9876
touch pad.
– The cursor is set onto the right digit.
+/-
.
0
7
4
1
8
5
2
9
6
3
ESC
-9876
The cursor is set onto the right digit.
– In alphanumeric or dynamic text
fields the cursor is set onto the left
+/-
.
0
7
4
1
8
5
2
9
6
3
ESC
-9876
fields the cursor is set onto the left
digit (see J) or I)).
+/-
.
0
7
4
1
8
5
2
9
6
3
ESC
-9876
C)
enter a new numerical value.
1. Change to the parameter level (see B)).
2. Leave the cursor on the right digit.
+/-
.
0
7
4
1
8
5
2
9
6
3
ESC
-9876
3. Enter the value of the first digit.
– All other digits are set to zero.
0
...
9
+/-
.
0
7
4
1
8
5
2
9
6
3
ESC
0001
All other digits are set to zero.
+/-
.
0
7
4
1
8
5
2
9
6
3
ESC
0001
+/-
.
0
7
4
1
8
5
2
9
6
3
ESC
0001
+/-
.
0
7
4
1
8
5
2
9
6
3
ESC
0001
4. Enter the value for the next digit.
– The digit entered will shift one place
0
...
9
+/-
.
0
7
4
1
8
5
2
9
6
3
ESC
0012
The digit entered will shift one place
to the left.
+/-
.
0
7
4
1
8
5
2
9
6
3
ESC
0012
+/-
.
0
7
4
1
8
5
2
9
6
3
ESC
0012
+/-
.
0
7
4
1
8
5
2
9
6
3
ESC
0012
+/-
.
0
7
4
1
8
5
2
9
6
3
ESC
0012
5. If necessary, enter a floating point.
.
+/-
.
0
7
4
1
8
5
2
9
6
3
ESC
012.
TIP Floating points can only be entered if the
field is defined as “Floating Point” (see
planning tool “HMI Designer”).
+/-
.
0
7
4
1
8
5
2
9
6
3
ESC
012.
6. Repeat step 4. until the value is entered.
7. If necessary, enter a sign.
+/-
+/-
.
0
7
4
1
8
5
2
9
6
3
ESC
12.34
8. Confirm the input.
– The cursor changes to the menu
level
+/-
.
0
7
4
1
8
5
2
9
6
3
ESC
12.34
level.
+/-
.
0
7
4
1
8
5
2
9
6
3
ESC
12.34
Show/Hide Bookmarks