Operation – Leica Biosystems RM2255 User Manual
Page 30
28
Instructions for Use, V 1.8 RevC – 07/2013
Sectioning window setting
The sectioning window function allows to optimally adapt the size of the
sectioning area to the actual size of the specimen.
The selected sectioning window setting is maintained when the instrument
is turned off.
• Turn the handwheel to position the lower edge of the sample approxi-
mately 3 mm above the cutting edge.
• Press the "SET SECTIONING WINDOW" button. This defines the first
window border.
• The green LED (43) in the button flashes after the first window border is
defined.
• Pass the specimen through to the upper border of the cutting edge and
press the "SET SECTIONING WINDOW" button again.
• After the second window border is defined, the green LED in the button
goes out. This indicates that both values were accepted.
5. Operation
43
To set a sectioning window, you must always enter a pair of values.
The sequence of entry (upper or lower) is optional.
Canceling a defined sectioning window
• To cancel a defined sectioning window before the start, press the "SET
SECTIONING WINDOW" button once. This sets the sectioning area to the
maximum size (corresponding to the entire sectioning area).
The set sectioning speed is only active within the boundaries of the
sectioning area. A higher speed is used outside the sectioning area.
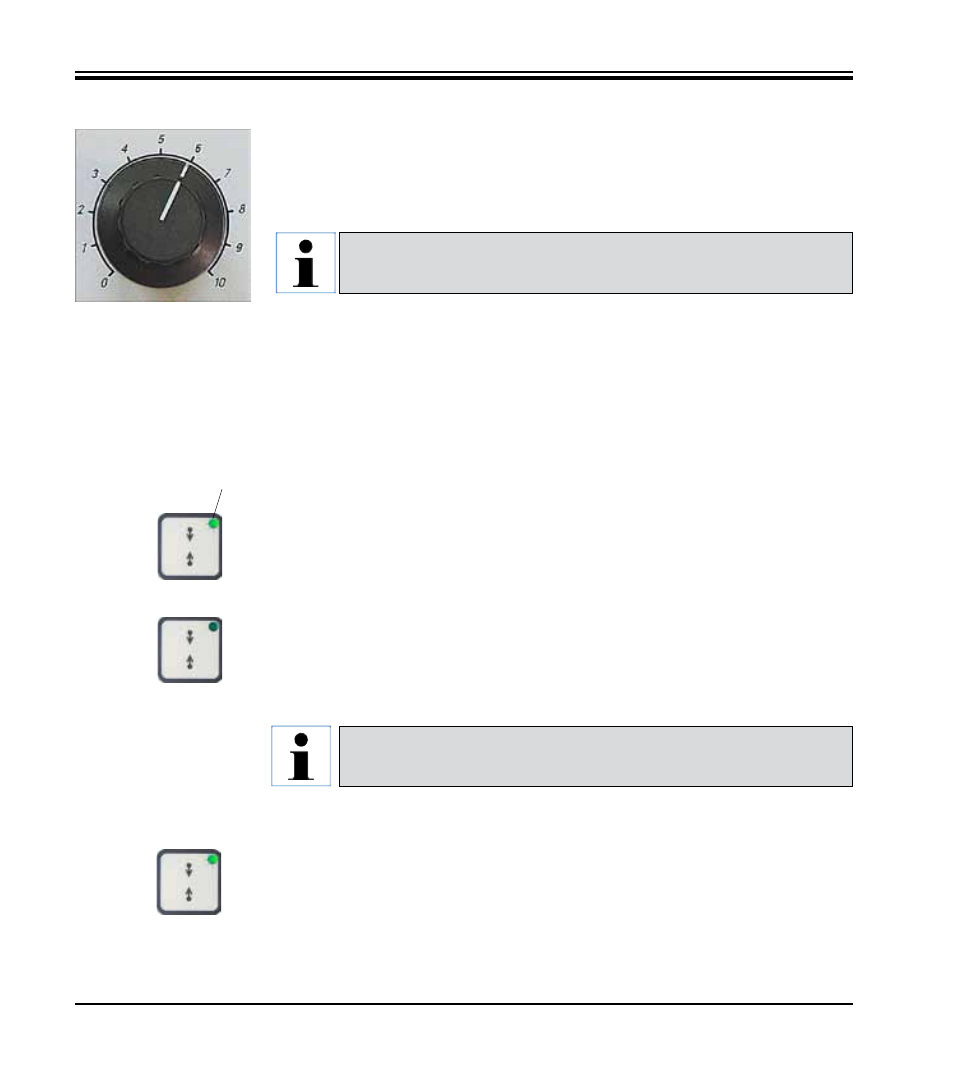
Setting the sectioning speed
• The sectioning speed can be set continuously (in the range of
0 - 420 mm/s) using the rotary knob.
The speed selector has a scale graduation from 1 to 10. The graduation is
provided for reference purposes and does not indicate a particular speed.