Step 3 step 4, Step 5, Goop application – Kargo Master Pro III Steel Ladder Rack – Without A Camper Shell (80020) User Manual
Page 6: Cj m, Gn k, Fp n k
Pro3&4
_4.1
G
N
K
GO
OP
F
P
N
K
(RIGHT SIDE SHOWN)
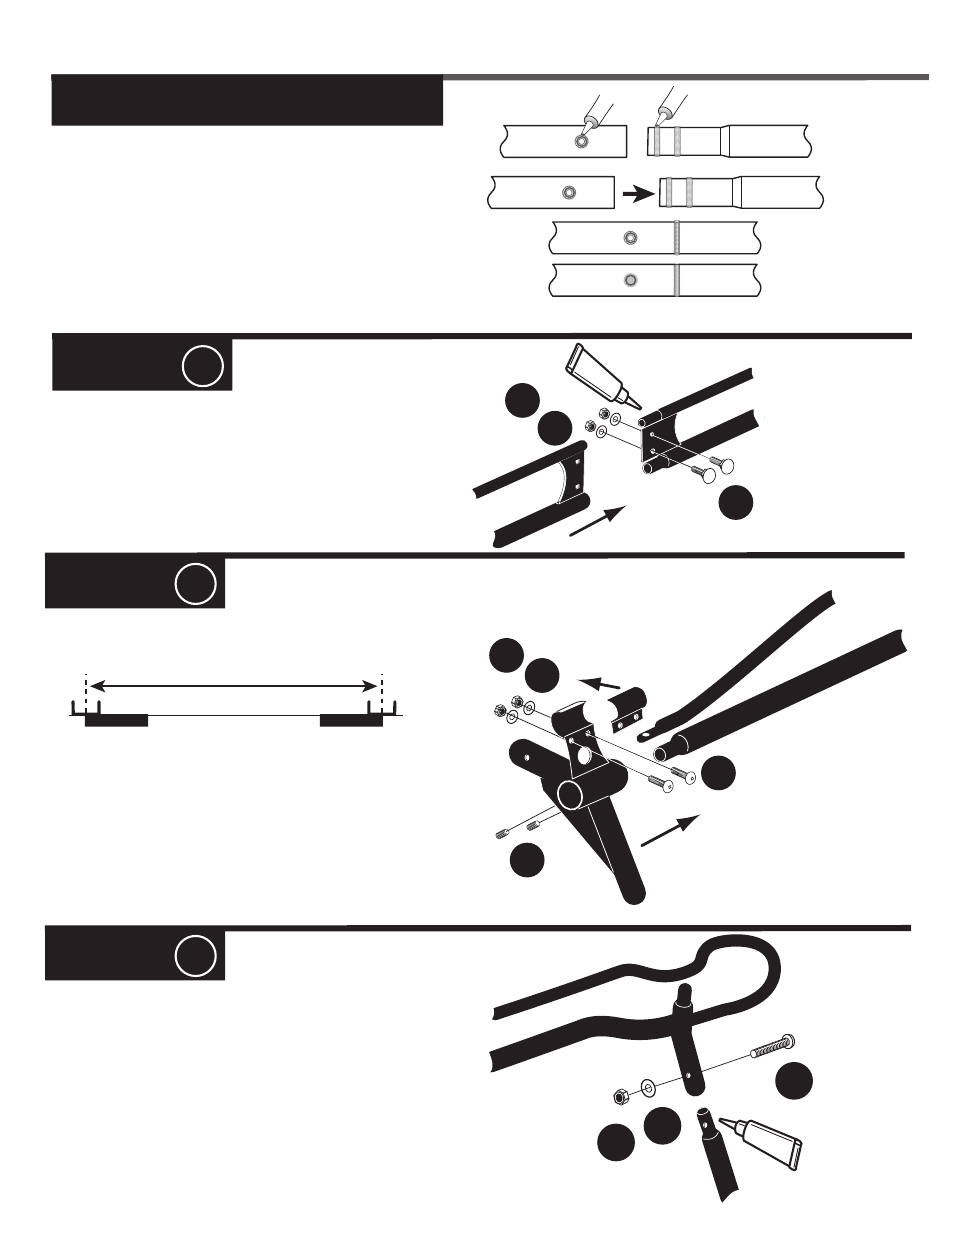
STEP 3
STEP 4
#1 = Cover entire swedge joints with goop
sealant and join FRONT and REAR side channels
together. There is a RIGHT & LEFT REAR. The
leg cups angle outward. Be sure the connecting
plates overlap, and loosely bolt together with bolts
G, washers K and lock nuts N.
#2 = Slide the FRONT leg onto the front side channel.
There is a RIGHT & a LEFT. Match to the correct side
channel so that both FRONT & REAR legs angle outward.
Position distance to match same as above. Insert the set
screws P, but do not tighten yet.
#3 = Loosely attach the top CLAMP with
bolts F, washers K, and nuts N.
#1 = Cover entire swedge joints with goop
sealant and attach the REAR LEGS with
bolts C, washers J, and nuts M.
Note: The distance between front & rear
legs will not be longer than the inside
measurements of the bed itself.
STEP 5
GOOP
C
J
M
GOOP APPLICATION
Apply a healthy air tight bead of goop
around
every swaged joint as shown, to
prevent moisture from leaking into and out
of the joint. If this is not done properly, the
inside surface of the tubes can rust and
rusty water can leak out. Maintain this
joint seal throughout the life of your rack.
Swaged joint & holes
Smooth goop at swaged joint & holes
GOOP
GOOP
#1 = Measure the center to center measurement
between the front and rear footplate saddles.
Final positioning of the front legs will follow.
Bulkhead (front)
Tailgate (rear)