Step 4 step 5 – Kargo Master Pro II Steel Ladder Rack – Without A Camper Shell (0104) User Manual
Page 5
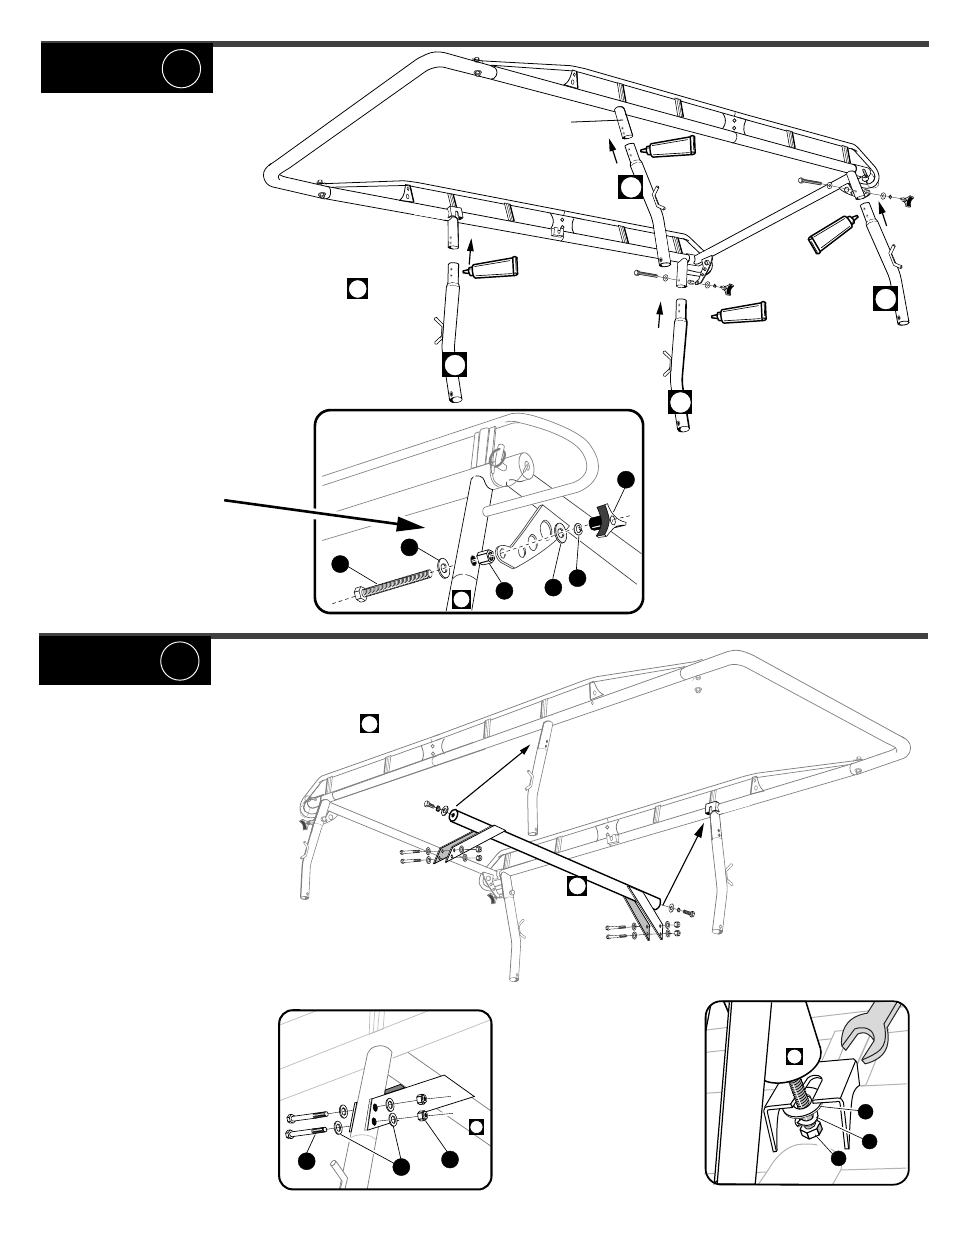
#
1
= All 4 legs are identical.
./4%
Cover entire swedged joint surfaces with E6000,
Then i
nsert the swedged end of each leg ,rope
hooks facing outward, into the short leg cup.
Repeat this operation for each leg, leaving FRONT
LEGS unbolted.
STEP 4
STEP 5
E6000
E6000
E6000
E6000
#
1
=
At each end of CENTER CROSS BAR ,
start BOLTS & WASHERS. Be sure to include
both flat and lock WASHERS.
Leave loose enough so that
BOLT shaft can be slid into
the FRONT SLOTTED BRACKET
as shown in #3 below.
01
01
01
01
01
H
O
B
P
3
4
/
B
R
U
F
B
B
#
2
= Bolt REAR LEGS and
REAR BAR BRACE (as shown)
K
U
N
U
E
W
01
Leg Cup
#2
=
On one side of rack, slide BOLTS & WASHERS
into FRONT SLOTTED BRACKET as shown in #3
below.
On the other side of the rack, slide the BOLT &
WASHERS into FRONT SLOTTED BRACKET. Bolt
CENTER CROSS BAR
BRACES and LEG
together(snug only).
Returning to the other side
of the rack, bolt the
CENTER CROSS BAR
BRACES
and LEG together (snug only)
#3
=
With an open end
3/4" wrench, snug the
CENTER CROSS BAR
BOLTS on each side of
the rack.
Pro 2 12_1.1