E6000 application, Step 1 step 2 step 3, Qm l – Kargo Master Pro II Steel Ladder Rack – Without A Camper Shell (0104) User Manual
Page 4
Q
M
L
E
60
00
#
2
=
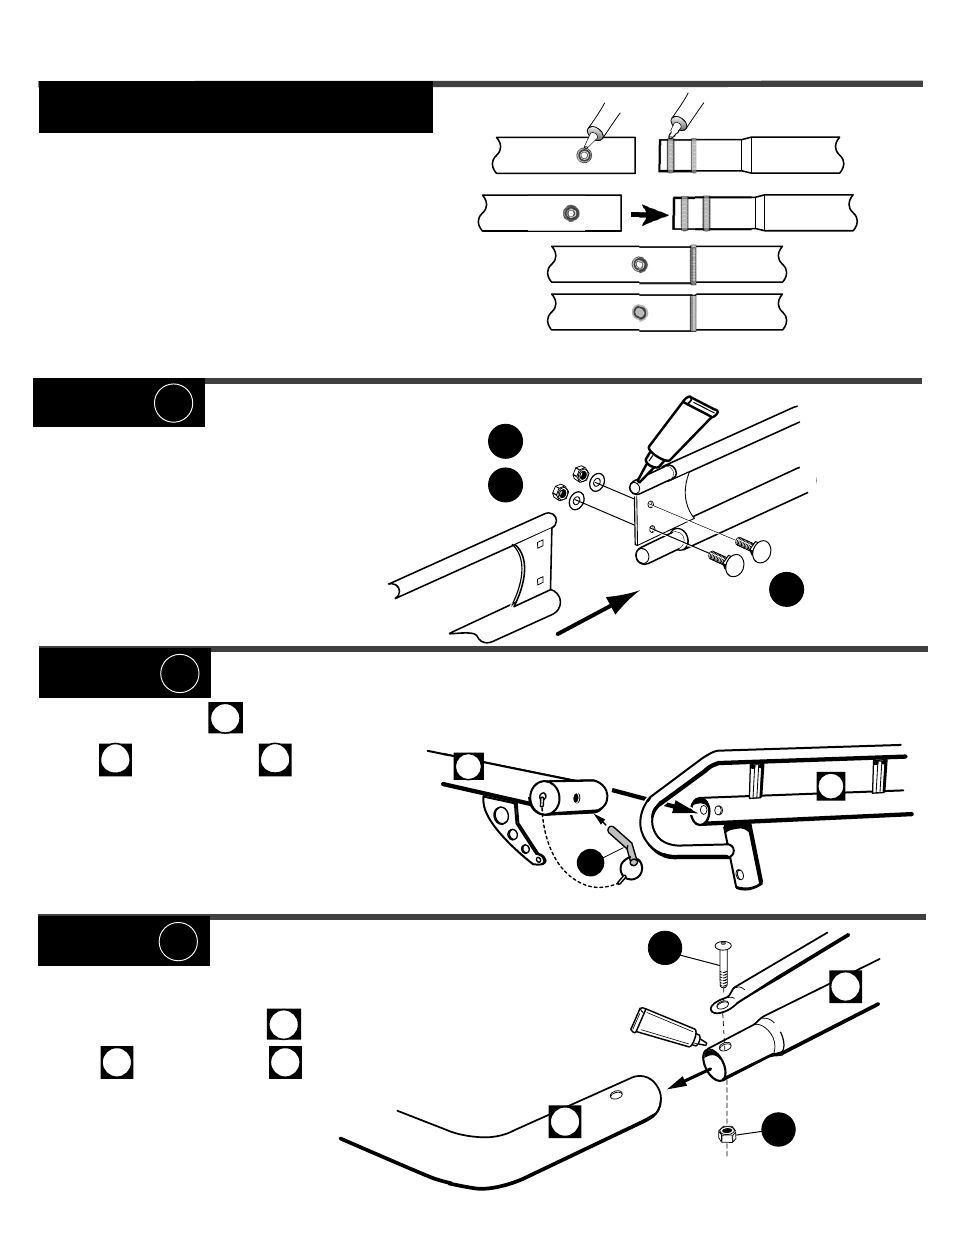
BOLT TOGETHER using
G & I.
The allen wrench is included
in the package.REAR SIDE BEAMS
#
1
=
Cover entire swedged joint surfaces with E6000,
Slide FRONT CROSS BAR into FRONT SIDE BEAMS
#
1
= Slide REAR BAR on to REAR SIDE BEAMS
J
#
3
= Fully insert LOCK PINS
J completely to the bend of the pin.
#
2
= Install LOCK PIN CAP
J onto Rear Bar D by
soaking plastic cap in hot soapy water, dry, then add E6000
to plastic and Insert.
D
A
04
03
05
G
A
03
E6000
I
STEP 1
STEP 2
STEP 3
J
D
06
E6000 APPLICATION
Apply a healthy air tight bead of E6000
around every swedged joint as shown, to
prevent moisture from leaking into and out
of the joint. If this is not done properly, the
inside surface of the tubes can rust and
rusty water can leak out. Maintain this joint
seal throughout the life of your rack.
Swedged joint & holes
Smooth E6000 at swedged joint & holes
%
%
$RIVER
#HANNEL
06
0ASSENGER
#HANNEL
$RIVER
#HANNEL
0ASSENGER
SIDE
#
1
= Cover entire swedge joints with E6000 and
join FRONT and REAR side channels together.
Be sure the connecting plates overlap and bolt
together with bolts
Q, washers
Pro 2 12_1.1