New Buck Corporation 21 User Manual
Page 12
B. Wall Exit Into Metal Tee-Box
1. Mark the plumb line on the wall directly behind the center of the heater. (See Figure 7.)
NOTE: When using 24# ga. minimum blue or black steel pipe, maintain 18" between pipe
and ceiling.
2. Place the vertical portion of the heater pipe and the elbow in position and project a
point onto the plumb line level with the center of the elbow.
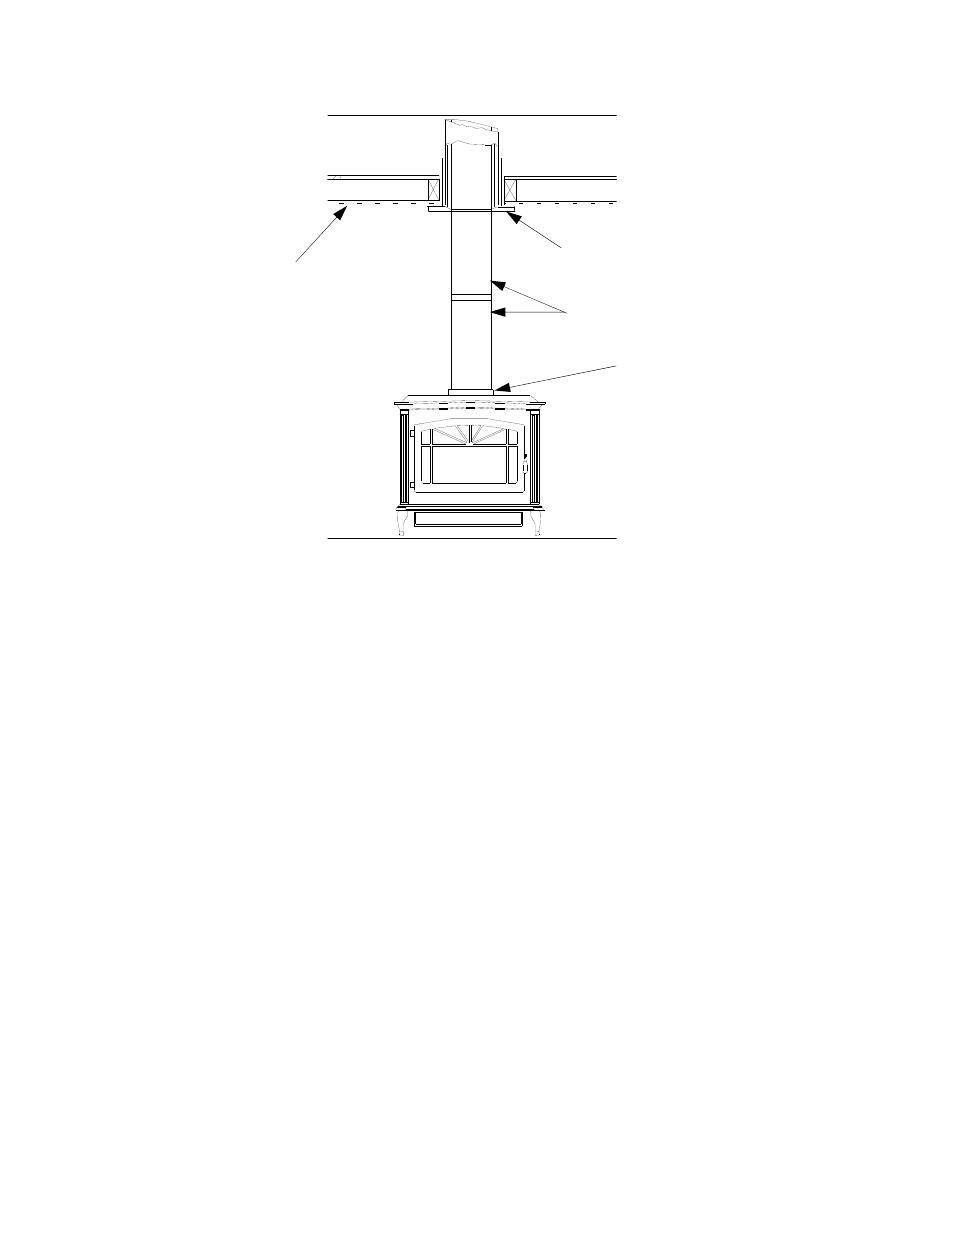
Ceiling
Ceiling Support Box
Single Wall Connector Pipe
Heater Collar
NOTE: See Chimney
Manufacturers Installation
Instructions For Installing
Chimney and Ceiling Trim
Plate.
Figure 7
3. Measure up so there will be at least 1/4" rise per foot of horizontal connector pipe,
maintaining clearances to the ceiling as noted in Figure 8. This will give you the center of
the hole for the chimney penetration.
4. After locating the center of the penetration, install the tee-box and chimney as per the
chimney manufacturer's specifications.
5. Connect the chimney collar to the tee-box using #24 ga. minimum blued or black steel
connector pipe. DO NOT use galvanized pipe. Connect each section so the crimped end
faces downward, and secure each section to each other using three (3) sheet metal screws
or rivets.
10