Metal halide 575w – GAM METAL HALIDE 575W User Manual
Page 2
Silicone cable connection between ballast & fixture:
Connect the Amphenol plug coming from the lamphouse
to socket (output to lamp). Screw on the bayonet catch
(clockwise) to ensure safe connection.
Main Switch:
For normal operation & for DMX operation the main
switch should be at “ON” = 1 at all times. Should the
unit no longer react to standard DMX values, switching it
“OFF” and “ON” can reset it.
Ventilator Opening:
Make sure the ventilator openings do not become obstruct-
ed so that the free flow of air is maintained.
Note: The fan only runs when the fixture is in use and “lit”.
Hour Counter:
This serves to monitor
lamp service life. Reset
is not possible.
Lamp Installation
Make sure unit is
unplugged. Open the
milled screw at the
rear of the fixture with
a screwdriver. Pull the
lamp house back, tip-
ping it down slightly. It is
secured from falling by
the grounding cable.
(Pull out the old lamp)
and insert the new lamp without touching the quartz ele-
ment. The lamps of the fixtures are also numbered. You
have to use only the lamps and the fixtures with the same
numbers.
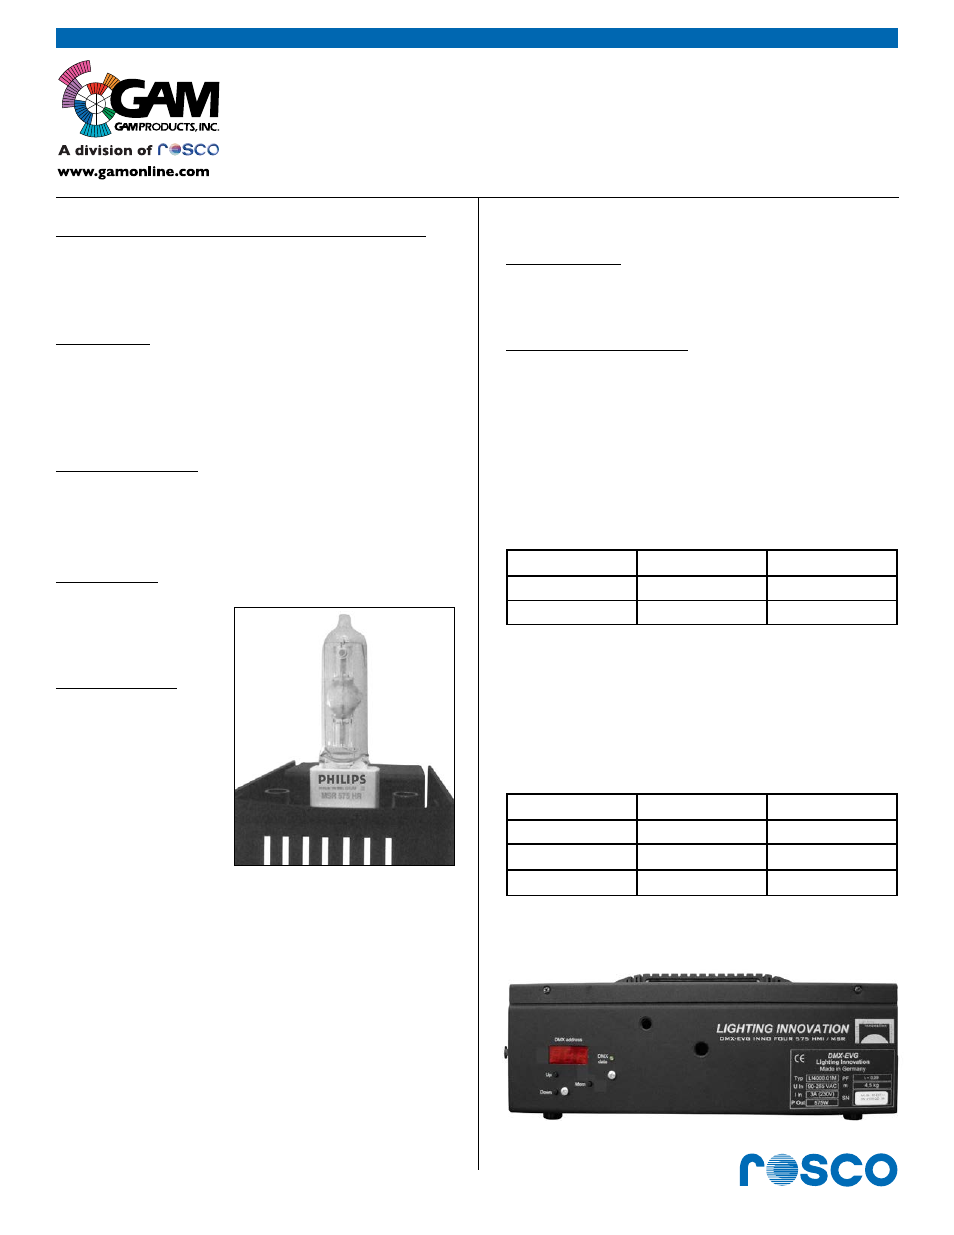
Due to the differences of the manufacturing of the Philips
MSR 575 HR lamp, it’s very important to pay attention
to the lamp position. You should insert the lamp only as
shown on the picture. The lamp is adjusted in that po-
sition, with the “Phillips” logo on the top (see photo).
Re-place the lamp house on the guide rails and push the
unit together.
Tighten the milled screw again with a screwdriver, until
you hear a click from the Safety switch.
Page 2 of 4
www.rosco.com
GAM Product # GL4002.15/30,25/50
METAL HALIDE 575W
YOU ARE NOW READY TO POWER UP THE UNIT.
DMX Operation
The electronic ballast takes 2 channels. Set the switch to
manual and make sure the main switch is on.
Setting the Start Address:
Use the UP and DOWN keys to set the start address.
Press MEM, while display in on, to store the new
address. If you don’t press MEM then changes are lost.
Green LED shows valid DMX is present. To avoid
unwanted light from both displays, remember they are
only on after power up and when pressing a button.
Channel 1 (start address): on/off
LI4000.01M-DMX switches on at 128 (50%).
DMX%
DMX (dec)
Lamp
0-49
0-127
Off
50-100
128-255
On
It takes about two minutes for the GAM 575W Metal
Halide lamp to reach operating temperature in which
dimming is possible.
Channel 2 (start address + 1): dimming Intensity is
regulated according to DMX from 30% to 100%
Curve is linear to achieve even dimming.
DMX%
DMX (dec)
Intensity
0-9
0-24
Minimum (30%)
10-90
25-230
Dim
91-100
231-255
Maximum (100%)