GAM PRISMO TS7000 User Manual
GAM Lighting
Required Tools
• Two small blocks of wood
• One small flat blade screwdriver
• One supplied 1/32” thick gasket ZPTSPM-32
• One supplied 1/64” thin gasket ZPTSPM-64
If the prism has not already been mounted, the first step
is to mount the prism in the rotator. You will need two
small blocks of wood as a support. Place the prism rotator
on the blocks motor side up so that it sits slightly off the
work table, (see figure #1). First place the 1/32” thick
gasket into the prism ring. Next place the prism into the
Prismo™, flat side facing you and the facets facing down
and press in firmly. Then take the retaining ring and feed
it into the groove just above the prism, making sure that it
is fully seated in the groove. Start with the flat edge and
work your way around to the slotted end, (see figure #2).
Check to see if the prism slips. If you are having problems
putting the retaining ring in and it pops out, take out the
thicker 1/32” gasket and use the 1/64” thinner gasket.
If the prism slips you will need to add the second 1/64”
thin gasket along with the 1/32” thick gasket.
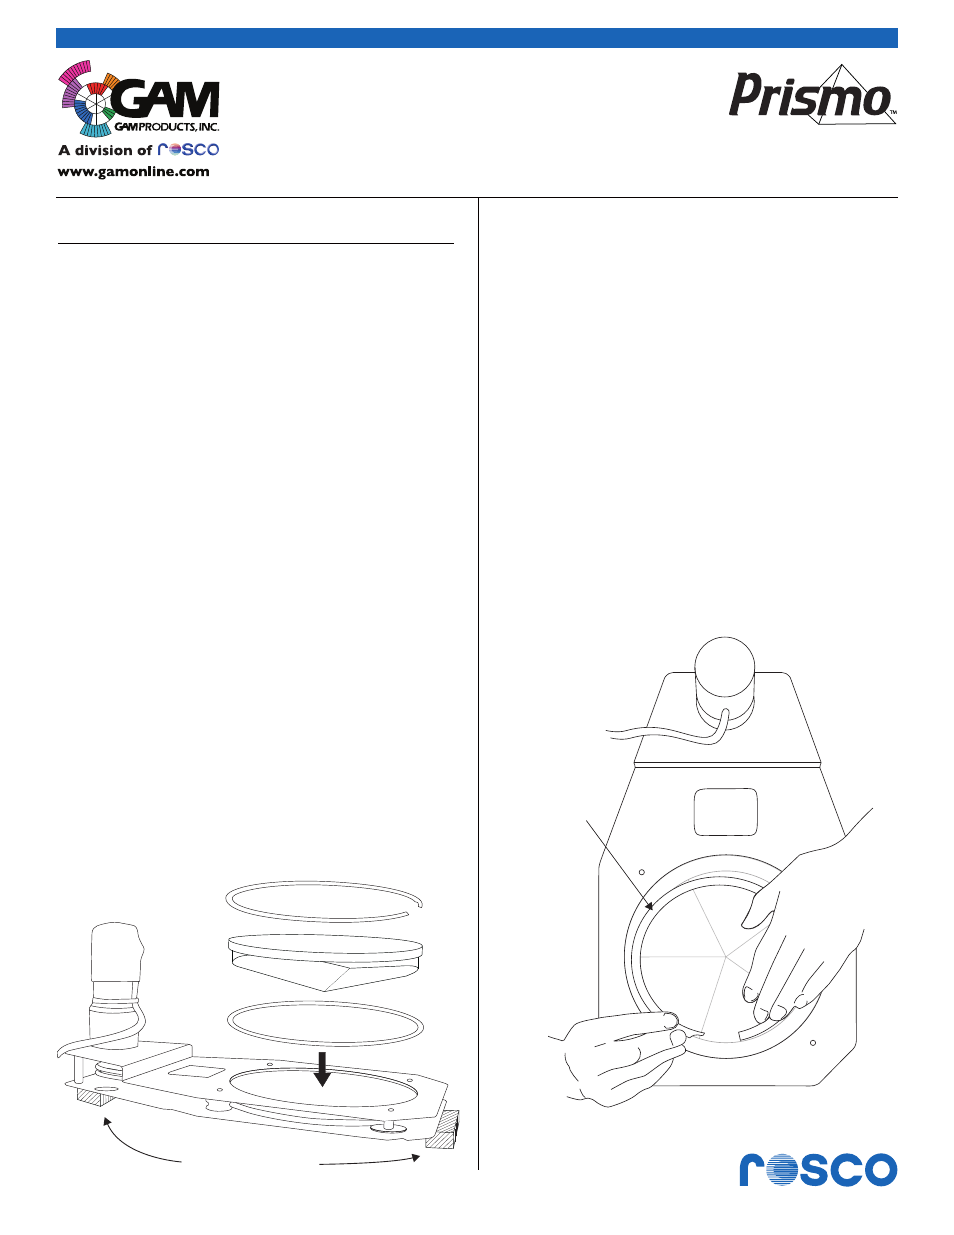
CHANGING THE PRISM
Be careful as you can chip or scratch the glass prism. At
the slotted end of the retaining ring use the screwdriver
to pry the ring out of the groove. Make sure not to catch
the glass or it will chip. Push the retaining ring up and
MOUNTING RING
FRICTION GASKET
MOUNTING BLOCKS
PRISM
Figure #1
RETAINING RING
Figure #2
Page 1 of 1
www.rosco.com
PRISM INSTALLATION INSTRUCTIONS
in toward the center of the prism to pull the ring out of
the groove. Pull up on the retaining ring. Have a hand
on the prism in case it pops out. Take out the prism and
gasket. Because of different tolerances in the machining
and the grinding of the prism and the gasket, the prism
comes with a 1/64” thin gasket. You may not need it.
REASSEMBLY
Put the thicker gasket 1/32” in the prism ring. Next,
place the prism into the Prismo™, flat side facing you
and the facets facing down and press in firmly. Now
take the retaining ring and feed it into the groove just
above the prism, making sure that it is fully seated in
the groove. Start with the flat edge and work your way
around to the slotted end, (see figure #2).
Prism is too loose:
Add the second 1/64” gasket with the 1/32” gasket.
Retaining Ring won’t fit:
Remove 1/32” gasket and use the 1/64” gasket.
PRODUCT INSTRUCTIONS
Product #TS7000
Rosco Product #
205 77000 0000