Lens identification, Changing a lens, Lens identification changing a lens – ETC Source Four PAR CE User Manual
Page 8: Removing a lens, Installing a lens
6
Source Four PAR CE User Manual
English
Step 7:
Reinstall the Earth continuity cable, then install the lamp housing by aligning the bolt hole
and tightening the knurled bolt.
Lens identification
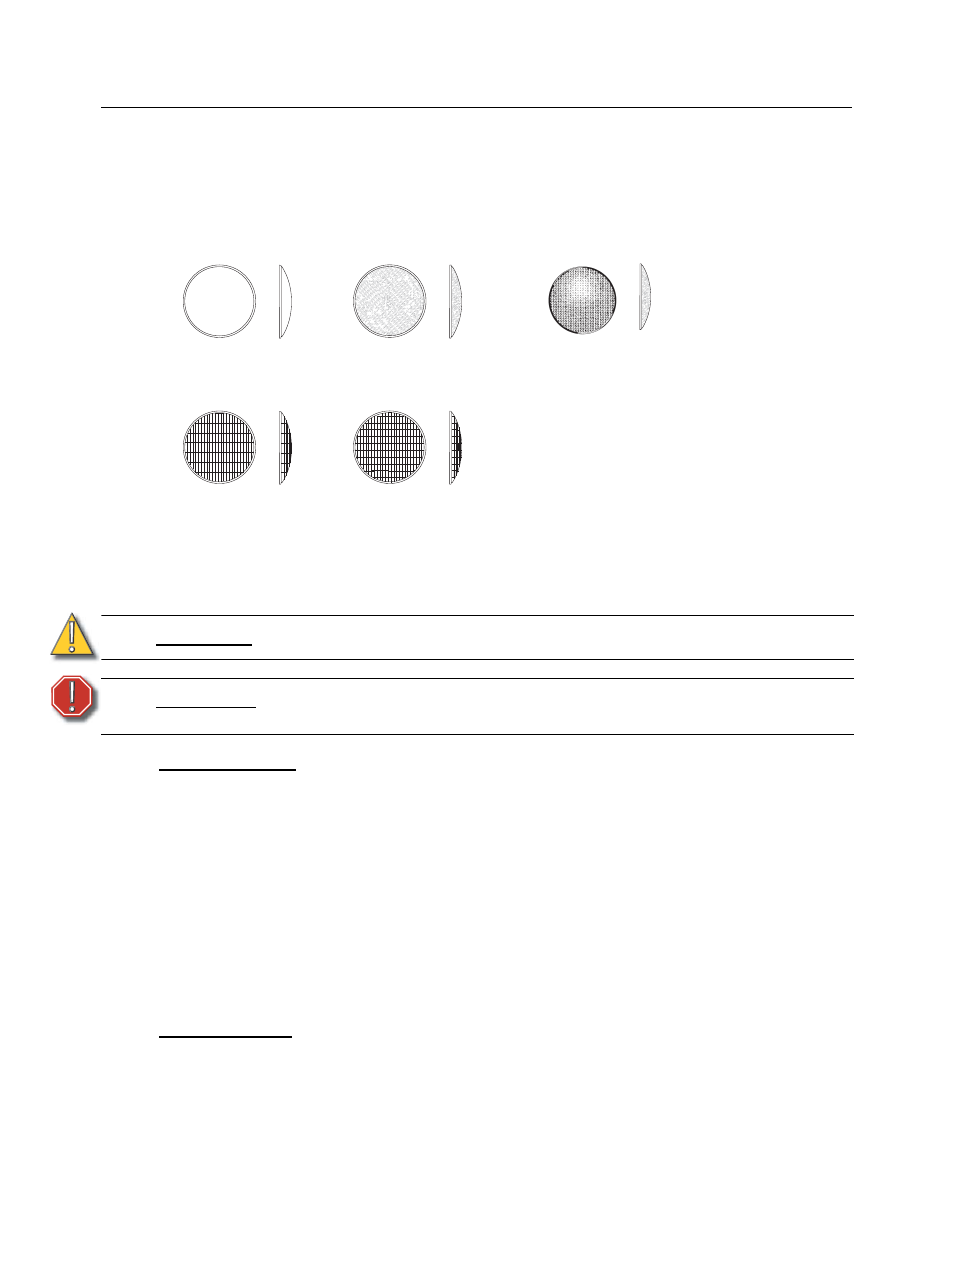
Lenses for the Source Four PAR come in four versions. The type, or beam spread, can be identified
by the lens texture.
Changing a lens
Change lenses if they become cracked or badly scratched.
Removing a lens
Step 1:
Place the luminaire on a flat, stable work surface. Do Not remove or install lenses with
luminaire hanging.
Step 2:
Position the lens rotation ring with the spring clip at the top of the unit, directly below the
gel retaining clip. See
Figure 1
.
Step 3:
Tilt the front of the luminaire down at least 45°. See
Figure 7
.
Step 4:
Press the spring clip with your finger to release the lens.
Step 5:
Allow the lens to drop forward from under the clip.
Step 6:
When the lens drops, remove your finger, allowing the lens to slide forward until it rests
on the lens catchers. See
Figure 8
.
Step 7:
Carefully remove the lens.
Installing a lens
Step 1:
Position the luminaire with the front of the unit (lens side) facing you, and tilted slightly
upward. See
Figure 9
.
C A U T I O N :
Never operate the luminaire without a lens in place.
W A R N I N G :
Unplug the luminaire and allow it to cool down before attempting to change
a lens.
MFL
WFL
NSP
VNSP
Very narrow spot
Clear glass
15° Round beam shape
Narrow spot
Stipple glass (slight diffuse texture)
19° Round beam shape
Medium flood
Fewer facets, sized 6 x 22mm
21° x 34° Oblong beam shape
Wide flood
Many facets, sized 6 x 12mm
30° x 51° Oblong beam shape
XWFL
Extra-wide, or buxom, lens
Molded, borosilicate lens, multi-faceted
60° Round beam shape
(Optional)
Figure 6