Service – Danuser 9000 Postmaster/SlabBlaster User Manual
Page 20
20
Service
STEP 1: Remove the safety catch pin from the top of the frame. Insert a hook into the chain
links welded to the top of the hammer, and lift out the hammer with a hoist,
forklift, or another vehicle. Lay the hammer on the ground.
STEP 2: Disconnect the hydraulic hoses, and remove the Postmaster/Slab Blaster from the
vehicle.
STEP 3: Carefully lay down the Postmaster/Slab Blaster on its back.
STEP 4: Remove the front cover.
STEP 5: Remove the chain. (The drive chain has been welded together and must be cut off.)
STEP 6: Loosen the bolts on the bearings, allowing the sprockets to slide closer together for
reassembly.
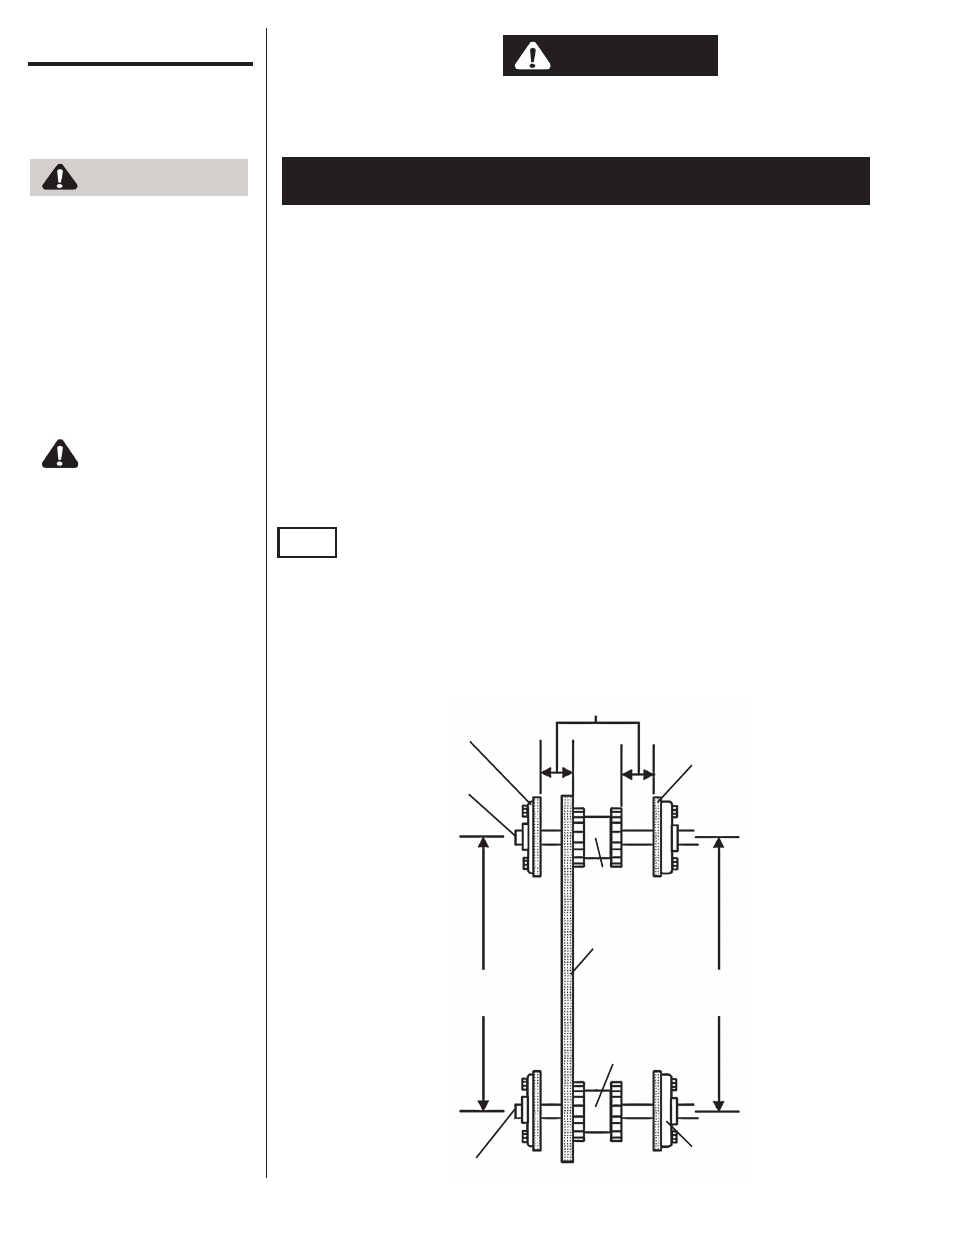
STEP 7: Check the alignment of the sprockets by measuring the distance from each side
of the sprocket to the frame on the upper and lower sprocket. Then place a straight
edge on the side of the sprockets from the upper sprocket to the lower sprocket to
ensure straight alignment.
REPLACING THE DRIVE CHAIN
Check sprockets and nylon guide plate for wear and replace if necessary.
NOTE
Never attempt repairs or adjustments while the equipment
is in operation.
D A N G E R
Because of the weight of
some components, and
because some
components are difficult
to balance, two people are
required for safe
assembly and installation
of this equipment.
C A U T I O N
Personal protection
equipment including hard
hat, safety glasses, safety
shoes, gloves, and ear
plugs are recommended
during assembly,
installation, operation,
maintenance, service,
removal, or movement of
the attachment.
w A R N I N G
Equal Measurements
Equal Measurements
(both sides)
Bearing
Bearing
Shaft
Equal Measurements
(both sides)
Frame
Shaft
Upper
Sprocket
Straight
Edge
Lower
Sprocket