1 preparing the unit for blotting – C.B.S. Scientific QNX-700 User Manual
Page 15
15
www.cbsscientific.com
1
SECTION 5
Instructions for Western Blotting
5.1
Preparing the Unit for Blotting
1. Remove safety cover from the assembled unit
by simultaneously pressing down on white push
pins while lifting up on blue safety cover.
Do not
remove safety cover by pulling up on leads!
Remove white core from lower reservoir by grasp-
ing core with one hand and lifting directly up.
Open doors on the core assembly by pulling up
on the white latches, as shown in figure 1.
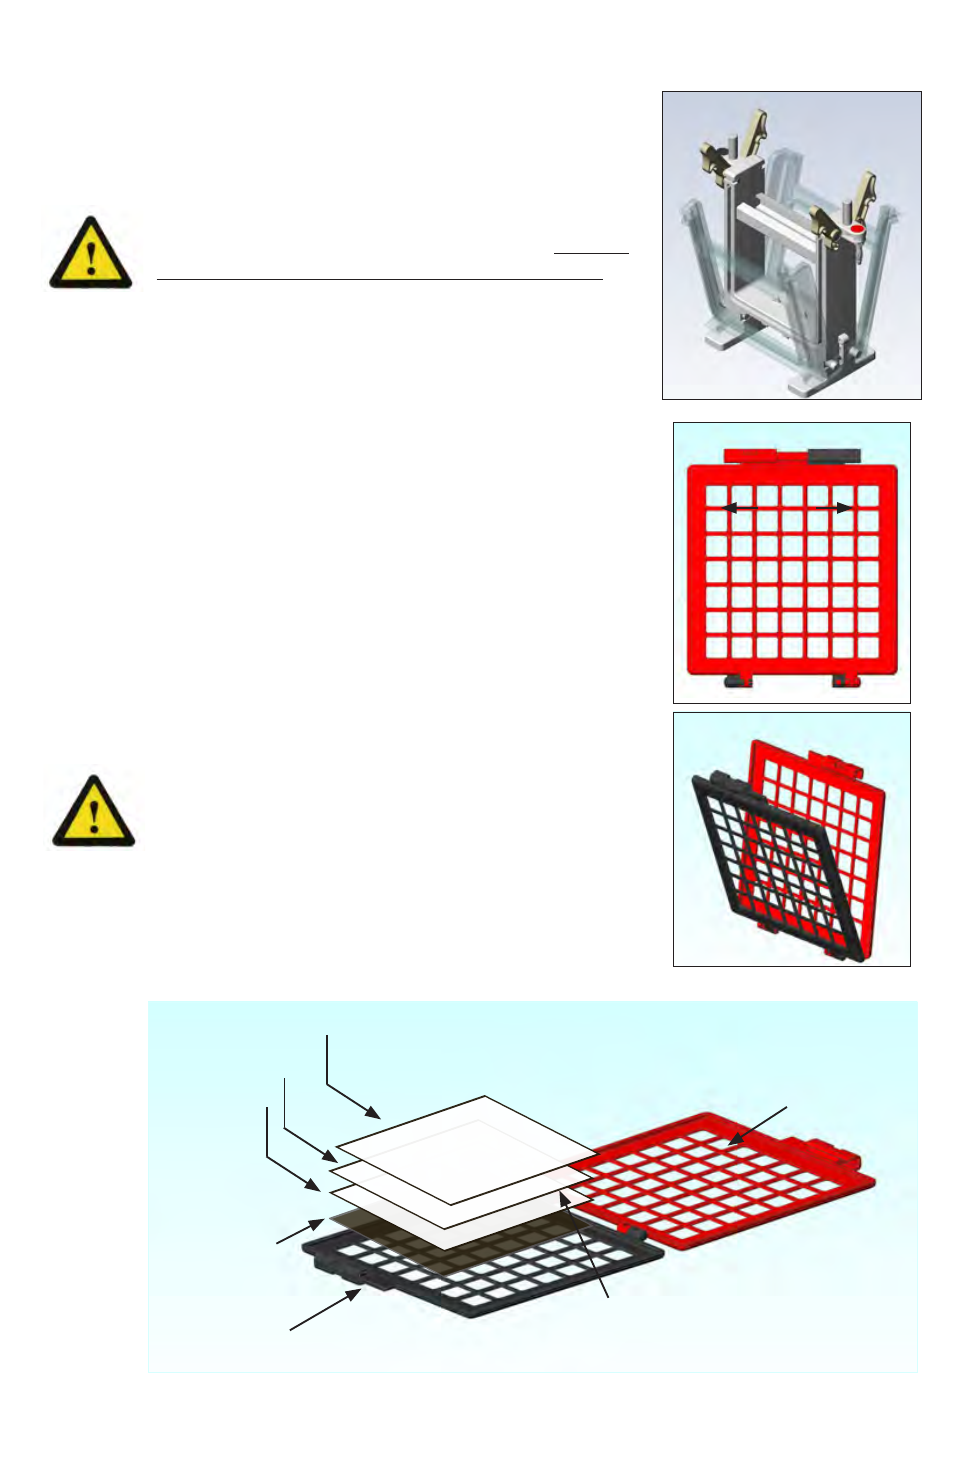
2. Open blotting cassette as shown in figures 2-3
and lay it flat on the bench.
3. Assemble blotting stack as shown in figure 4. With
cassette wide open assemble components on
black side in the following order: foam pad, gel*,
buffer saturated transfer membrane, then buf-
fer saturated blotting paper. Smooth with gloved
finger or roll with glass rod to be sure no bubbles
exist between the gel an the transfer membrane.
*Note: to prepare gel for blotting, trim off wells
and any excess acrylamide at the bottom, and
invert 180º so that the large molecular weight
proteins are at the bottom of the cassette. This
puts them in contact with a stronger field strength
and allows the blotting transfer to take place more
efficiently.
red side
high molecular weight
bands at this end
blotting paper
gel
foam pad
black side
membrane
2
3
4
SECTION 4
Alternate Protocol for Slab Gel Electrophoresis.
(Not using Pre-cast gels)
4.2
Preparing the Electrophoresis Unit when Using Gel Wrap™ Gasket
Casting Method
1. Place unit in authorized work area. Remove safety
cover from the assembled unit by simultaneously
pressing down on white push pins while lifting up on
blue safety cover as shown in figure 1.
Do not remove safety cover by pulling up on leads!
2. Remove white core from lower reservoir by grasping
core with one hand and lifting directly up as shown in
figure 2. Remove second core in same manner.
3. Open doors on the core assemblies by pulling up on
the white latches, as shown in figure 3.
4. Slide glass plate sandwiches into the core assemblies
with the notched plate facing in towards the upper
buffer reservoir as shown in figure 4.
5. If running one gel, slide white plastic adaptor plate into
the side without the gel.
6. Close doors and relatch by pressing down on the
white latches so that the assembly looks like that
shown in figure 5.
9. For rest of protocol please refer to instructions on
pages 10-11 (Sections 3.2 and 3.3) for running the gel
and removing it after electrophoresis.