BASELINE Tire Changer User Manual
Page 27
Important: Always read and follow operating instructions.
• 23
13.
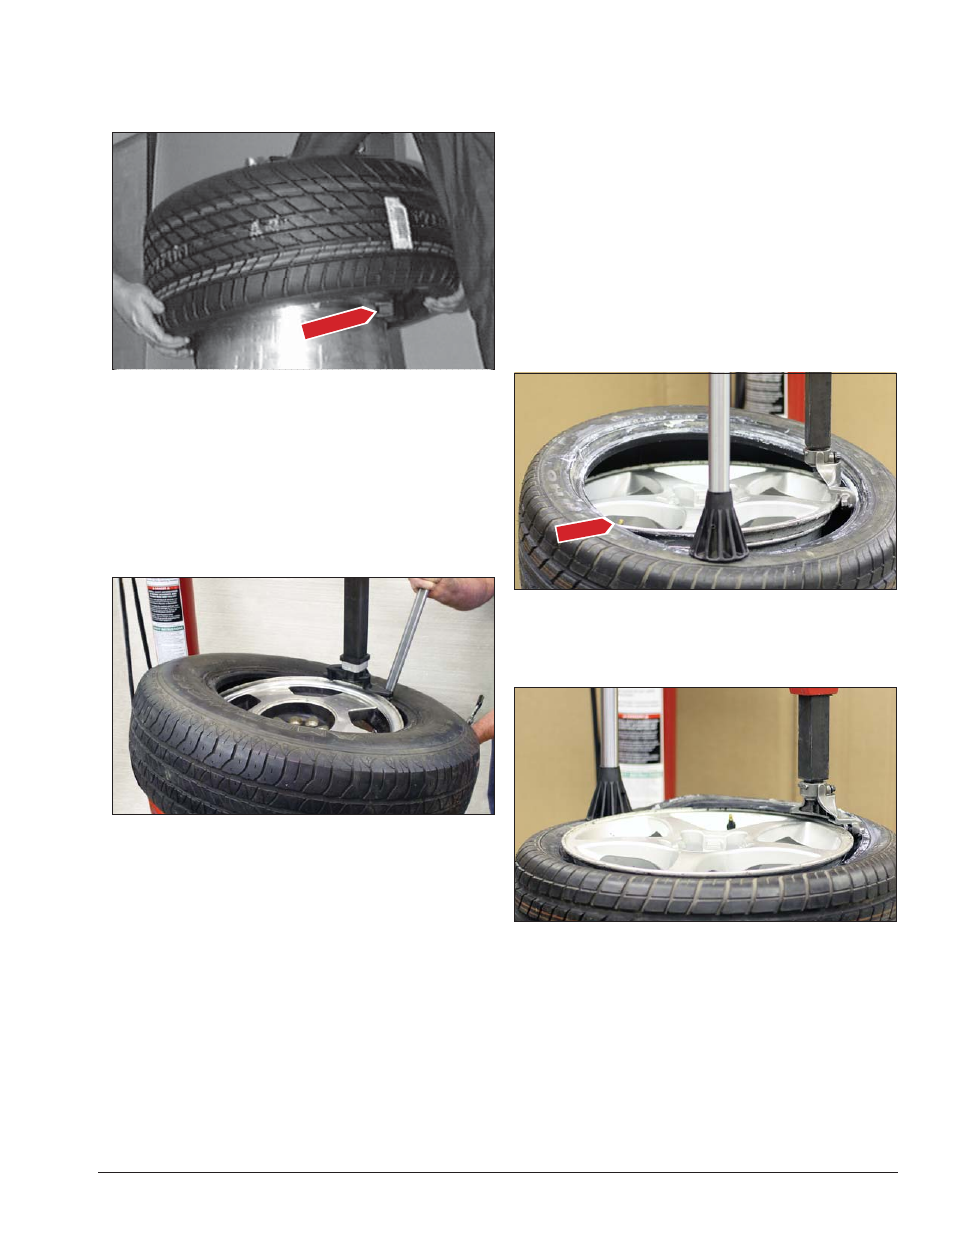
Demount lower bead. Pay close attention to sen-
sor/transmitter location, and position it just before the
demount tool when starting the lower bead demount
procedure (Figure 12).
Figure 12 - Sensor/Transmitter Location
14.
Lift and hold the tire at an angle so the lower
bead is resting in the drop center directly across from
the demount head, and is loose below the demount
head. Insert bead lifting tool down over demount tool
and below the lower bead. Lift the lower bead over the
demount tool (Figure 13). Hold the lifting tool in place.
Depress the table top rotation pedal momentarily to jog
the wheel short distances to complete the demounting
process.
Figure 13 - Lower Bead in Drop Center
Mounting
1.
Lubricate both tire beads liberally. Performance
tires will require more lubrication than standard pas-
senger car tires.
2.
Mount the lower bead. In most cases, the lower
bead will mount easily.
AE: Mounting the top bead can be very difficult
when mounting new tires on performance and custom
wheels. Proceed slowly and cautiously.
3.
Position the valve stem 90 degrees clockwise in
front of the mount/demount tool for top bead mount-
ing. Lift the bead over the rear of the mounting head.
Use the assist tool to hold the bead in the drop center
(Figure 14). Rotate the wheel in short steps and apply
extra lubricant to mount upper bead.
Figure 14 - Mount Upper Bead, Use Assist
4.
On extremely tight tire and wheel combinations, it
may be necessary to use the bottom of the assist foot
to flip the tire bead over the rim flange (Figure 15)
Figure 15 - Assist Foot to Flip Bead Over Rim Flange
Sensor
Valve