BASELINE Tire Changer User Manual
Page 11
Important: Always read and follow operating instructions.
• 7
4.
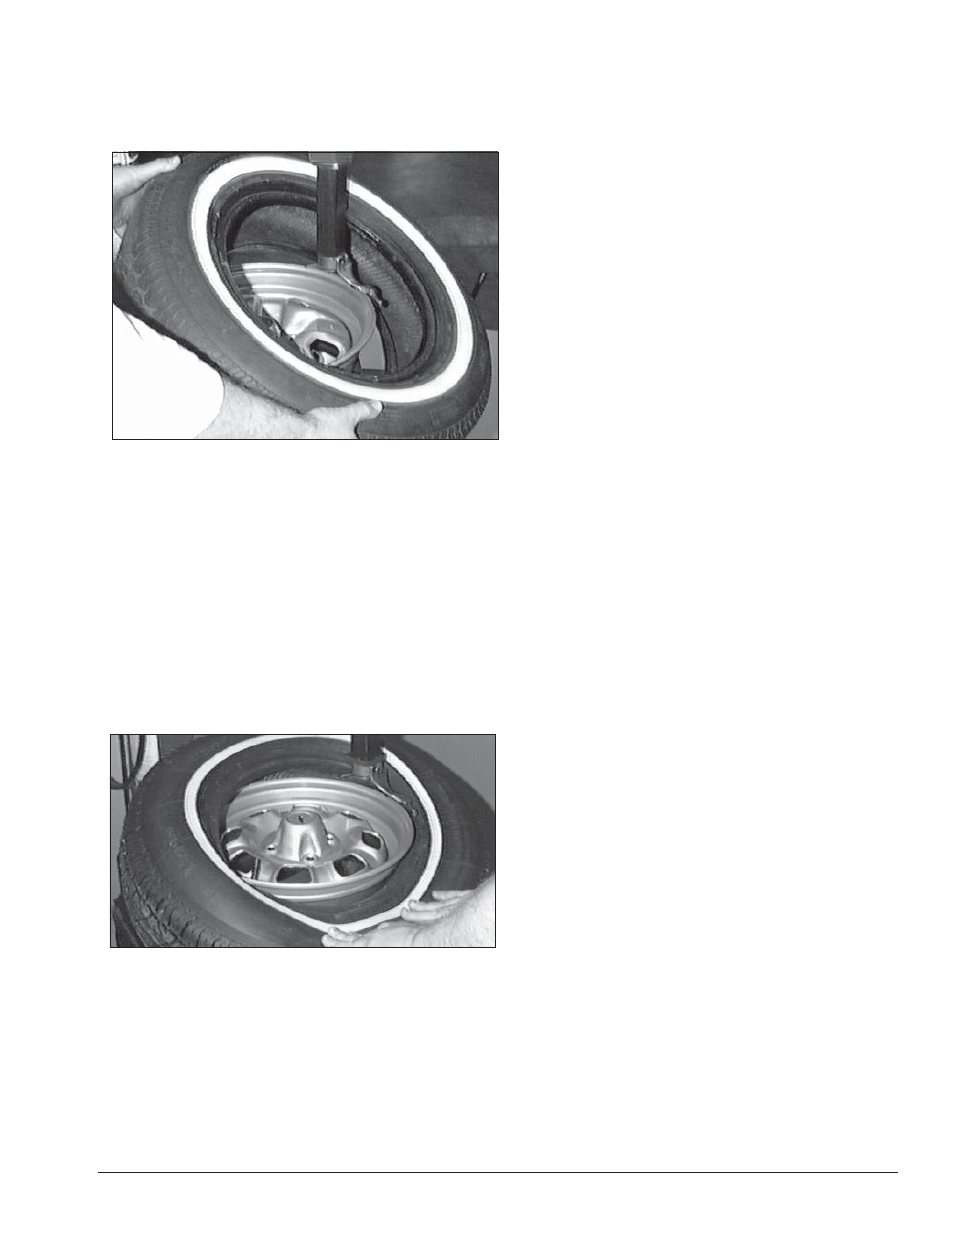
Place tire over wheel and move swing arm into
position making sure the valve stem is at the 9 o’clock
position in front of bead lock. Position tire so that lower
bead is above the rear extension of the mount/demount
tool and below the front knob (figure 17).
Figure 17 - Position Tire Against (Mount/Demount Tool)
5.
Depress table top pedal and rotate wheel to mount
lower bead. Use drop center of wheel by forcing down
on tire just ahead of the mounting tool, and follow as tire
rotates. Rotate table top until lower bead is mounted.
6.
For top bead installation, rotate the table top
until the valve stem is directly across from the mount
head. Lift the upper bead up and over the rear of the
mount head. With your left hand press down on the tire
between the mount head and the valve stem to hold
the tire in the drop center. Depress table top pedal and
rotate tire until bead is mounted. Be careful to ensure
bead stays in the rim drop center in the area ahead of
Duckhead (figure 18).
Figure 18 - Mounting Top Bead
N. If table top rotation stalls, reverse the table top
momentarily until tire bead is again loose on the
wheel. Reposition tire on Duckhead, make sure
bead is correctly positioned in drop center of the
wheel; then attempt mounting again.
P. For low profile or stiff sidewall tires, it may be
advantageous to use the bead lifting tool to initially
hold the upper bead down in the drop center.
R. For tube type tires, mount lower bead first, move
swing arm out, install tube, and then mount upper
bead.