The live-event gauge and its configuration – Axcess e/OLS User Manual User Manual
Page 9
O N L I N E S U P E R V I S O R U S E R ’ S M A N U A L
©AXCESS INTERNATIONAL, Inc
750.015.001 R00
6
5/4/2007
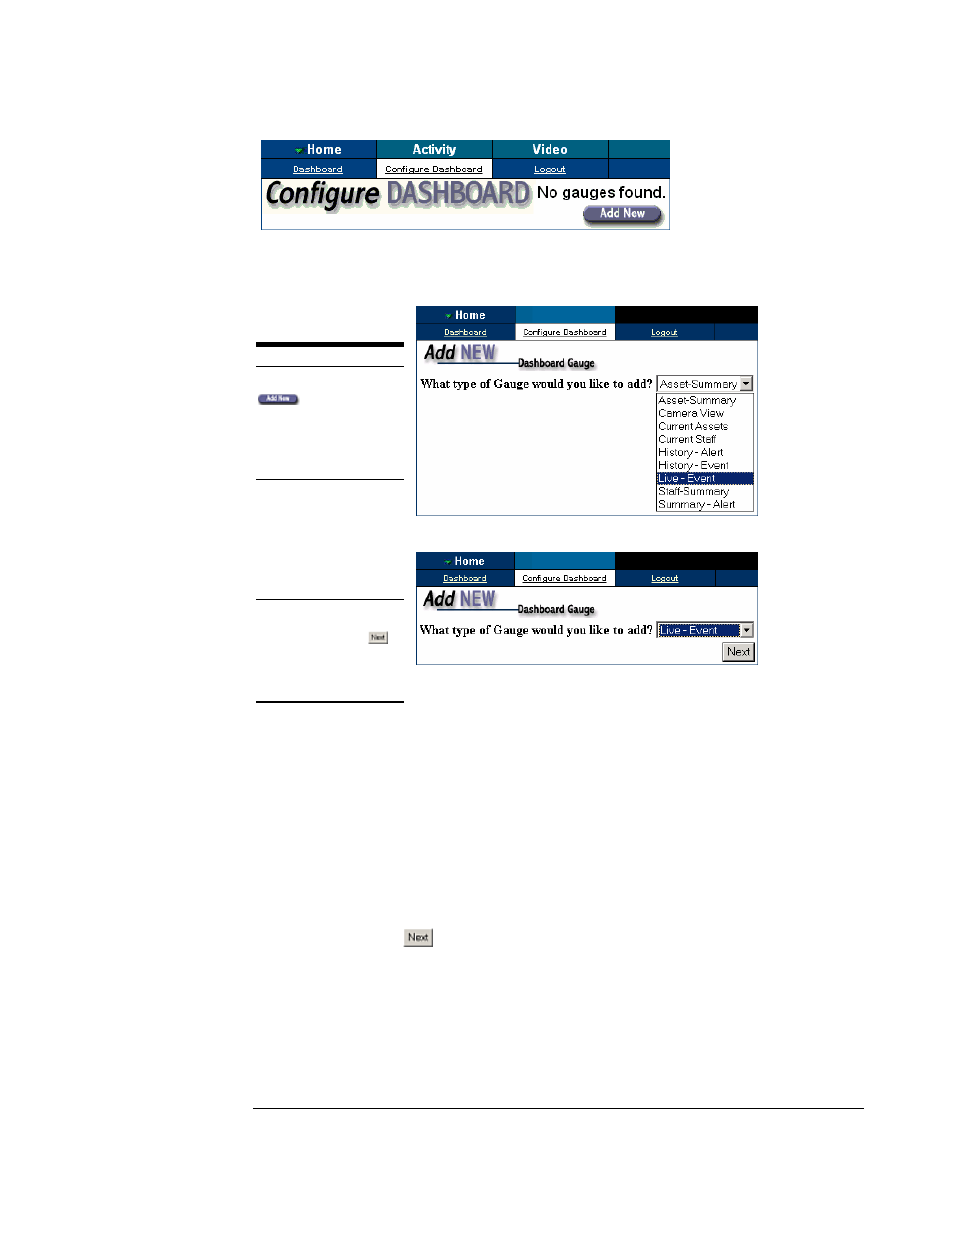
Figure 2.2 Initial Configure Dashboard submenu
Follow the three steps below to add a gauge to the OLS Dashboard.
Figure 2.3 Gauge choice drop-down box
Figure 2.4 Live-Event gauge about to be confirmed.
Note that the three steps above also reveal how to add any
gauge to the Dashboard. However, after the desired gauge type is chosen, the future
configuration steps are then dependent upon which gauge was chosen. For our
purposes we will configure and investigate the “Live-Event” gauge first, and do the like
for the other gauges later.
Also note that the total number of gauges added to the Dashboard, and each gauge’s
particular configuration is constrained by monitor size and display resolution. Trial and
error may be necessary for desired effect.
The Live-Event gauge and its configuration
After clicking the
button (figure 2.4), for the Live-Event gauge, we should see
the next configuration task for the Live-Event gauge below in figure 2.5.
A D D A G A U G E
n
After clicking the
button, observe the
dropdown box of gauge
selections in figure 2.3.
o
Choose the “Live-
Event” gauge by highlighting
it
.
p
Click the “Next”
button to confirm your
choice, as in figure 2.4