Anchor CENTURY FRAME TENTS 30X30 WITH OPTIONAL WALLS User Manual
Page 5
5
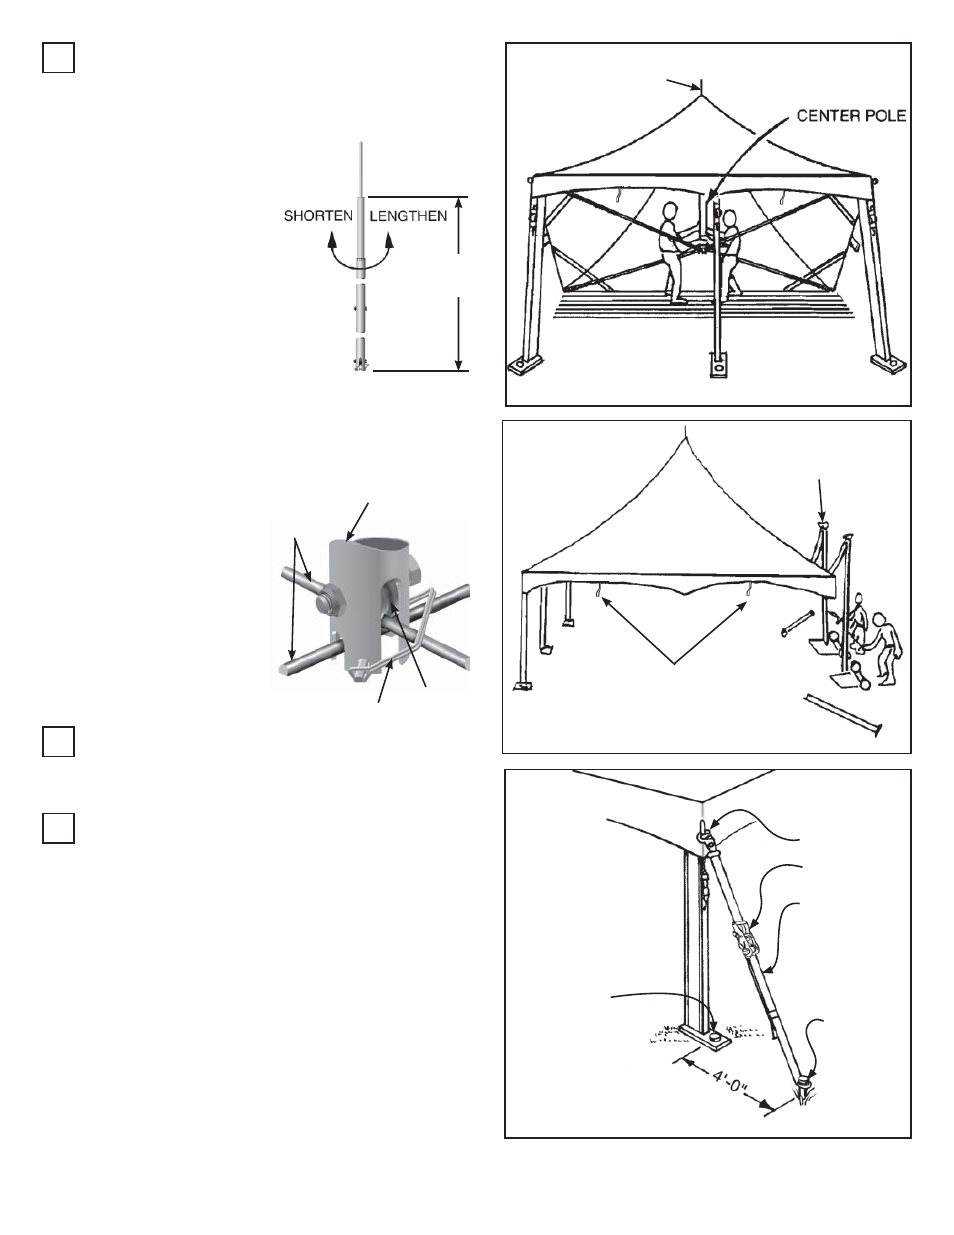
Carefully position center
pole pin through pole
hole in top. Use cau-
tion to prevent tearing
of fabric. Raise top
by pushing pole on
the upper cable. Slide
pole along cable until
at intersection of both cables. Place lower cable
in slot at bottom of pole and attach lock pin to
secure.
Center Pole
Lock Pin
Caution:
Base of pole is on
a roller for ease of
installation. Be sure
movement of pole
is controlled (firmly
held) during installa-
tion and removal to
prevent base from
moving too quickly.
Roller
Cables
ADJUST CENTER POLE
Center Poles must be adjusted to the height on the
illustration below. Turn the top of the center pole
in the direction noted
to meet the required
dimension. (As marked
on center pole)
14’-3”
Minimum
LIFT OTHER SIDE
Raise opposite side by repeating Step 5. Attach
remaining uprights. Plumb uprights.
7
CENTER
POLE PIN
8
FRAME
LIFTS
SECURE TENT
Make certain that tent is positioned in the desired
location and uprights are square and aligned before
staking. Drive a 1” x 30” stake through each base-
plate. Fasten guy web snaps to ring on corner weld-
ments.
At other end of guy webs, drive a 1” x 30” stake
through the ring. Tension guy web. See illustration
for positioning of stake.
Repeat for intermediate uprights.
While tensioning the frame down, continually check
the alignment to insure the frame is square and
plumb. Pay special attention to the eave bars when
tensioning the intermediate guy webs so that the eave
does not bow.
See guy web operating instructions provided.
9
Fiesta Straps,
see Step 10.
Snap
Ratchet
Web guy
Stake
Stake
IMPORTANT NOTE: PLEASE REFER TO CAUTION AND OTHER ANCHORING INFORMATION
ON BACK PAGE.