AirLive WP-201G User Manual
Page 47
6. You have now successfully created the print queue that
your print server will serve. Press the Escape key until the
Available Options main menu is displayed.
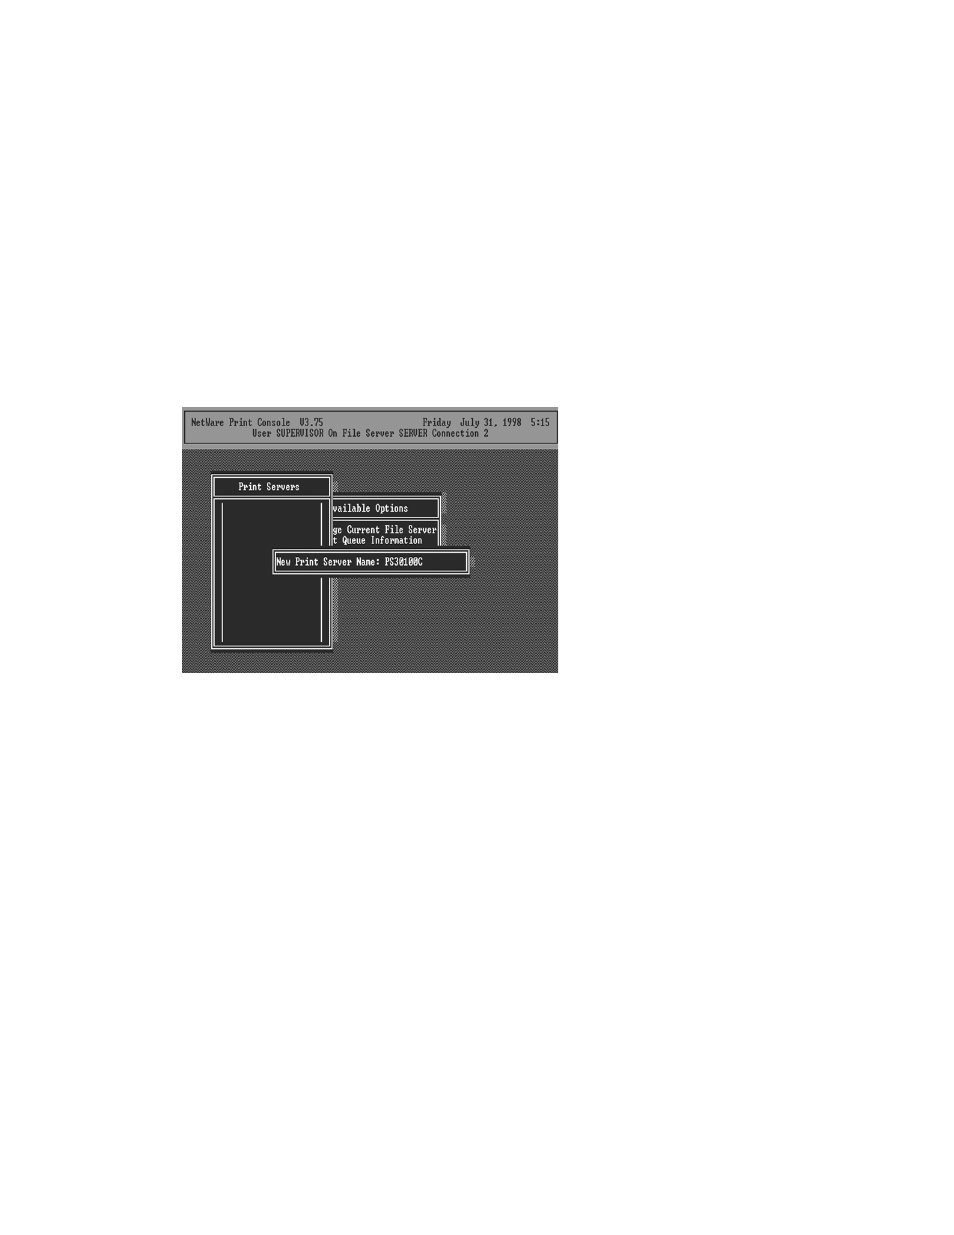
7. Select Print Server Information.
8. Press the Insert key to add a new NetWare print server
object. The print server name can be identical to the
PSxxxxxx name printed on the label of the print server.
9. Press Enter to select the newly created print server.
10. Select Print Server Configuration.
11. Select Printer Configuration.
12. Select Printer 0 (or Printer 1, Printer 2), and press
Enter, then select LPT1 (or LPT2, LPT3) in the Type field.
If your print server is with only one port, you do not need
to configure this Type field.
39 AirLive WP-201G User’s Manual
See also other documents in the category AirLive Accessories for video:
- AirMax5 (146 pages)
- AirMax5N (93 pages)
- AirMax5X (91 pages)
- AirVideo-100 (67 pages)
- AirVideo-100v2 (63 pages)
- AirVideo-2000 (31 pages)
- AP60 (101 pages)
- BT-201USB (63 pages)
- BT-302USB (52 pages)
- BU-3026 (64 pages)
- CamPro Professional (178 pages)
- CoreNVR 16 (55 pages)
- DS-100 (34 pages)
- DS-100 v2 (36 pages)
- ES-4000 v2 (168 pages)
- ES-6000 (221 pages)
- Ether-FSH2402NT (19 pages)
- Ether-FSH2422W (55 pages)
- Ether-GSH16TW (42 pages)
- Ether-GSH2404W (50 pages)
- Ether-GSH2416W (61 pages)
- Ether-GSH24T v.2 (16 pages)
- Ether-GSH24TW (42 pages)
- Ether-GSH8TW v2 (36 pages)
- EtherWe-1000U (15 pages)
- G.DUO (137 pages)
- HP-1000E v2 (13 pages)
- HP-2000E (29 pages)
- HP-3000E (15 pages)
- IAR-5000 v2 (202 pages)
- IAS-2000 (163 pages)
- IGR-1500 (78 pages)
- IGR-2500 (81 pages)
- Live-800G (16 pages)
- Live-GSH5T (25 pages)
- Live-GSH8T (25 pages)
- WFP-101U (133 pages)
- MU-5000FS A2 (42 pages)
- MW-2000S (225 pages)
- N.MINI (87 pages)
- N.Plug (103 pages)
- N.TOP (71 pages)
- NAS-235 (89 pages)
- NVR4 (85 pages)
- OD-2025HD (101 pages)