3 attach the chipper deflec- tor, 4 attach the optional dis- charge tube – Echo 77412 Owners Manual v.1 User Manual
Page 12
Page 10
4.5" BearCat Chipper Operator's Manual
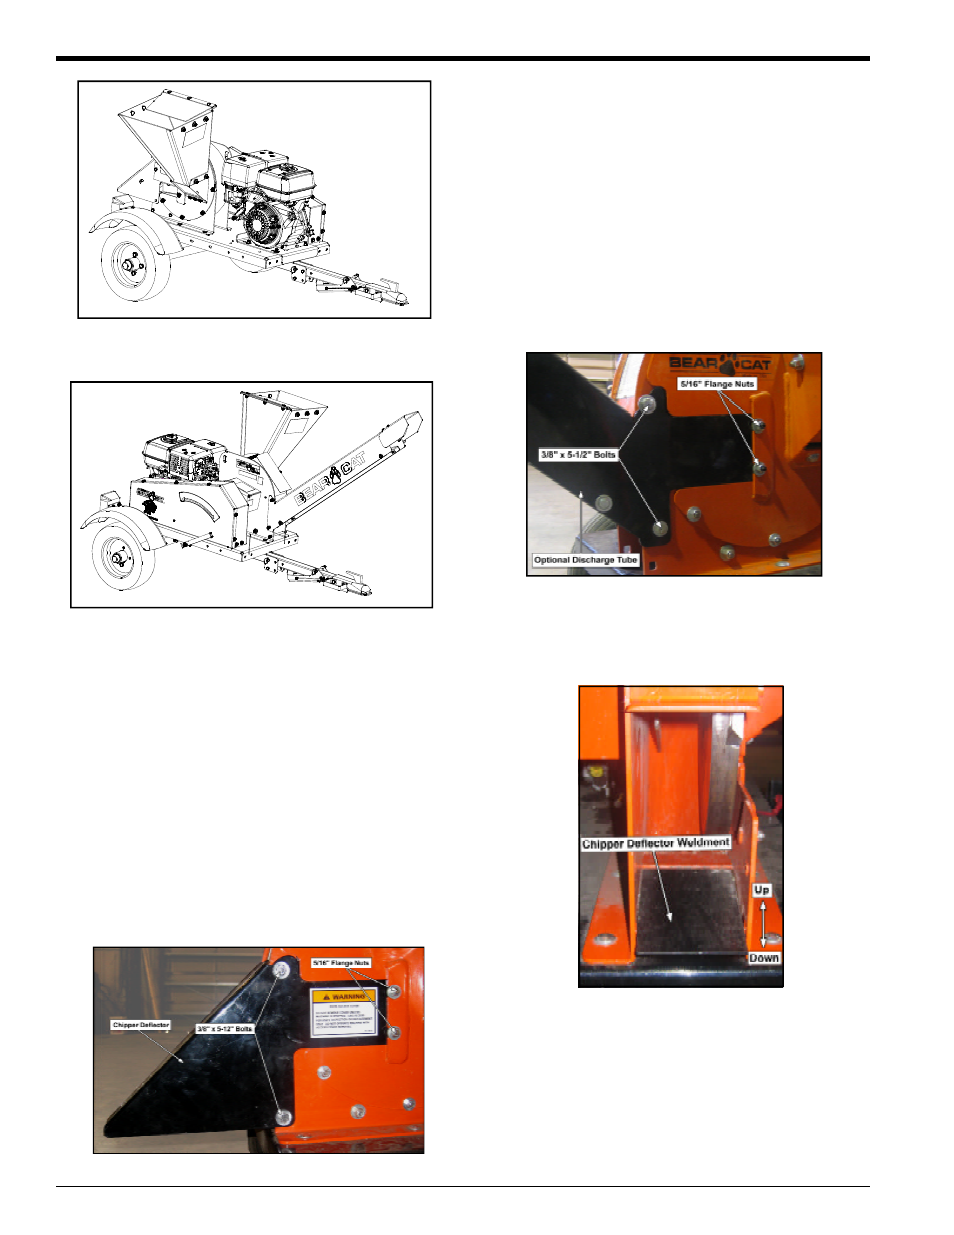
2.3 ATTACH THE CHIPPER DEFLEC-
TOR
1.
Move the chipper deflector weldment inside the chipper
housing down towards the trailer (Figure 2.11)
2.
Slide the chipper deflector onto the chipper housing en-
suring that the weld studs fit into the notches on the
disk cover (Figure 2.9). Tighten using 5/16" flange nuts.
3.
Insert two 3/8" x 5-1/2" bolts into the bolt holes on the
chipper deflector and tighten using 3/8" washers and
3/8" nylock nuts.
ASSEMBLY
2.4 ATTACH THE OPTIONAL DIS-
CHARGE TUBE
1.
Move the chipper deflector weldment inside the chip-
per housing upward (Figure 2.11).
2.
Slide the discharge tube onto the chipper housing en-
suring that the weld studs fit into the notches on the
disk cover (Figure 2.10). Tighten using 5/16" flange nuts.
3.
Insert two 3/8" x 5-1/2" bolt into the bolt holes on the
chipper deflector and tighten using 3/8" washers and
3/8" nylock nuts.
Figure 2.9 - Chipper Deflector
Figure 2.8 - Optional Trailer Configuration
(Models 77413, 77413S)
Figure 2.7 - Standard Trailer Configuration
(Models 77413, 77413S)
Figure 2.10 - Optional Discharge Tube
Figure 2.11 - Chipper Deflector Weldment