5 setting blade clearance, 6 adjusting/replacing drive belt, Warning – Echo CH4540 Owners Manual v.2 User Manual
Page 20
4 INCH CHIPPER
16
SERVICE & MAINTENANCE
WaRNING
BEFORE INSPECTINg OR SERVICINg ANy PART OF THIS MACHINE, SHuT OFF POWER SOuRCE AND MAkE SuRE
All MOVINg PARTS HAVE COME TO A COMPlETE STOP.
Install the new belt on pulleys. Slide engine back into
4.
place and tighten bolts to proper torque.
Check pulley alignment with a straight edge and adjust
5.
if needed.
Check belt tension and adjust if needed. The belt
6.
deflection at the center of the belt should be 7/16" when
a 20 lb. load is placed against it (see Figure 5.6).
Reinstall belt guard.
7.
Depress belt engagement pedal, start engine, engage
8.
drive belt, and test unit. Readjust pulleys if needed.
5.6.2 pTo modEL dRIvE bELTS
disengage
1.
PTO and shut tractor engine off.
Remove belt guard.
2.
Remove idler pulley by removing its 1/2 x 4-1/2" bolt,
3.
spacers, washer and nut. Take the drive belt off the
pulleys (Figure 5.5)
5.6 adJuSTING/REpLaCING dRIvE bELT
5.6.1 ENGINE modEL dRIvE bELT
Shut
1.
off engine and disconnect spark plugs.
Remove belt guard.
2.
Take the tension off the drive belt by depressing the
3.
belt engagement pedal, loosening the engine bolts,
and sliding the engine back. Then, remove the drive
belt from pulleys (Figure 5.4).
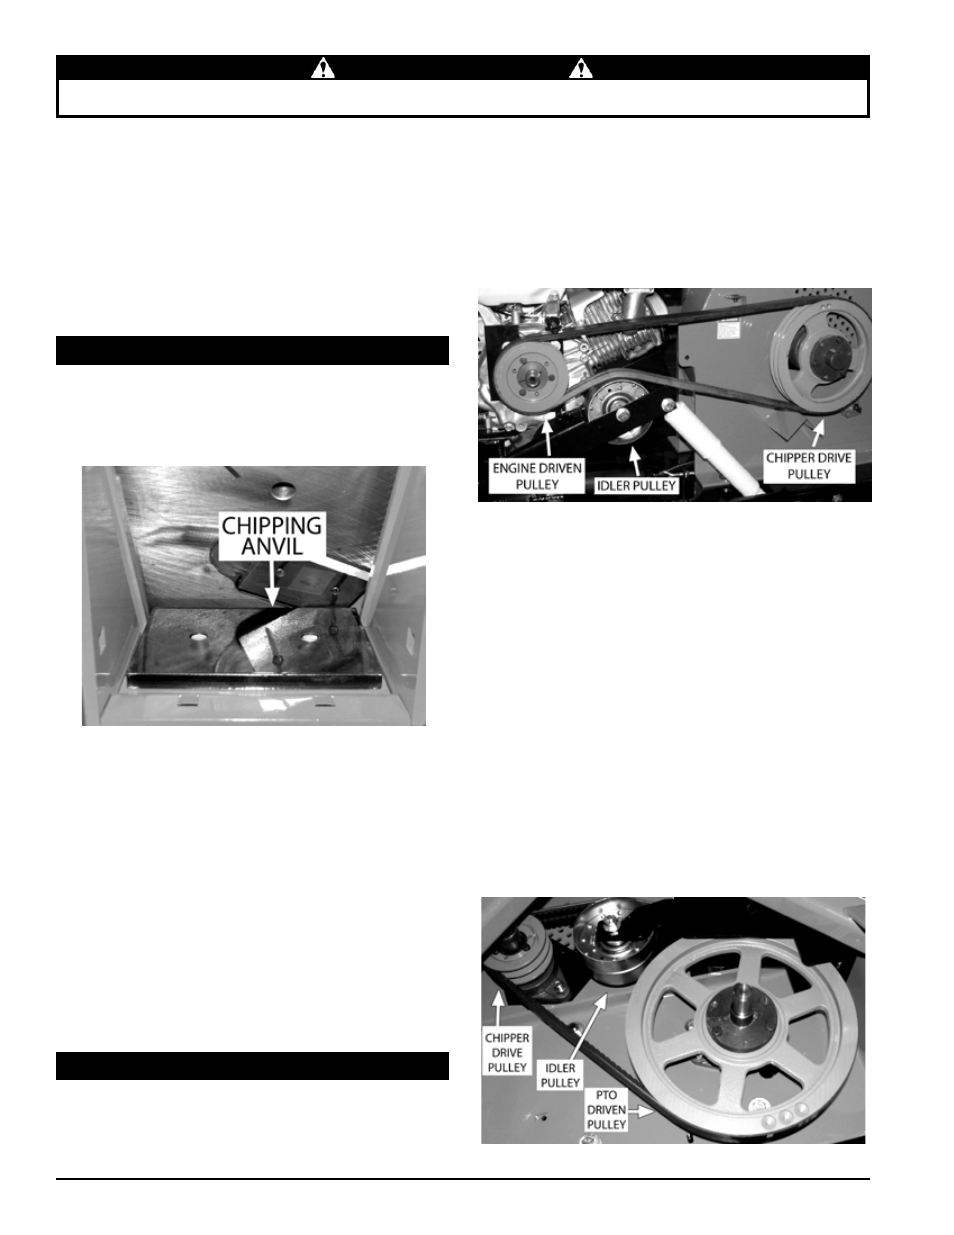
Figure 5.5, PTO model drive belts
Figure 5.4, Engine model drive belt
To adjust the Chipping anvil:
1. lift rotor access cover and expose rotor. loosen
the two 1/2" bolts that hold the chipper anvil to the
frame.
2. Measure the amount of clearance between chipping
blade and chipping anvil from inside of housing.
3. Adjust inward or outward to desired measurement.
4. Tighten bolts on chipping anvil to 75 ft-lbs. Make sure
all blades clear the anvil by 1/16" to 3/16" before
operating.
If the chipping anvil edge is damaged or worn unevenly,
remove the two bolts holding the anvil and use one of the
other three edges. Adjust for correct measurement.
5.5 SETTING bLadE CLEaRaNCE
Figure 5.3, Chipping anvil location
5. Remove an equal amount off each blade to maintain
rotor balance.
6. Small imperfections such as nicks and burrs on
the flat side of the blade will not affect the chipping
performance of the machine.
7. For blades that have been repeatedly sharpened,
ensure that the sharpened surface extends past the
chipping slot opening. If it does not extend past the
opening, the blades should be replaced.
The chipping blades should clear the anvil by 1/16 inch to
1/8 inch. Check the clearance every 8 hours of operation
and adjust if needed. The chipping anvil is reversible. All
four sides of the anvil can be used for chipping.
Check the condition of the drive belt annually or after every
25 hours of operating, whichever comes first. If the belt is
cracked, frayed, or worn, replace it. To replace or adjust
drive belt, proceed as follows: