12 clearing a plugged rotor – Echo 72620 User Manual
Page 21
6 INCH CHIPPER
17
SERVICE & MAINTENANCE
BEFORE INSPECTING OR SERVICING ANY PART OF THIS MACHINE, SHUT OFF POWER SOURCE,
ANd MAKe suRe All MoVINg PARts hAVe CoMe to A CoMPlete stoP.
Warning
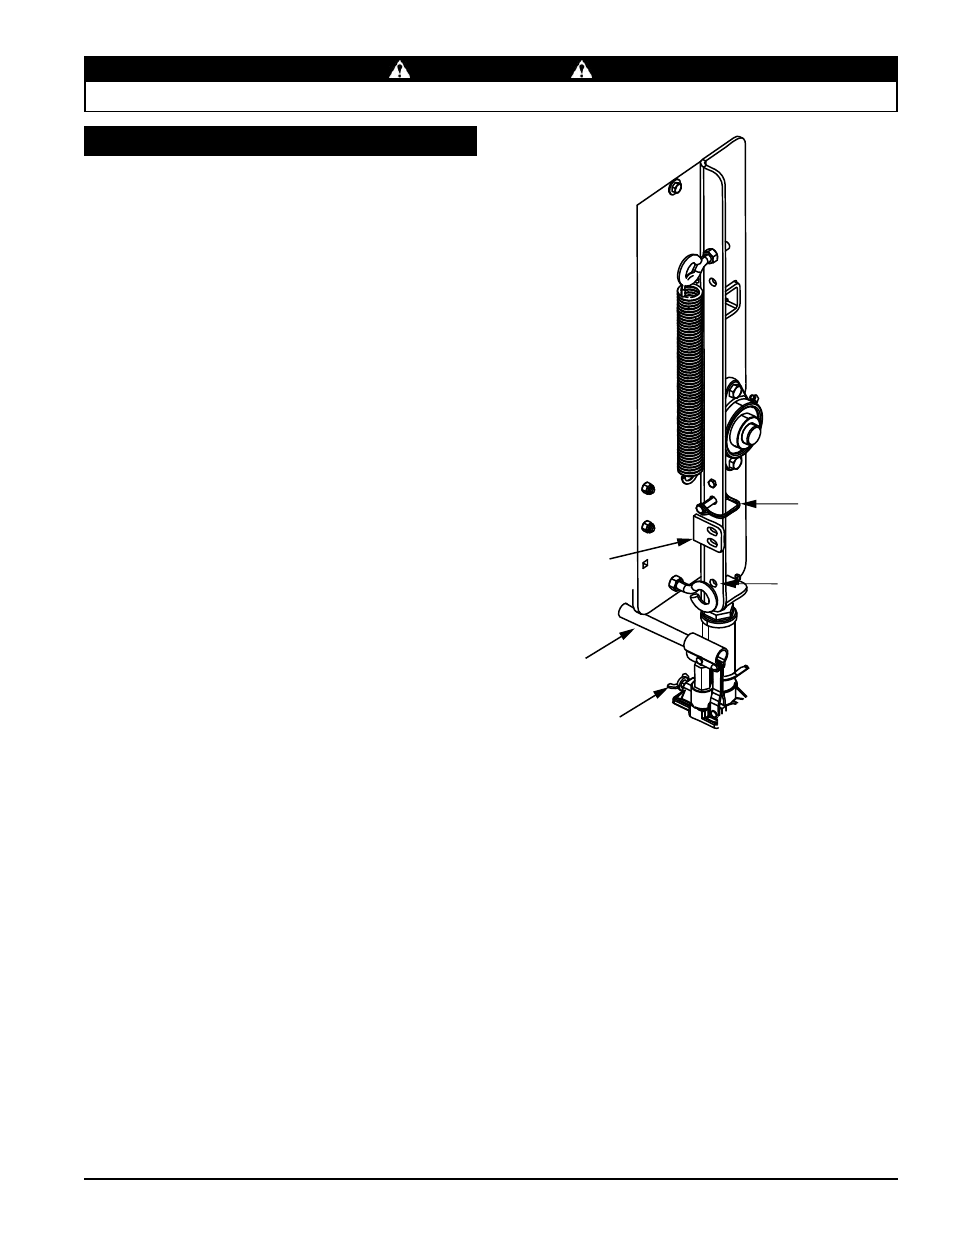
FEED
ROLLER
JACK
CHECK
VALVE
SUPPORT
BRACKET
LOCK PIN
STORAGE
POSITION
LOCK PIN
POSITION
Feeding too large or too much material at once may plug
the chipper. To clear a plugged disk, proceed as follows:
Lift the engagement handle and turn off engine key
1.
switch. Allow all moving parts to come to a complete
stop.
Remove the two 3/8” retaining bolts holding the access
2.
cover to the chipper frame and lift up access cover.
Remove the lock pin from storage position (see Fig.
3.
5.5)
Turn check valve clockwise to engage the jack pump.
4.
Pump the handle to raise the feed roller until the lock pin
5.
position aligns with one of the support bracket holes.
Secure the position by putting the lock pin through the
6.
support bracket and lock pin position.
Clean the debris away from the chipper disk. Turn the
7.
disk by hand to be sure it is free to rotate. Be careful
to avoid the chipper blades when cleaning out the
debris.
Remove the lock pin and put it back in storage
8.
position. leAVINg the loCK PIN IN ANy otheR
PosItIoN MAy INteRfeRe WIth feed RolleR
oPeRAtIoN.
turn the check valve counterclockwise to disengage
9.
the pump and lower the jack.
Close access cover and replace bolts.
10.
start the engine. depress belt engagement pedal
11.
when engine is running to engage drive belt. Resume
operation at 1/4 throttle.
5.12 clearing a Plugged roTor
Figure 5.5, Feed roller jack