5 attach extension tray, 6 connect control cable, 7 install a battery – Echo CH911DH Owners Manual v.2 User Manual
Page 11: Warning, English
9 INCH CHIPPER
7
ENGLISH
ASSEMBLY
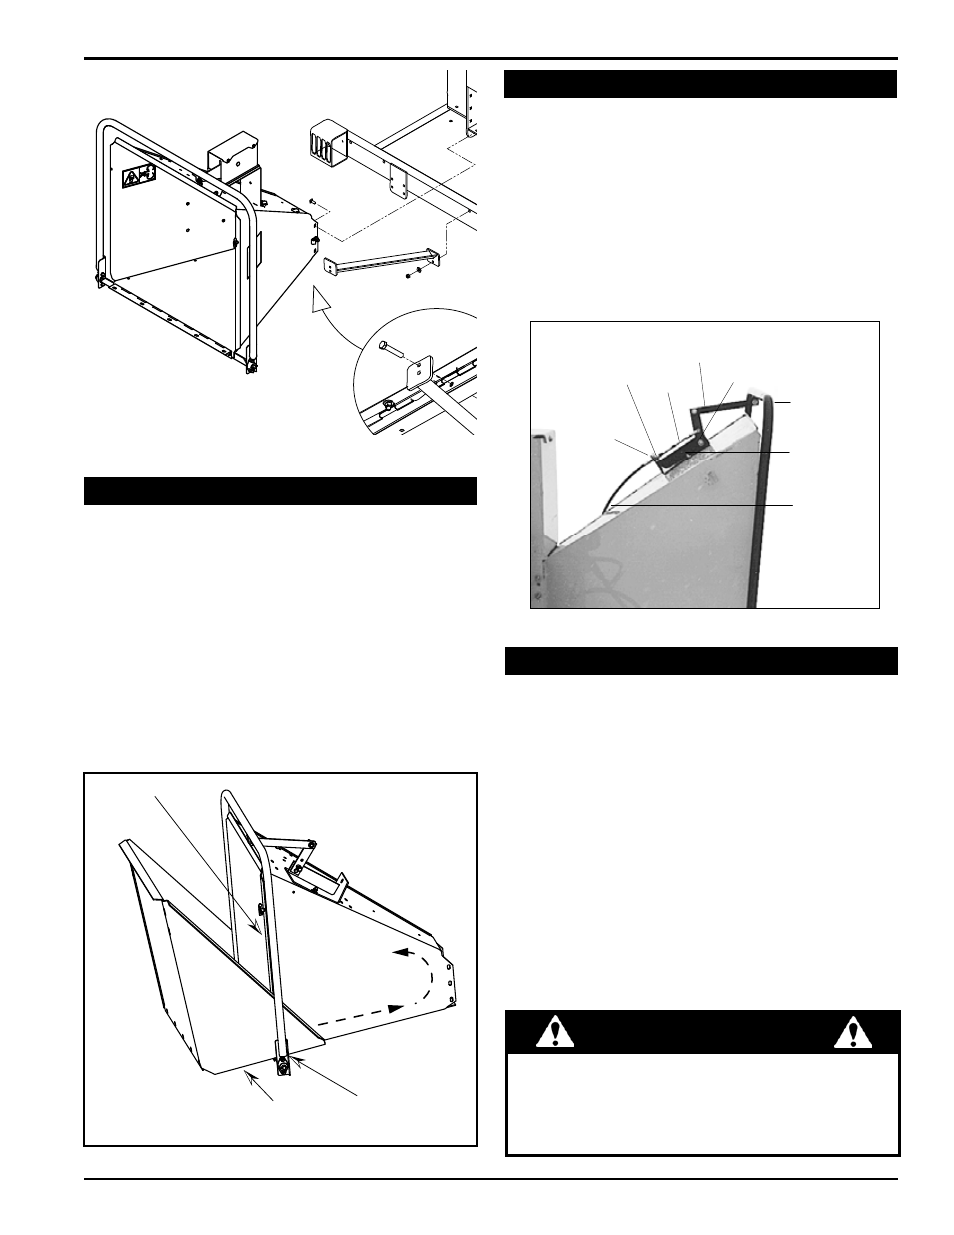
2.5 ATTACH ExTENSIoN TRAY
Figure 2.3, Attaching the chute support
Tilt the extension tray up, so the bottom of the tray is
1.
facing outward (Figure 2.4). Slide the extension tray lips
between the extension hinge and chipper chute lips.
Tilt the extension tray down until the tray rests on the
2.
extension hinge, and the extension tray lips contact
the back of the chipper chute lips.
Insert five 3/8" x 1" carriage bolts (included in owner's
3.
kit) through the extension tray and hinge. Secure the
bolts with washers and nylock nuts from the bottom.
Attach the chute support weldment to the middle hole
4.
of the chipper chute by using the existing bolt.
EXTENSION
TRAY LIP
CHIPPER CHUTE LIP
EXTENSION
HINGE
Figure 2.4, Attaching the extension tray
2.6 CoNNECT CoNTRoL CAbLE
Remove the clevis assembly from the hydrostatic
1.
control cable end (see Figure 2.5). Remove one nut
on the cable end. Insert the cable end into the hole
in the cable anchor weldment. Replace the nut and
clevis assembly.
Attach the clevis assembly to the center hole on the
2.
feed control lever.
Adjust the cable detent ball to contact the detents in
3.
the cable anchor weldment when the control arm is in
the forward or reverse position.
INSERT CABLE
THROUGH HOLE
NUT
CLEVIS
ASSEMBLY
DETENT
BALL
CONTROL
ARM
CABLE ANCHOR
WELDMENT
HYDROSTAT
CONTROL
CABLE
FEED
CONTROL
LEVER
Figure 2.5, Control cable components
2.7 INSTALL A bATTERY
you will need to purchase a battery. Choose a battery that
meets or exceeds the engine manufacturer’s specifications.
Consult your engine owner’s manual or authorized dealer
for specification details.
To install the battery:
Open the battery box and insert battery into the bat-
1.
tery box.
Attach the positive (red) battery cable from the engine
2.
to the positive (+) battery terminal.
Attach the negative (black) battery cable from the
3.
engine to the negative (-) battery terminal.
Secure the cover on the battery box with the strap.
WARNING
To avoid sparks and a possible explosion or fire due to a
short circuit, do not touch the positive (+) battery terminal
and any surrounding metal with tools, jewelry or other
metal objects. When installing battery cables, connect
the positive (+) cable first and the negative (-) cable last.