Explanation of the view album interface, 8 - quick start guide – I.R.I.S. IRIScan Executive 2 for Windows Quick Start User Manual
Page 7
Click on the button “Verified” to display the cards that were entirely validated. Verified cards are
blue; these contacts can be exported, synchronized, used in mailings etc.
• Searching and selecting contacts.
Click on the “Select” button to find your contacts back. Fill out one or more fields in the search
mask to execute “query by example” searching.
Enter a search term in the “Search” field and press Enter to execute “free text” searching on any
database field.
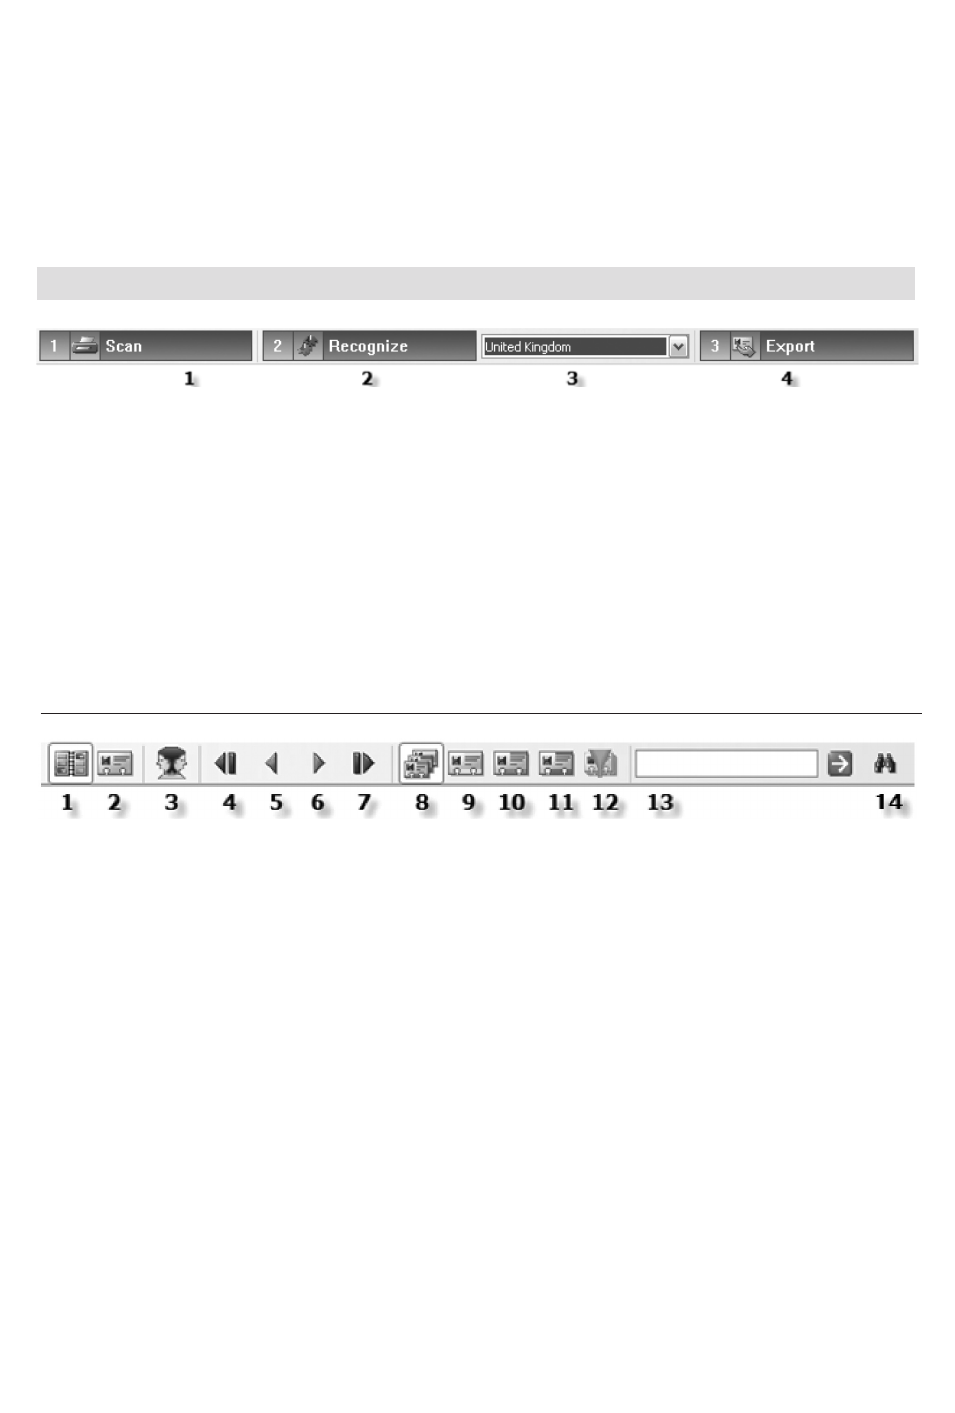
Explanation of the view album interface
1. Scan Card
Scan your cards in the electronic Rolodex
®
.
2. Recognize card
Choose the card style before you trigger the card recognition.
3. Card style
Indicating the card’s country is imperative to execute the recognition and field analysis correctly.
4. Export, import and synchronize contacts
• Export your contacts to your favorite contact manager, to the electronic address book of your
PDA or save them in a structured text file.
• Import contacts from contact manager into the Cardiris database.
• Synchronize your Cardiris contacts with your contact manager.
1. Album view
Display your cards in album view mode.
2. Card view
Display a single card. This view mode displays all data fields, including the personal notes. You can
change the card status here.
3. Find duplicates: allows you to find and solve conflicts for duplicates contacts
4. First card
Go to the first card of the database/of your selection.
5. Previous card
Go to the previous card of the database/of your selection.
6. Next Card
Go to the next card of the database/of your selection.
7. Last card
Go to the last card of the database/of your selection.
8. All cards
Display all cards of the database.
8 - Quick Start Guide