Aries Automotive P3063 User Manual
Page 4
a. Once the Frame Brackets are fully tightened to the vehicle, temporarily remove only the Grille
Guard. Hold the plastic lower bumper cover up in the approximate position against the bottom
Of the bumper and against the Brackets, (If cover was previously removed in Step 3a). Mark the
Bracket location onto the back of the bumper cover. Cut slots through the cover to clear the
Brackets, (Fig 18). IMPORTANT: For best results, start with a small opening and only trim away
material required for Bracket clearance. Once properly trimmed, reinstall plastic bumper cover
with the factory hardware.
b. Reinstall the Grille Guard and tighten all Mounting Bracket and Support Bracket hardware.
15. Release the levers on the Quick Release Bolts, (Fig 19), and loosen the top Hex Bolts on the Frame
Mounting Bracket. WARNING! Do not loosen the bolts all the way. Loosen hardware only enough to
move the Grille Guard. Damage to the truck or Grille Guard may occur.
16. Pull the Grille Guard all the way forward, away from the vehicle, (Fig 20).
17. Carefully close the hood and check for clearance between the Top Bracket and the factory grille. Adjust
the Brackets up or down for fit as necessary. IMPORTANT: Always make sure that the hood and grille
will clear the Grille Guard before closing the hood.
18. Close the hood. Push the Grille Guard back towards the vehicle until it is vertical, check the alignment
again and adjust the Grille Guard as required. Tighten all Mounting Bracket hardware including the
Quick Release Bolts, (Fig 19).
19. Do periodic inspections to the installation to make sure that all hardware is secure and tight,
For the Led lights wiring please refer to the manufactures installation.
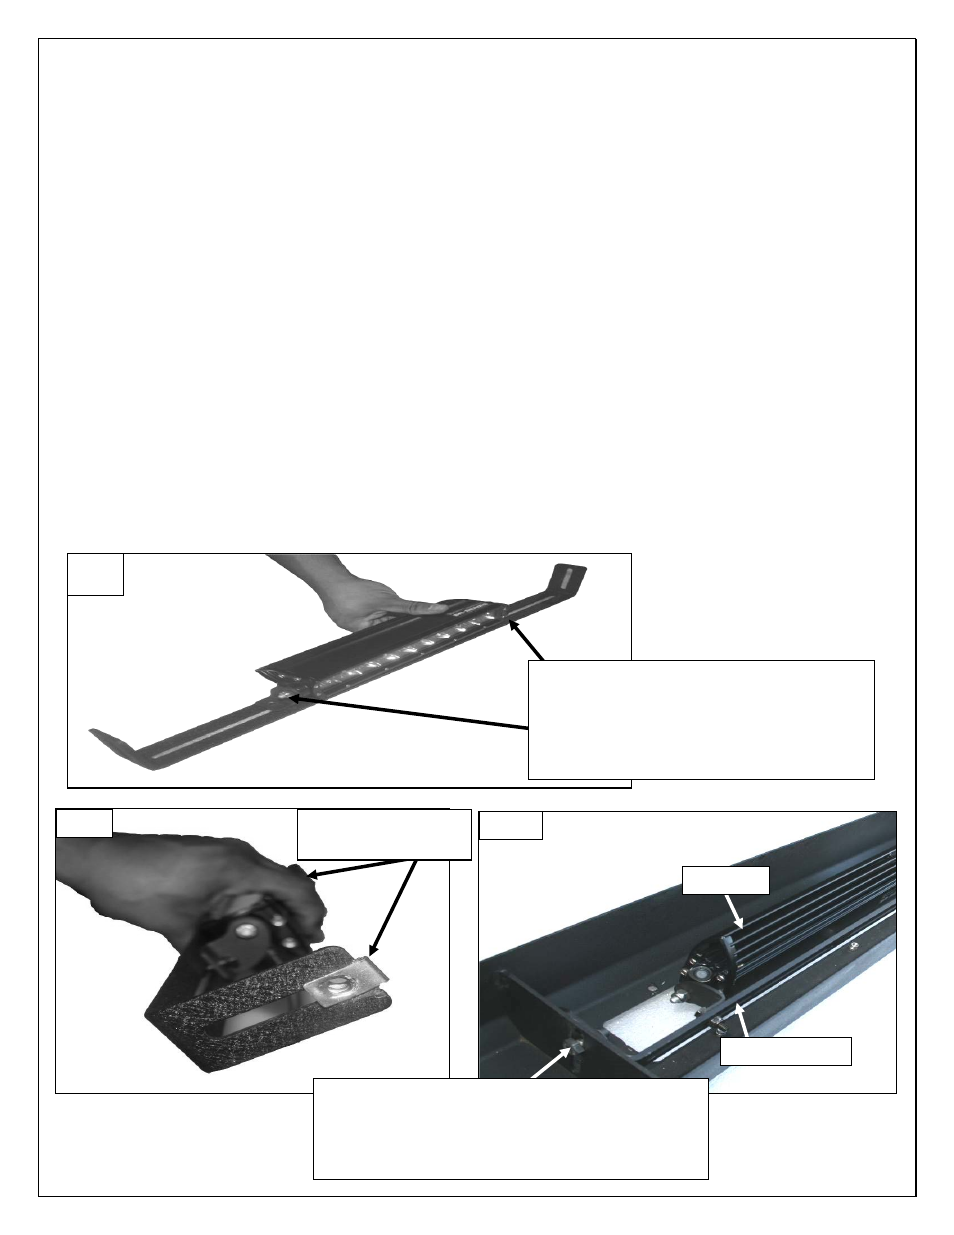
Fig 1
LED light attached to support flange.
NOTE:
LED Manufactures will have similar
but different mounting styles or brackets,
once you determine you mounting options
attach it to the support flange as seen.
8mm nut clip
attached (1) per side
Fig 2
Support flange
Secure support flange into center flange with
(1) 8mm Hex head bolt
(1) 8mm Flat Washers
(1) 8mm Lock washer
Per side.
Fig 3
Led Light
Page 4 of 9
11/12/2013