Aries Automotive P4083 User Manual
Page 4
12. Line up the outer bent end of the Top Bracket with the hole in the Grille Guard upright. Bolt the bent
end of the Outer Top Bracket to the upright with (1) 10mm x 25mm Button Head Allen Bolt, (2) 10mm
Flat Washers and (1) 10mm Nylon Lock Nut, (Fig 19).
13. Repeat Steps 8 – 12 for passenger side Top Bracket assembly installation.
14. Level and adjust the Grille Guard and fully tighten all hardware including bumper, bumper bracket and
all Grille Guard Bracket hardware. IMPORTANT: Adjust the position of the Top Brackets so that they
cannot come in contact with the plastic grille, (Fig 19).
15. Reinstall the top plastic cover using the factory hardware.
16. Do periodic inspections to the installation to make sure that all hardware is secure and tight.
To protect your investment, wax this product after installing. Regular waxing is recommended to add a
protective layer over the finish. Do not use any type of polish or wax that may contain abrasives that could
damage the finish.
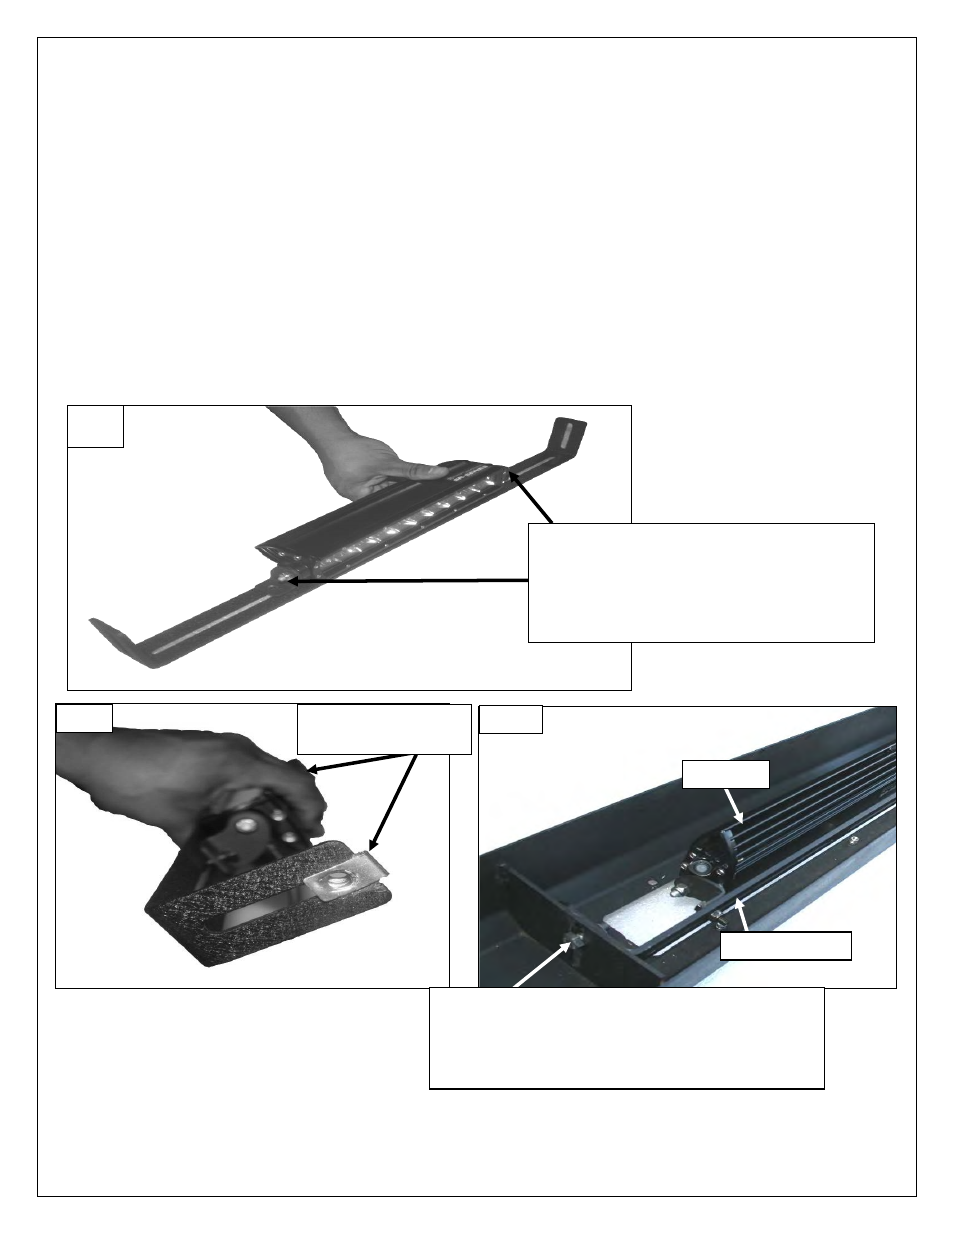
Fig 1
LED light attached to support flange.
NOTE:
LED Manufactures will have similar
but different mounting styles or brackets,
once you determine you mounting options
attach it to the support flange as seen.
8mm nut clip
attached (1) per side
Fig 2
Support flange
Secure support flange into center flange with
(1) 8mm Hex head bolt
(1) 8mm Flat Washers
(1) 8mm Lock washer
Per side.
Fig 3
Led Light
Page 4 of 9