Aintenance – Snorkel X26N-sn51089+V-2 User Manual
Page 19
9 M
AINTENANCE
Page 15
9 M
AINTENANCE
W A R N I N G
!
!
Never perform service while the platform is elevated without first blocking the elevating assembly.
DO NOT stand in the elevating assembly area while deploying or storing the brace.
B
L O C K I N G
T
H E
E
L E V A T I N G
A
S S E M B L Y
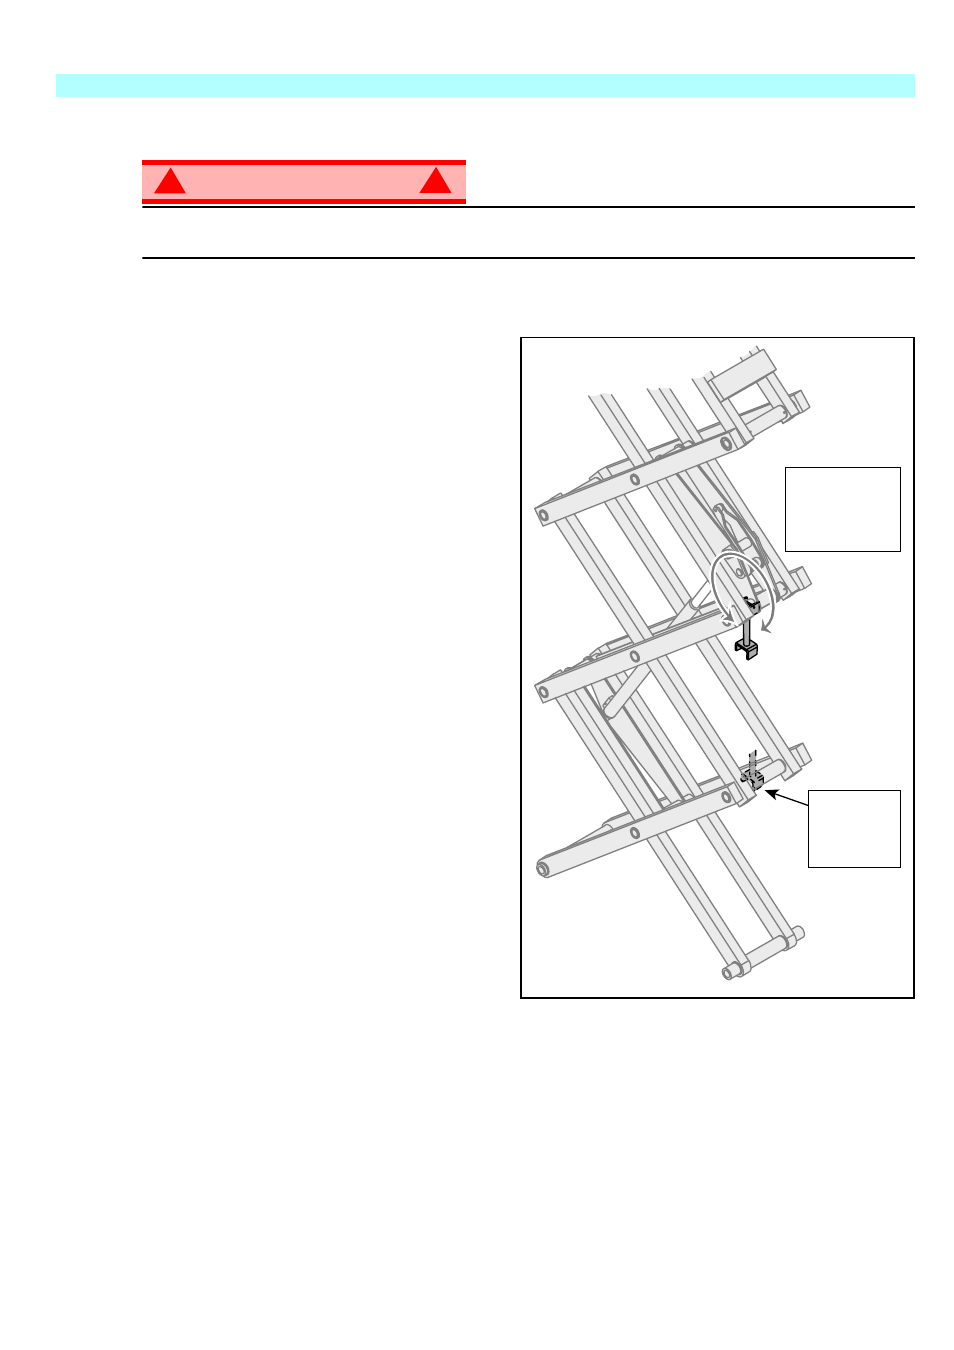
Figure 10: Scissor Brace
S
CISSOR
B
RACE
I
NSTALLATION
1. Park the machine on a firm, level surface.
2. Pull Chassis Emergency Stop Switch to the
ON position.
3. Pull Platform Emergency Stop Switch to the
ON position.
4. Turn and hold the Chassis Key Switch to
CHASSIS.
5. Push the Chassis Lift/Lower Switch to LIFT to
elevate the platform until the scissor brace can
be rotated to the vertical position.
6. From the rear of the machine, lift the scissor
brace from its stowed position. Rotate upward
and outward, then down until it is hanging
vertically below its attachment point.
7. Lower the platform by pushing the Chassis
Lift/Lower Switch to LOWER and gradually
lower the platform until the scissor brace is
supporting the platform.
S
CISSOR
B
RACE
S
TORAGE
1. Using the Chassis Controls, gradually elevate
the platform until the scissor brace is clear.
2. Rotate the scissor brace outward and upward
over its mounting point until it rests in the
stowed position.
3. Lower the platform by pushing the Chassis
Lift/Lower Switch to LOWER to completely
lower the platform.
Rotate Brace
Clockwise to
Block
Counterclockwise
to Store
Brace Rests
on Weldment
when in
Blocking
Position