Parking brake release, After use each day, Release the parking brake – Snorkel X26N-sn51089+V-1 User Manual
Page 16: Engage the parking brake
Page 12
7 OPERATION
PARKING BRAKE RELEASE
Perform the following only when the machine will not operate under its own power and it is necessary to move
the machine or when winching onto a transport vehicle (see «Transporting the Machine»).
W A R N I N G
!
!
NEVER winch or move the machine faster than 0,3 m/sec. (1 ft./sec).
NEVER operate the machine with the parking brakes released. Serious injury or damage could result.
DO NOT release the parking brakes if the machine is on a slope.
The parking brakes are integral to the drive motors. Each drive motor has two brake release screws. Release
and engage the parking brakes one wheel at a time. Turn the brake release screws in stages (½ turn at a
time) to prevent possible binding of the brake mechanism.
RELEASE THE PARKING
BRAKE
The front wheel motors each have two
brake release nuts.
IMPORTANT: Turn the nuts alternately
in ½ turn increments to insure uniform
adjustment and prevent binding.
1. Chock the rear wheels to prevent the
machine from rolling.
2. Using a 5mm Allen Key, remove the
two G1/8 plugs from the motor body
turning counter-clockwise.
3. Using a 5mm Allen Key turn the
inner G1/8 plug as far as possible in a
clockwise direction.
4. The brake is released.
C A U T I O N
!
!
To avoid confusion, the outer plugs should not be replaced before the braking function is re-instated.
ENGAGE THE PARKING BRAKE
1. Chock the rear wheels to prevent the machine from rolling.
2. Using a 5mm Allen Key turn the inner G1/8 plug as far as possible in the counter-clockwise direction.
3. Fit the two outer G1/8 plugs then, using the 5mm Allen Key, screw in clockwise until tight.
AFTER USE EACH DAY
1. Ensure that the platform is fully lowered.
2. Park the machine on a firm, level surface, preferably under cover, secure against vandals, children and
unauthorized operation.
3. Turn the Chassis Key Switch to OFF and remove the key to prevent unauthorized operation.
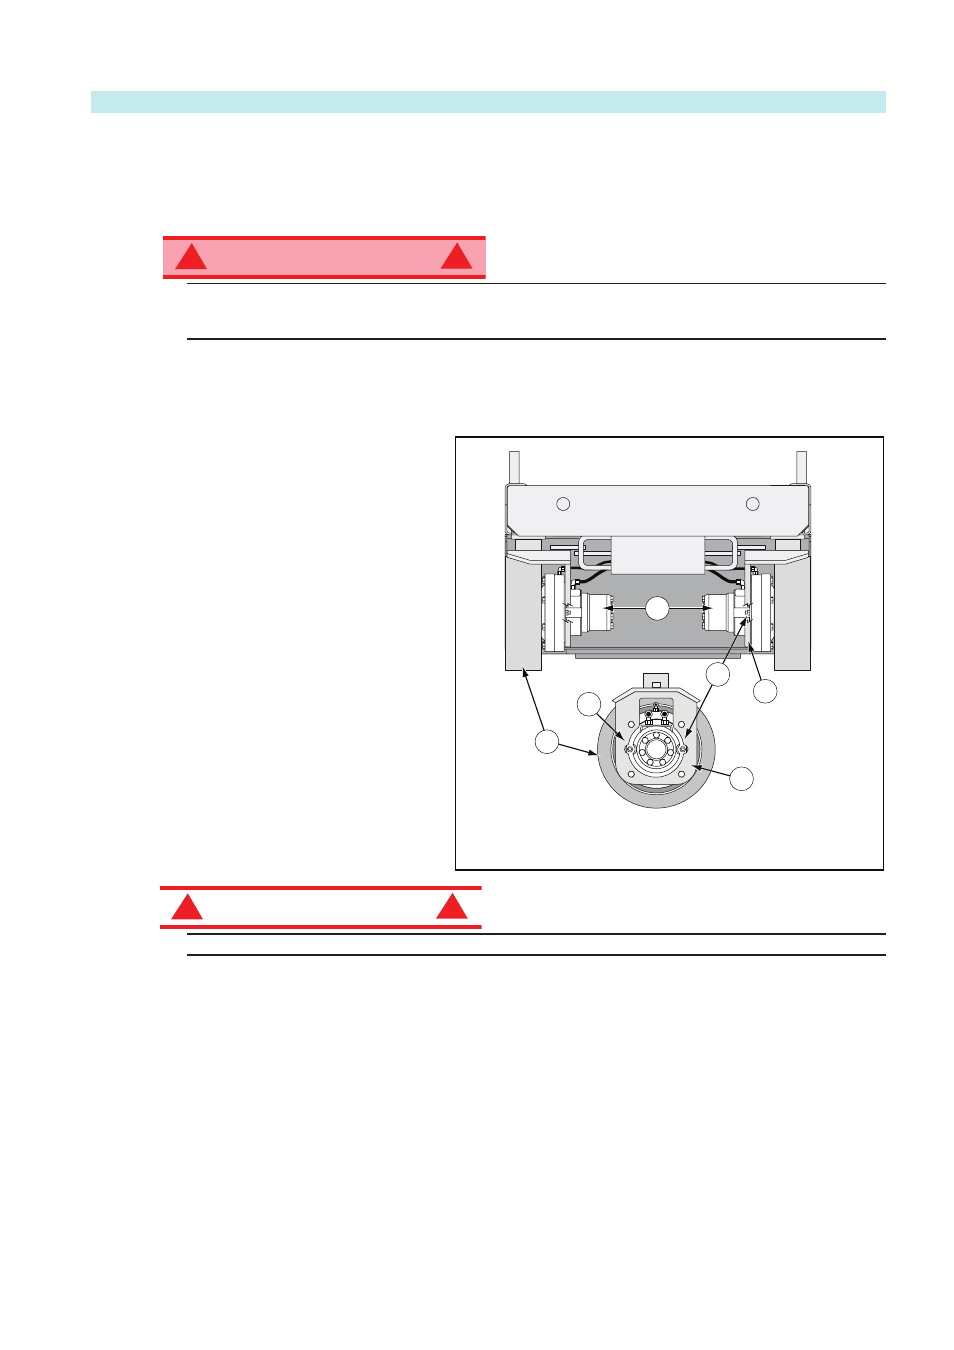
Figure 7: Parking Brake Release
e
replaced before the braking function is re-instated.
3. G1/8 Plugs
2
3
3
4
1
1
1. Motor Mount
2. Drive Motor
3. Brake Release Nut
4. Wheel
FRONT
1. Motor Mount
2. Drive Motor
3. Brake Release Nut
4. Wheel
FRONT