Snorkel TL34-01-sn000123+ User Manual
Page 18
12
Do not attempt to set up the machine on steep slopes, ramps
or soft ground.
3. Manual Outriggers Only: Pull out the outrigger arms and allow the spring bolts to lock
thestabilisers into position.
Ensure BOTH spring bolts on each Outrigger arm are fully
located.
!
Wind down the screw jacks and level the machineusing the level gauge mounted on the
front of the chassis as a guide.
4. Lower the Outriggers two at a time starting at the tow bar end (No’s 3&4) until the jockey
wheel just clears the ground.
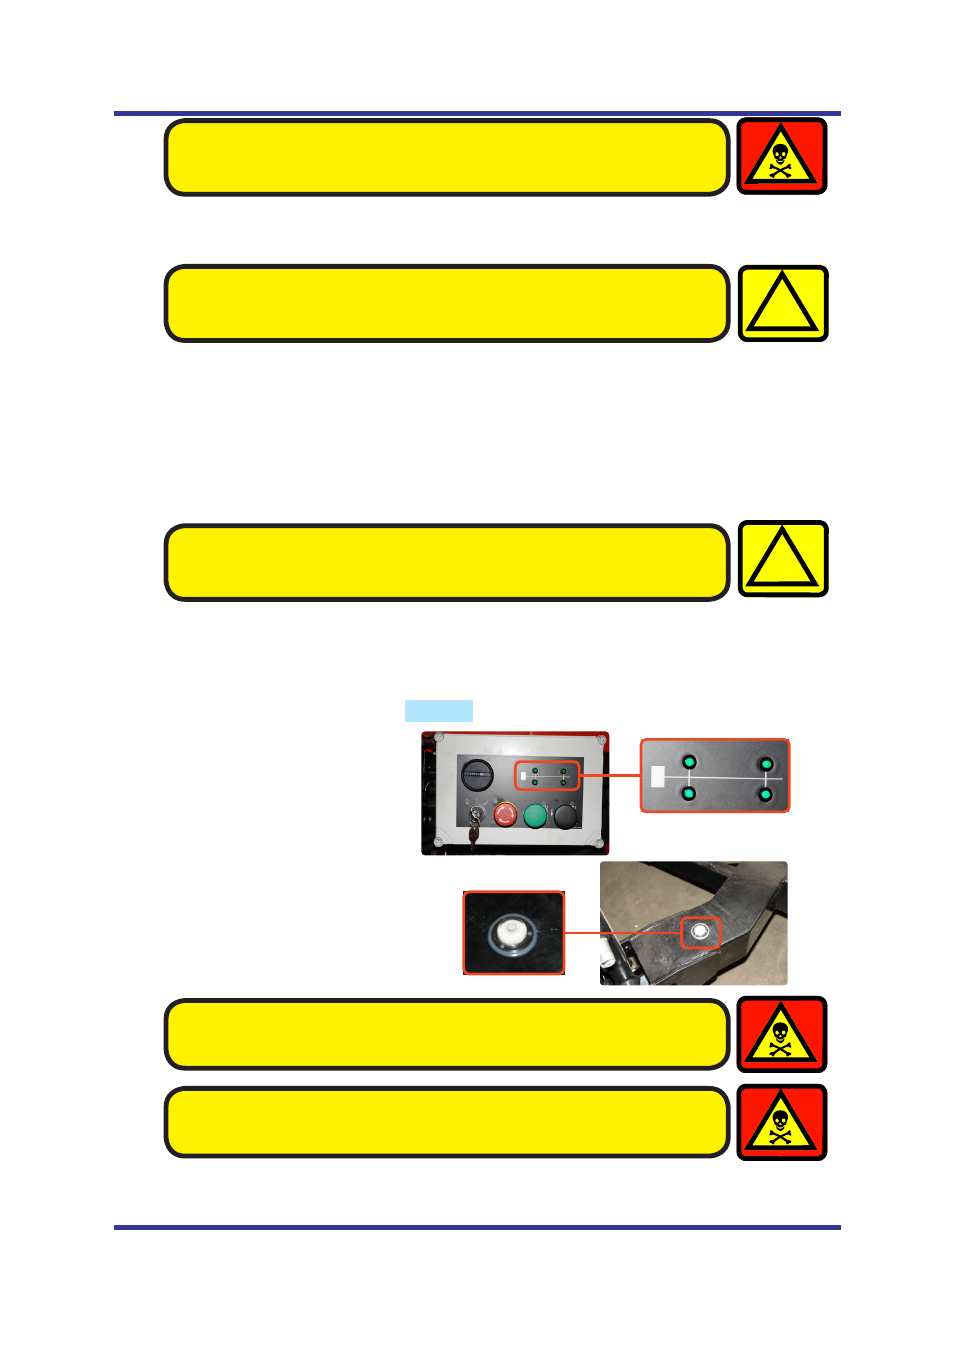
5. Lower Outriggers 1&2 until the green LED display indicates that they are under load.
(Fig 4)
6. Repeat this sequence for Outriggers 3&4.
Take EXTREME care NOT to ground either the Basket, or the
Jockey Wheel during the next step.
!
7. By alternating from 1&2 to 3&4, carefully inch down each pair of Outriggers until all four
Outriggers are fully deployed, and the wheels are well clear of the ground.
8. Now, by using the Level indicator (Fig.4), raise opposite Outriggers until the bubble and
indicator ring are concentric
(i.e., the bubble rests in the
centre).
9. Check that each LED on the
Ground Control panel is still
illuminated. This indicates
that each foot is in firm contact
with the supporting surface.
The unit is designed to operate on a supporting surface of
minimum bearing strength of 50N/cm
2
.
The maximum outrigger load is 10.3kN.
SETTING UP
LEVEL INDICATOR
BUBBLE INDICATOR
Fig. 4