Clip viewer, Timeline viewer – Apple iMovie at a Glance User Manual
Page 3
iMovie at a Glance
3
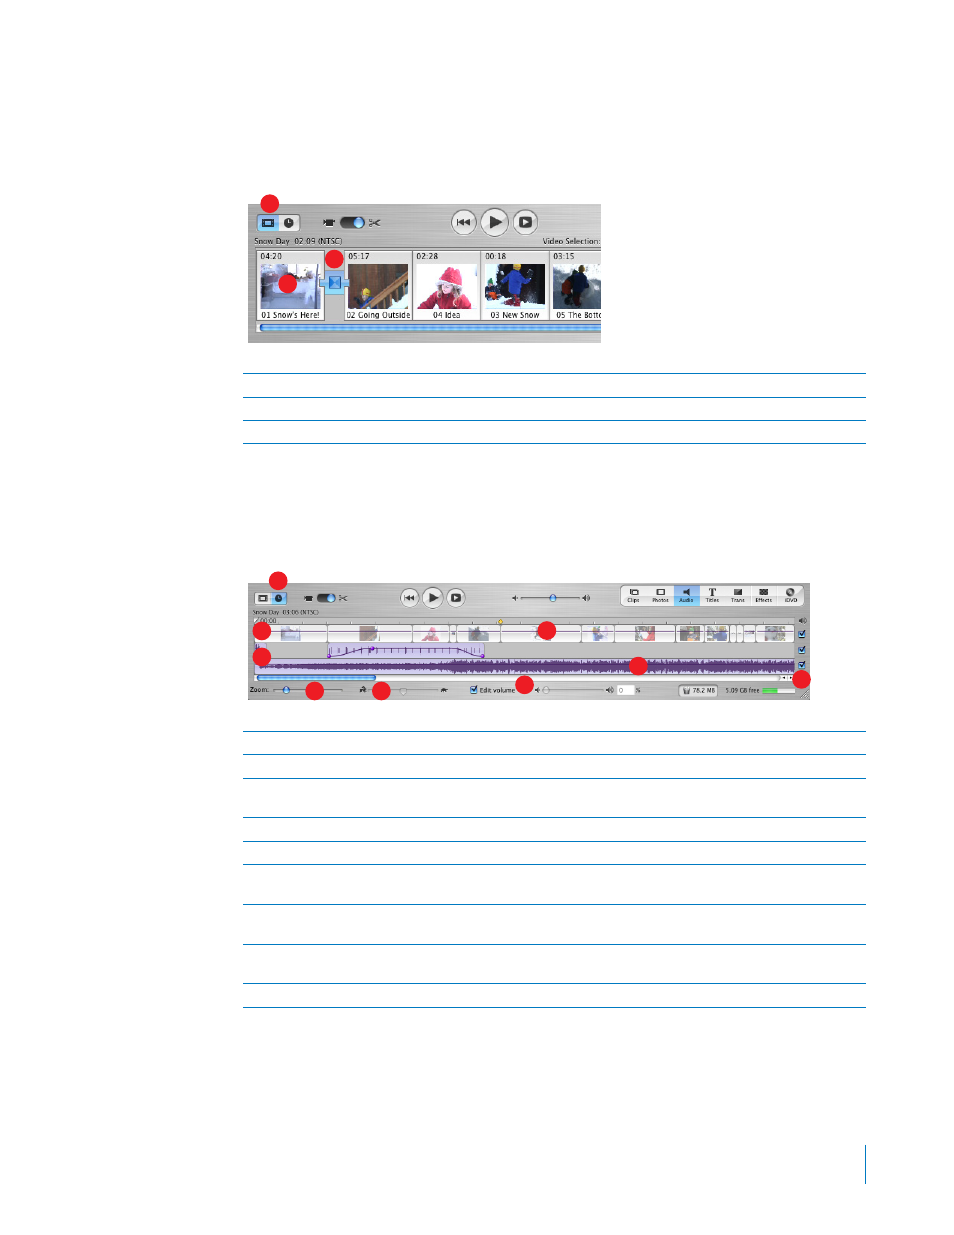
Clip Viewer
Use the clip viewer, shown below, to add clips to your movie and arrange them in the order you
want them to appear in your movie. When you create titles and transitions, or add photographs
from your iPhoto library, drag them to the clip viewer.
Timeline Viewer
Use the timeline viewer, shown below, to work with audio clips, synchronize your audio with
video, and to adjust the timing of your movie.
A
Clip viewer button:
Click the clip viewer button to switch from the timeline viewer.
B
Clip:
Each section of video footage and any still images you import are called clips.
C
Transition marker:
Transition markers indicate that two clips are linked by a transition.
A
B
C
A
Timeline viewer button:
Click the timeline viewer button to switch from the clip viewer.
B
Video track:
Select clips in this track to add motion effects.
C
Audio tracks:
Place and arrange audio clips in these tracks to synchronize audio and video clips. Deselecting
the checkbox to the right of the track mutes all the audio clips in that track.
D
Zoom slider:
Move the slider to make clips appear larger or smaller in the timeline.
E
Clip speed slider:
Select a video clip and drag this slider to make the clip play faster or slower.
F
Edit Volume:
Select this checkbox to see the volume level bar for all clips. Move the slider to raise or lower
the volume of a selected clip or clip segment.
G
Volume level bar:
Click this bar to add markers, then drag the markers to adjust the volume for sections of
audio clips. You can use this to make audio fade in or fade out.
H
Audio waveforms:
Representations of audio intensity. Use audio waveforms to align video to audio events
such as a certain drumbeat or the exact beginning or end of the audio.
I
Audio checkboxes:
Select a checkbox to hear the audio in its track. Deselect it to mute the track.
A
B
C
D
E
F
G
I
H