Edit view – Apple iPhoto 6 User Manual
Page 29
Chapter 3
iPhoto at a Glance
29
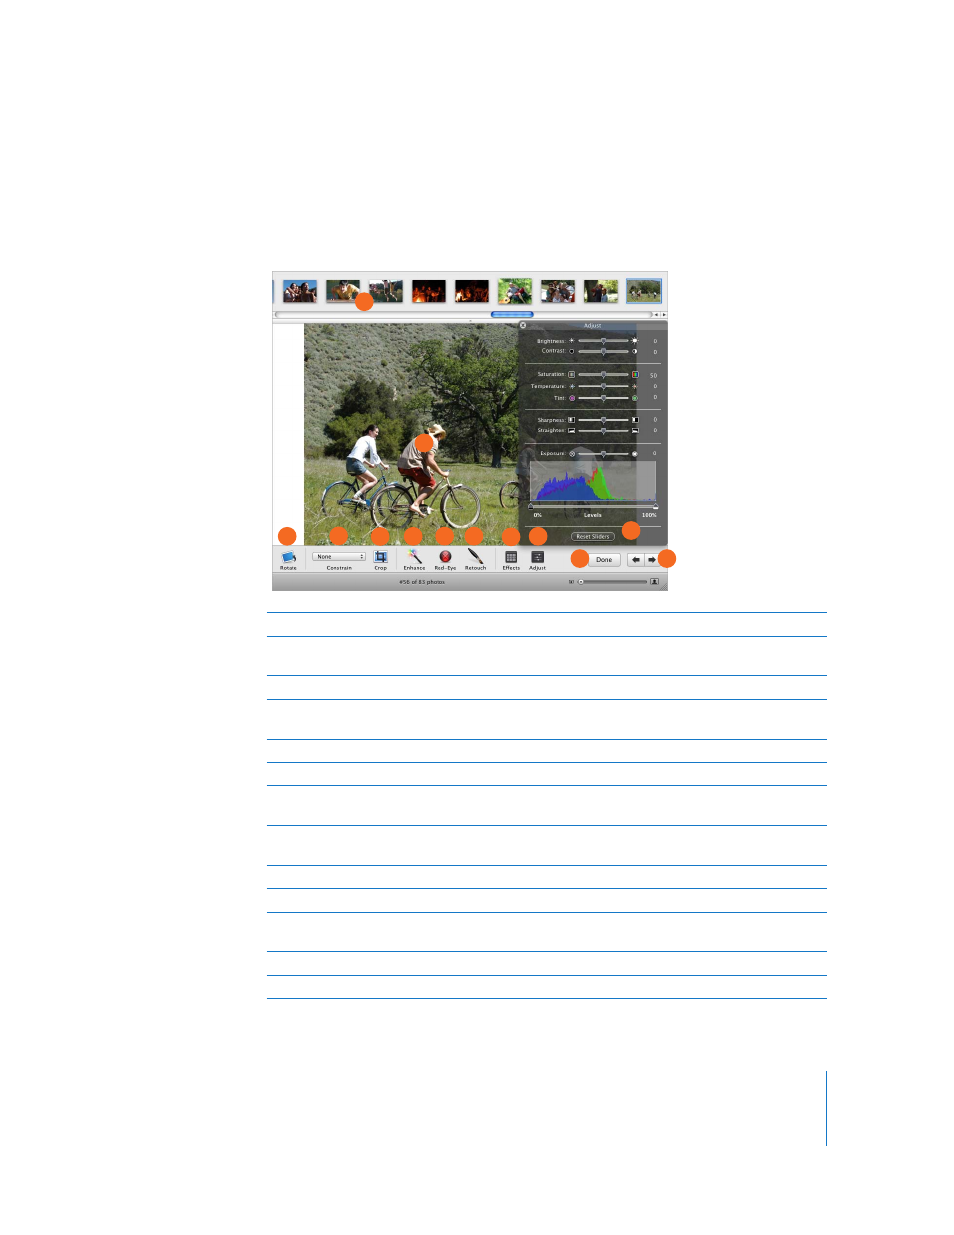
Edit View
If your library, an album, or an individual photo is selected in organize view, you can
click the Edit button to switch to edit view. Edit view gives you all the tools you need to
improve the color and composition of your photos.
A
Photo browser: Click the photo you want to edit.
B
Viewing area: View the photo whose color or composition you want to change. Drag to select a
portion of the photo for cropping or red-eye reduction.
C
Rotate button: Click to rotate photos by 90-degree increments.
D
Constrain pop-up menu: Choose a size ratio to constrain your crop or red-eye reduction
selection to a specific dimension.
E
Crop button: Click to edit a photo by keeping only the portion you like and removing the rest.
F
Enhance button: Click to automatically adjust the color and contrast of a photo.
G
Red-Eye button: Click to reduce the appearance of “red-eye” (when a person’s eyes look red in
your photo).
H
Retouch button: Click the Retouch button and then drag the crosshair pointer in short strokes
over blemishes and other small marks you want to remove from the photo.
I
Effects button: Click to display effects you can use on your photo.
J
Adjust button: Click to display advanced editing tools.
K
Adjust window: Use advanced editing tools to adjust a photo’s brightness, saturation,
sharpness, and more.
L
Done button: Click to leave edit view.
M
Arrow buttons: Click to go to the previous or next photo.
A
B
C
D
E
F
G
H
I
J
K
L
M