Parts list, Slider installation – Rock-Slide Engineering RAPTOR – SLIDER User Manual
Page 2
Installation Instruction RSEI 137
PARTS LIST
DESCRIPTION
1 Drivers Side Slider Assembly
1 Passenger Side Slider Assembly
2 Top Brackets
2 Back brackets
24 7/16” Washers
24 Aluminum Nutserts
14 5/16” SS Button Head Bolts
14 5/16” Stainless Steel Washers
*If any parts listed are missing or damaged please call Rock-Slide Engineering @ 435-752-4580 prior
to installation
SLIDER INSTALLATION
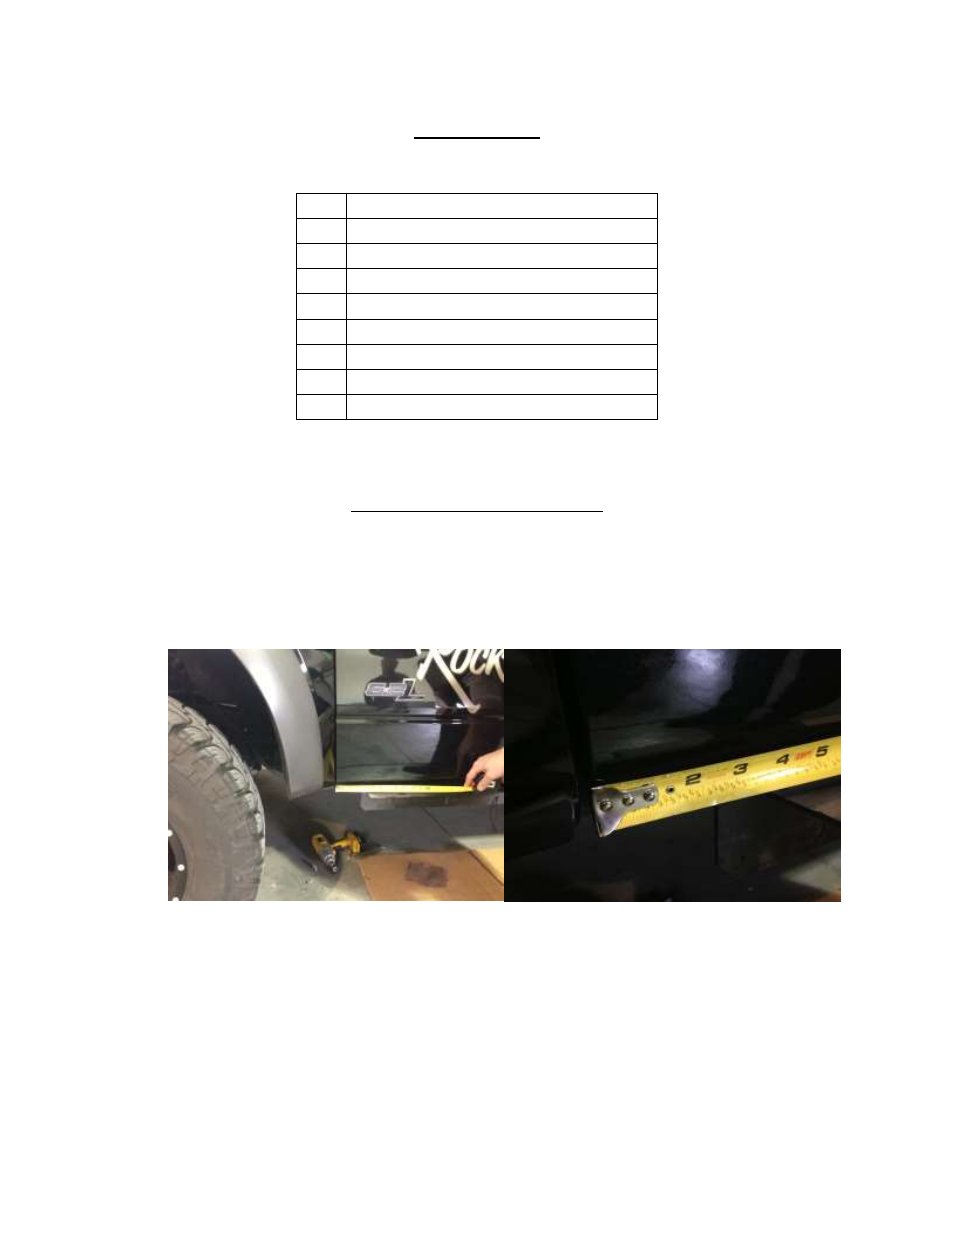
1. Remove the stock rocker panel guards
2. The top bracket will be installed first (If the brackets are not symmetrical make sure
you install the correct bracket on the correct side)
3. The bracket start point is approximately 4 3/8 inches back from the front door seam.
4. Find your starting point and hold the bracket up against the truck. Hold the bracket up
against the truck panel matching the body angles. Position the bracket so that the back
of the bracket is up against the panel seam. This should leave the top of the bracket in
approximately a level position when installed on the truck. Providing a level bracket for
the slider to sit on in the next step: