Switch adjustment, Feeder adjustment feeder block selection, Feeder block installation – Hornady Lock-N-Load Rifle Bullet Feeder User Manual
Page 8
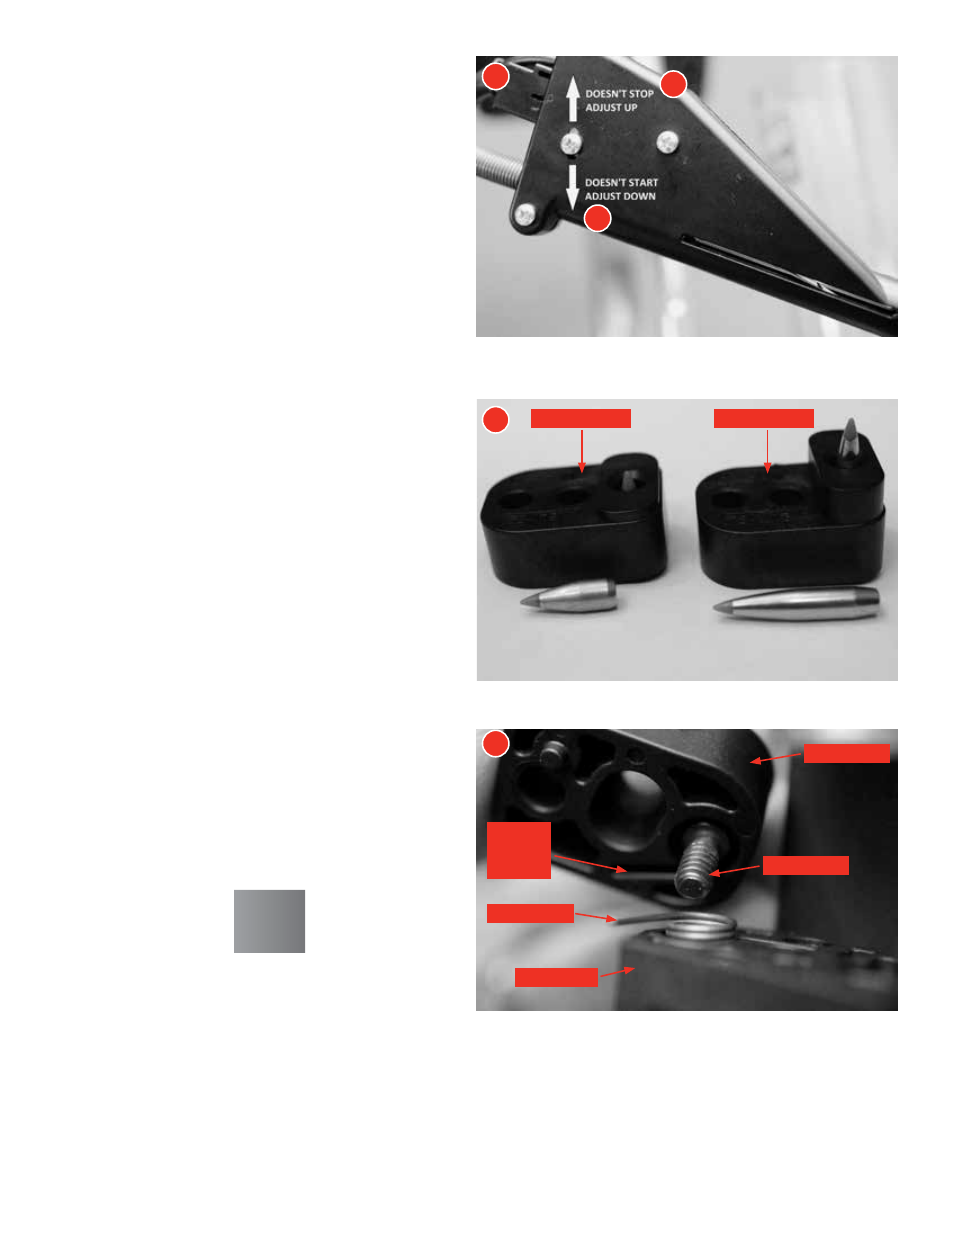
Short Feed Block
Slot in
Feeder
Block
Torsion Spring
Feeder Block
Shoulder Bolt
Feeder Cap
Tall Feed Block
Switch Adjustment
(if necessary)
12A: Hopper does not start
If the hopper does not rotate, make sure the power supply
is plugged in and the 2 Position Switch (32) is on. If it still
does not rotate, loosen the screw shown in the image and
slide DOWN slightly until a faint clicking of the switch can be
heard. Re-tighten (slightly snug: do not over tighten).
12B: Hopper does not stop
If the hopper does not shut off, turn off the hopper with the
2 Position Switch (32) and empty the Feed Tube. Loosen
the screw shown in the image and slide UP until the switch
faintly clicks. Move it back down a small amount so it clicks
again, then re-tighten (slightly snug: do not over tighten).
NOTE: Never push bullets upward through Switch Assembly.
This will damage the Micro Switch.
Feeder Adjustment
Feeder Block Selection
Select the tallest feed block (58 or 59) so the bullet tip
protrudes slightly out of the top.
If the tip protrudes too far to feed (greater than ¼"), replace
with the taller feed block. If the tip is recessed below the feed
block, replace with the shorter block.
Feeder Block Installation
(if necessary)
Remove the Shoulder Bolt (57) and Torsion Spring (60) and
replace with the new feeder block
Be sure that the Torsion Spring (60) is engaged in the slots in
the Feeder Cap (62) and Feeder Block (58 or 59).
Finger tighten (1 inch-pound max) the Shoulder
Bolt (57).
12
13
14
12
13
14
B
A
- 8 -