Tune & lock the die, Feeder attachment, Bullet feed tube attachment – Hornady Lock-N-Load Rifle Bullet Feeder User Manual
Page 14
Tune & Lock the Die
Next, lower the press ram and remove the cartridge. Place the
next set of components in the press and seat/crimp another
round.
Fine tune the crimp/seat depth if necessary. When adjusting
the Crimp Adjust Screw (46), hold the Seat Adjust Screw (42).
When adjusting the Seat Adjust Screw (42), hold the Crimp
Adjust Screw (46). Doing this will allow the crimp amount to be
adjusted without moving the seating depth and vice versa.
Once the crimp amount and the seat depth have been
obtained, tighten the Crimp Adjust Lock Ring (47) while
holding the Crimp Adjust Screw (46) so it doesn’t move. Then
tighten the Seat Adjust Lock Ring (44) while holding the Seat
Adjust Screw (42) so it doesn’t turn. Your die is now set to seat
and crimp in one step.
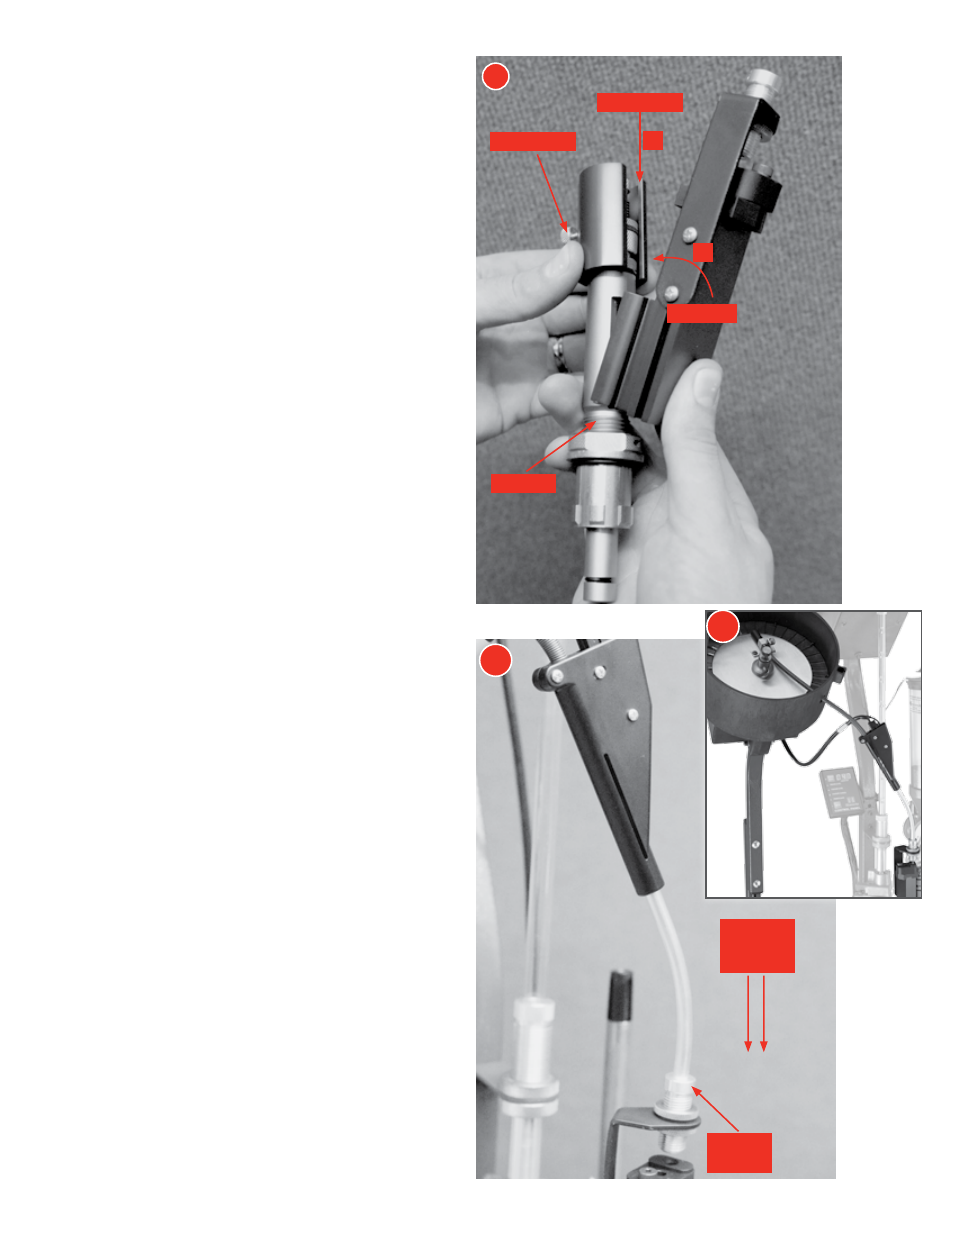
Feeder Attachment
The Bullet Ramp (66) and Compression Spring (64), must be
inside the Feeder Body (63).
Refer to photo 16B on page 9.
The press ram must be lowered and the alignment sleeve
down.
Slide the Feeder Body (63) onto the Die Body (51). Slide the
Feeder Clamp (40) down over the Die Body (51) and Feed Body
(63) and tighten the Thumb Screw (41).
NOTE: The Feeder Body can be attached while the die is in the
press. The Lock-N-Load
®
Bushing System allows the die to be
easily removed for assembly.
Bullet Feed Tube Attachment
25A:
Slide the Bullet Feed Tube (68) into the Feed Tube
Retainer (53).
25B:
Adjust the hopper height by loosening the Wing Nuts
(25) sliding the top Support tube (37) up or down, and re-
tightening the Wing Nuts (25). adjust the height to obtain
smooth feeding through the Feed Spring (71).
Turn on the hopper and allow the tube to fill. Make sure that
the bullets feed base down, and that the hopper switches off
when the tube fills.
24
25
24
25A
25B
Feeder Clamp
Thumb Screw
Feeder
Die Body
Feed Tube
Retainer
1
2
Insert Bullet
Feed Tube
- 14 -