Assembl y – Hornady Lock-N-Load AP User Manual
Page 13
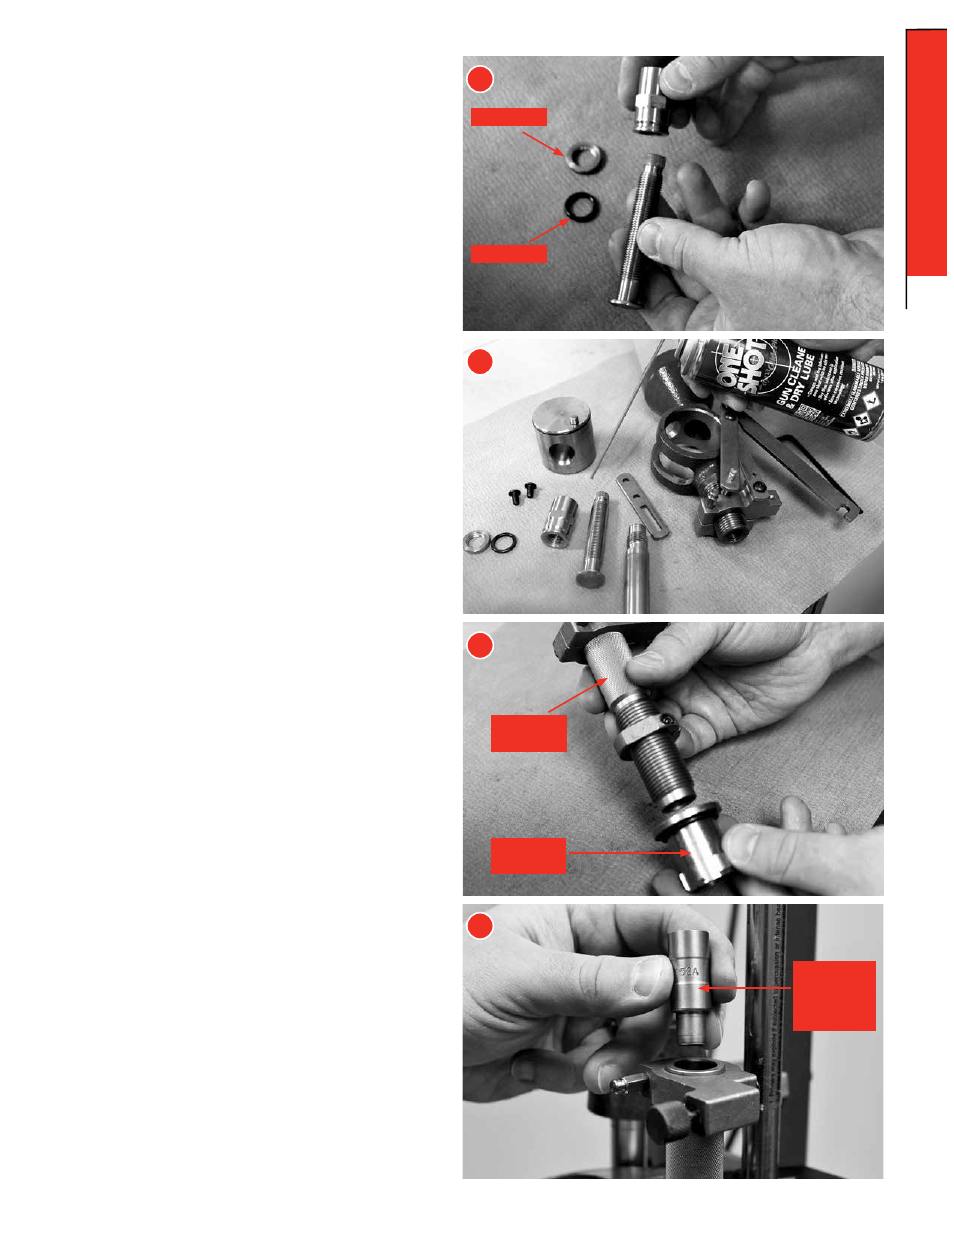
Remove the Lock Nut, O-Ring and Sleeve from the Metering
Plunger.
Spray all metal parts liberally with Hornady One Shot
®
Gun
Cleaner and Dry Lube. Be sure all rust preventative has been
removed.
Allow it to dry thoroughly before reassembling.
To Re-Assemble After Cleaning:
Reverse the procedure in the first five steps above.
Due to the tight machining tolerances of the Rotor and Body,
they must be properly aligned to reassemble.
DO NOT FORCE IT OR PERMANENT DAMAGE WILL OCCUR.
Installing the Case Activated Powder
Drop (Lower Assembly)
Screw the Measure Adapter (21) (Lower Assembly) onto the
Lock-N-Load
®
Bushing several turns. Place lower Assembly
into top of press and rotate to lock into the Lock-N-Load
®
Bushing.
Select the appropriate powder bushing sleeve for your
application
(Refer to Chart on page 22). Insert the bushing,
with the deep counter sink facing up, into the top of the
measure adapter.
If using a Powder Through Expander Sleeve (PTX Sleeve), insert
the PTX Sleeve with the deep countersink facing up, into the
top of the Measure Adapter.
Lock-N-Load
Bushing
Powder
Bushing Sleeve
or
PTX Sleeve
4
5
6
7
4
5
6
7
Lock Nut
O-Ring
Lower
Assembly
ASSEMBL
Y
- 13 -
ASSEMBLY: POWDER MEASURE