Step 9: tensioner end step 10: non-tensioner end – Mueller Roll-Up Door C250 User Manual
Page 9
WWW.MUELLERINC.COM
9
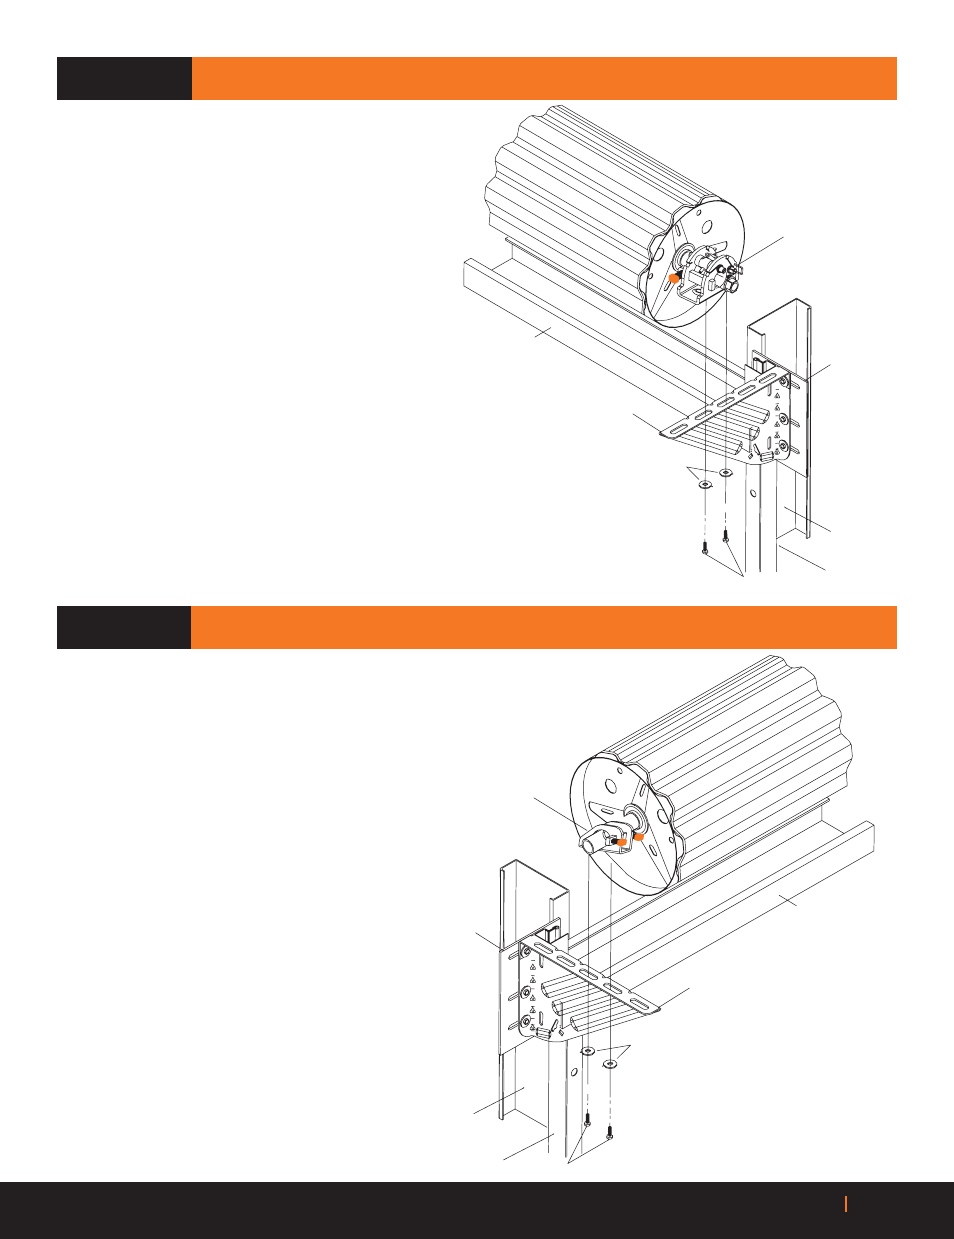
Axle
Support
Mounting
Plate
Door
Jamb
Guide
Door Header
Mounting Bracket
3/8˝ Washer
3/8˝ x 3/4˝ Bolt
Dual Tensioner
Mounting
Plate
Door
Jamb
Guide
Door
Header
Mounting
Bracket
Flange
3/8˝ Washer
3/8˝ x 3/4˝ Bolt
STEP 9: TENSIONER END
STEP 10: NON-TENSIONER END
A
Loosely attach axle support to door mounting bracket
flange using the hardware provided.
B
Tighten the red, square headed, 3/8 inch set screw
on the support bracket.
A
Loosely attach dual tensioner assembly to door
mounting bracket flange using the hardware provided.
B
Tighten the red, square headed, 3/8 inch set screw
on the tensioner bracket.