Mueller Roll-Up Door C250 User Manual
Page 11
WWW.MUELLERINC.COM
11
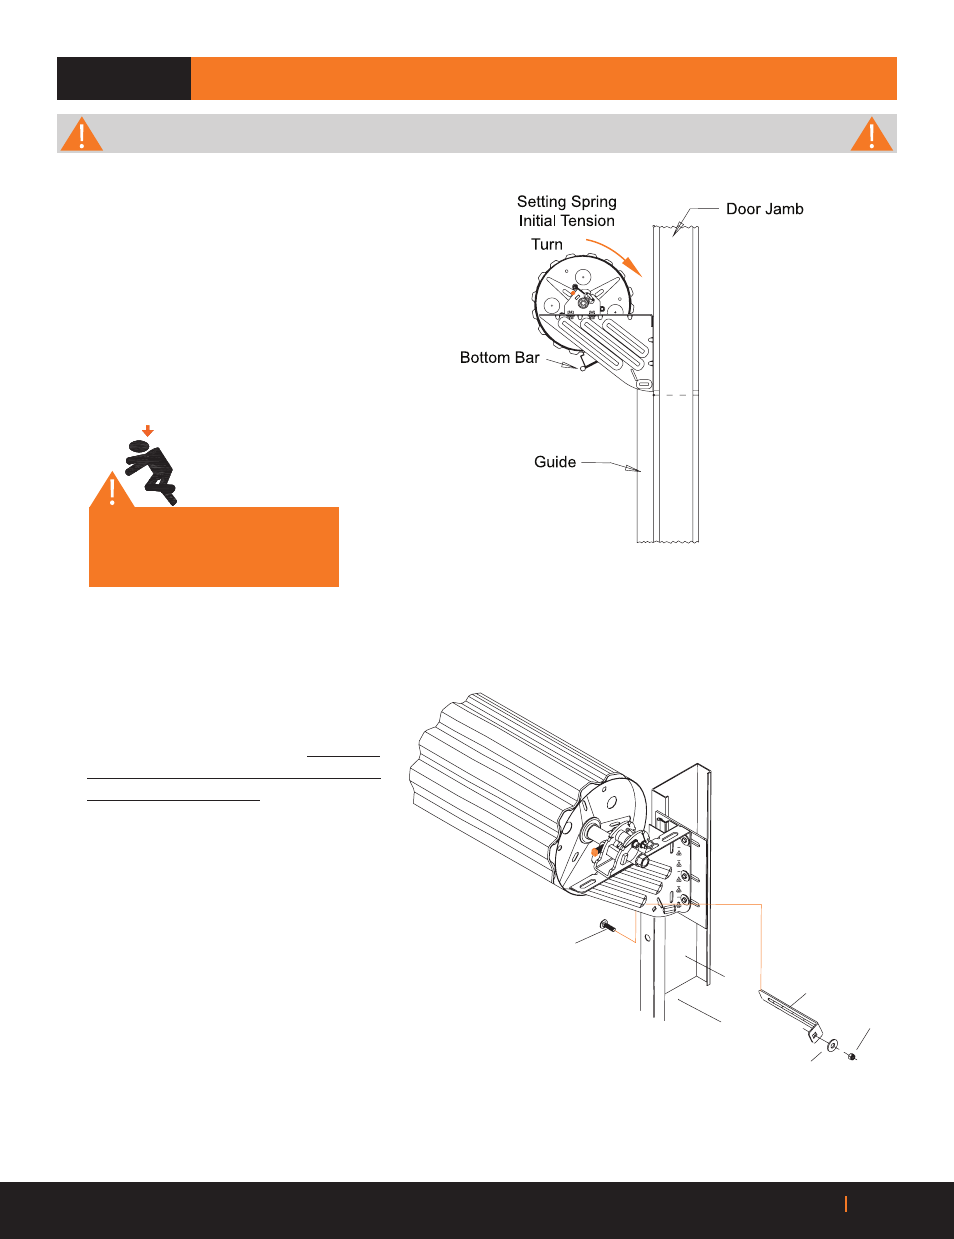
Headstop Bar
3/8˝
Lock Nut
1 x 3/8˝
Carriage Bolt
3/8˝
Washer
Guide
Door
Jamb
STEP 13: SETTING SPRING INITIAL TENSION
DO NOT CUT BANDS OR WRAPPING UNTIL INSTRUCTED.
WARNING DOOR IS UNDER
EXTREME TENSION!
B
While firmly holding the door, at the bottom
bar is recommended, cut the tape and plastic
wrap that holds the door in a coil ~ exercise
extreme caution; door is now under spring
tension and is dangerous.
C
Direct the bottom bar down into the entry of
the guides and bring the door curtain all the
way to the ground. Secure the door in the
closed position with the slide locks on
the bottom bar.
D
Slide head stop from outside to inside
of each bracket.
E
Secure each head stop in the brackets
with the hardware provided.
F
Once both head stops are securely installed,
unlock slide locks on the bottom bar and
check door operation.
A
Rotate door two revolutions, rotating the top of the
door towards the opening.
NOTE:
If your building design does not allow
for door rotation, lower the door curtain into the
guides and follow the instructions in Step16 to set
door tension.
DO NOT CUT BANDS
OR WRAPPING UNTIL
INSTRUCTED