Mueller Roll-Up Door C250 User Manual
Page 4
4
877-2-MUELLER
DO NOT CUT BANDS OR WRAPPING UNTIL INSTRUCTED.
A
Check wall opening width and height and verify these
measurements against size of door to be installed.
B
Verify that jambs are plumb.
C
Check floor and header for level.
D
Check for adequate side clearance at jambs and
clearance above and at sides of header. See
Clearance charts for minimum requirements.
E
Verify that the guide mounting surface on the jamb is flush.
F
Make sure all parts required for installation are
with the door; see parts list in hardware box.
G
Required tools
a. Tape measure
b. Electric drill, 1/2 inch
c. Drill bits, 3/8 inch
d. 3/8 inch nut setter
e. 1/2 inch drive socket set
f. Adjustable wrench
g. Leveling device; water or laser level recommended
h. Pocket / utility knife
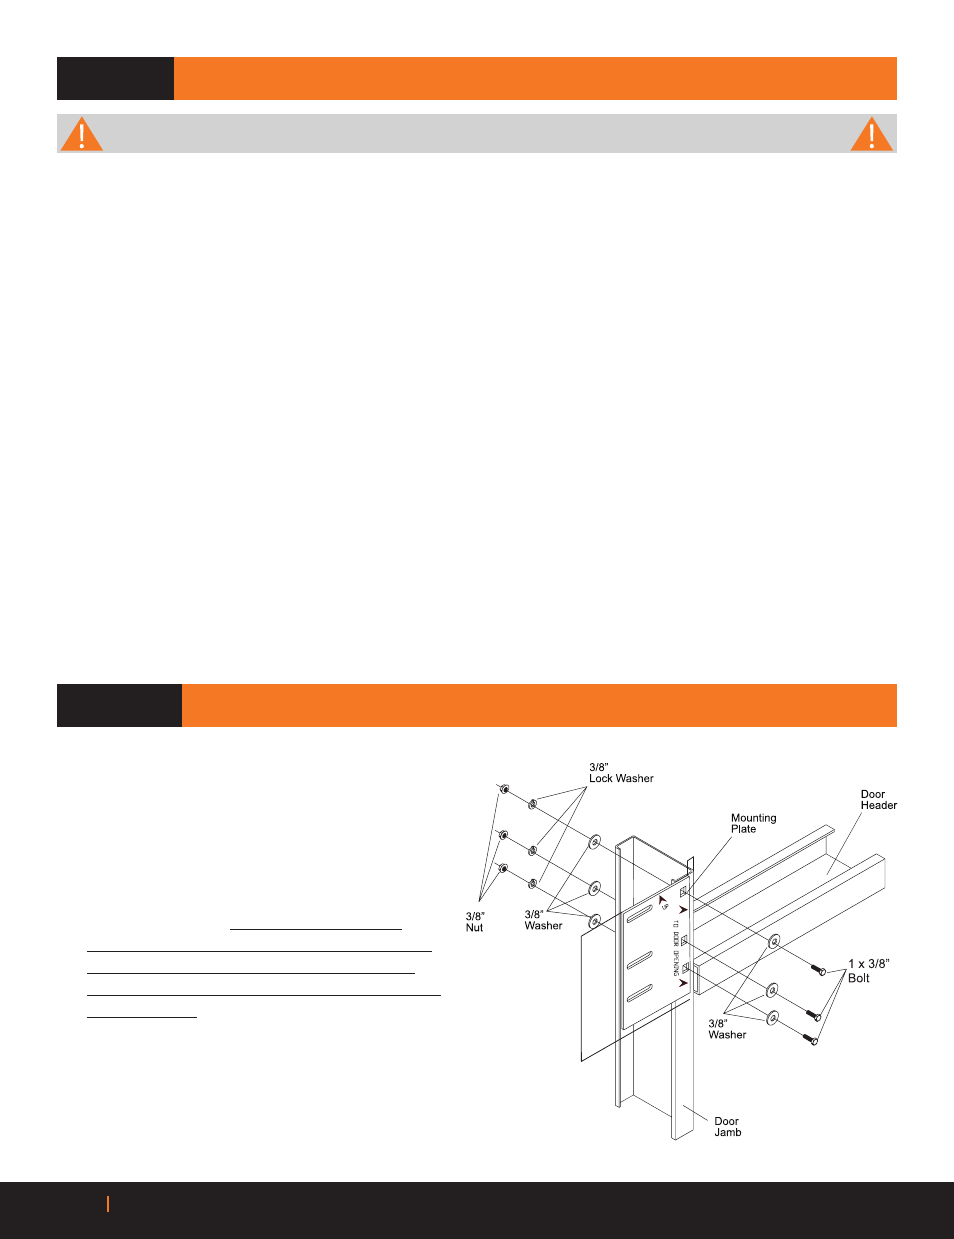
STEP 2: MOUNTING PLATES
A
If the door will be installed to steel jambs, mounting
plates for the door mounting plates are required and
may be welded or bolted to the jambs.
B
Top of mounting plates should be located approximately
10 inches above the top of the door opening. The inside
edge of mounting plate should be 1 1/2” from the inside
of the door jamb. (Note: direction of arrows
on mounting plates.) This is the most important
step; mounting plates MUST be level to each other;
checking via laser or water level is recommended,
do not go by relationship to door header; door header
may not be level.
STEP 1: WALL OPENING
1”
10”
Note: Minimum door jamb size of 8” x 3.5” 14 gauge,
grade 55 is required to support Roll Up Doors