Thermocouple, Combustion cones and gasket – L.B. White I-3 Infraconic User Manual
Page 17
THERMOCOUPLE
HOLE
STUD
INJECTOR TUBE
NUT
THERMOCOUPLE
LOCATION BRACKET
1. Remove the thermocouple bracket nut. See Fig. 18.
2. Pull the thermocouple from its mounting location.
3. Disconnect thermocouple from pilot safety gas control
valve. Replacement thermocouple will include a
factory installed locator bracket with retaining nut.
FIG. 18
THERMOCOUPLE
16
1
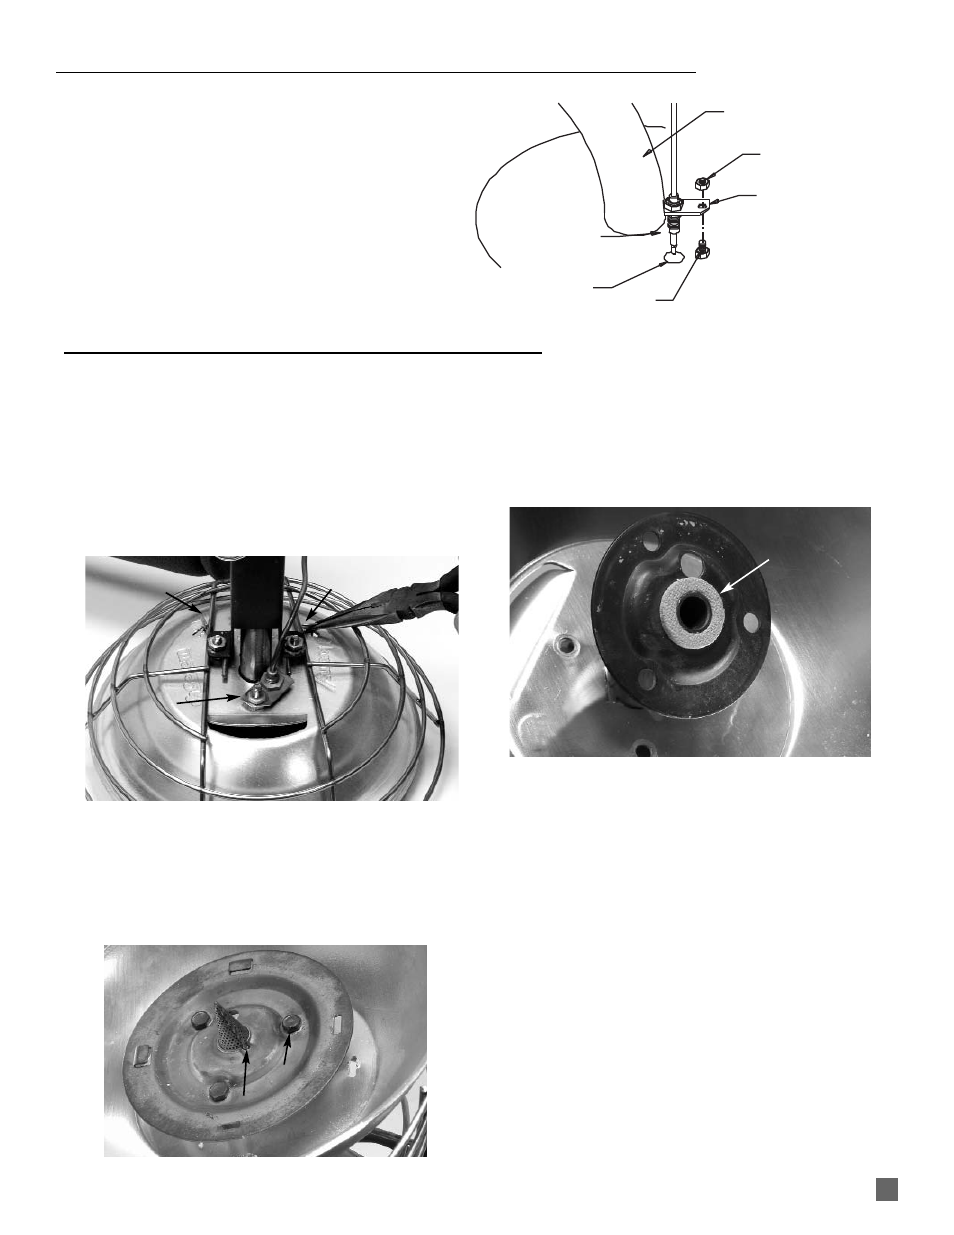
Remove all nuts from the three burner screws. See
Fig.19.
2. Remove thermocouple from burner.
3. Using pliers, straighten the tab at the top of both truss
clips. The truss clips will drop to the cone side of the
heater.
Fig. 19
\
4. Slide the canopy guard away from the burner top.
5. Slide the outer cone from the retainer slots. Remove
the three bolts and spacers. See Fig.20.
Fig. 20
6. Remove the burner plate and inner cone for access to
the burner gasket. See Fig.21. A replacement gasket
must be installed whenever the inner cone is removed.
Clean the sur face to which the gasket is located
beforehand.
Fig. 21
7. When reassembling, ensure:
-- Inner cone weld seam aligns to burner plate notch.
See. Fig.20.
-- All burner nuts and screws are securley tightened.
COMBUSTION CONES and GASKET
TRUSS CLIP
TAB
TRUSS CLIP
TAB
NUT
GASKET
BOLTS
CONE WELD SEAM
ALIGNED TO NOTCH