8 hooking up the tv/dvd (cont’d) – Philips CDV19BPH User Manual
Page 8
8 Hooking Up the TV/DVD (cont’d)
2D.
ANT.
Rod Antenna
(Not supplied)
VHF/UHF Antenna
(Not supplied)
Connect the antenna
wire to the
ANT(enna) jack on
the TV/DVD.
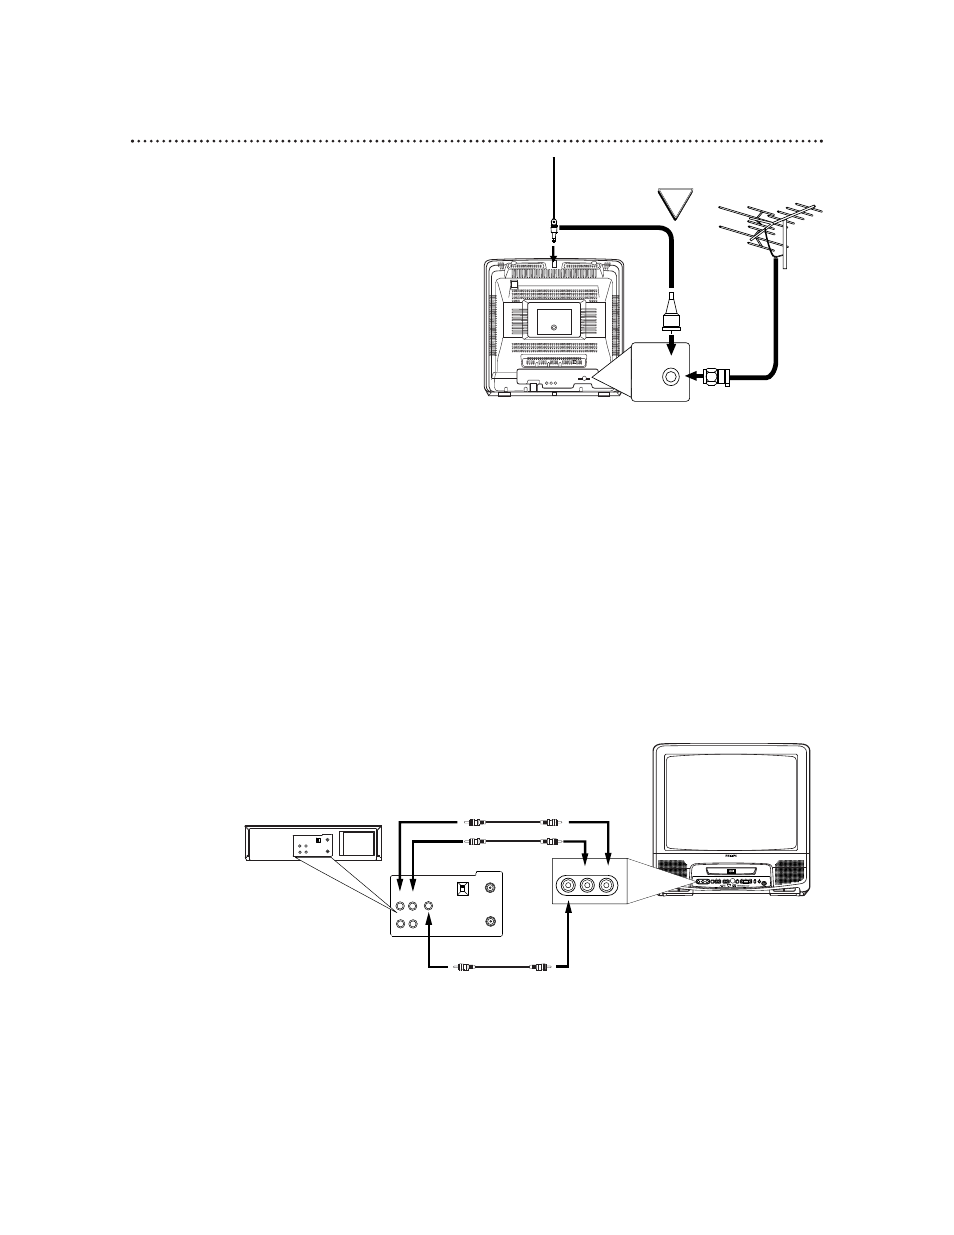
2C.
Hooking Up Your TV/DVD with an
Indoor Rod Antenna
or a Combined UHF/VHF Antenna
Push the stem of the antenna into the anten-
na hole on the top of the TV/DVD. Connect
the antenna wire to the ANT(enna) Jack on
the back of the TV/DVD.
Extend the rod antenna and adjust its length,
direction, and angle for the clearest picture.
OR
VIDEO
L AUDIO R
POWER
VOLUME
CHANNEL
STOP
SKIP
PLAY
SKIP
PAUSE
OPEN/
CLOSE
HEADPHONE
OUT
IN
VIDEO
IN
OUT
3CH
4CH
AUDIO
ANT.
OUT
IN
VIDEO
IN
OUT
3CH
4CH
AUDIO
ANT.
L-AUDIO-R
VIDEO
Connect the red and white audio cables to the
AUDIO OUT jacks on the VCR and to the
AUDIO In jacks on the front of the TV/DVD.
Connect the yellow video cable to
the VIDEO OUT jack on the VCR
and to the VIDEO In jack on the
front of the TV/DVD.
3
Unless you want to connect the TV/DVD to a stereo or decoder, you are finished. Connect
the TV/DVD (and Cable Box, VCR, etc.) to a power source. Go to page 11 to set up your
remote control, then go to page 17 to turn on the TV/DVD. To connect more equipment to your
TV/DVD, refer to pages 9-10.
Hooking Up Your TV/DVD to Another Video
Source
(VCR or Camcorder)
You may need this connection if you want to view videotapes
on the TV/DVD.
When viewing material from other equipment, press the
SELECT button repeatedly until VIDEO appears in the top
right corner of the TV/DVD screen. That indicates that the
TV/DVD is in VIDEO mode and is receiving the programming
from the equipment that is connected to the AUDIO and
VIDEO In jacks on the front of the TV/DVD.
• If the VCR or camcorder only has one audio out jack, use
the white audio cable to connect it to the white AUDIO L
(left) In jack on the front of the TV/DVD.