Rogramming, Ersonal, Acro – Philips MLINK User Manual
Page 18
RECORD
PERSONAL
ADD DELAY
1 2 3 4 5 6 7 8
DELETE STEP
VCR
SLEEP
TV/VCR
ON/OFF
POSITION
FREEZE
SWAP
SOURCE
UP
SOUND
PICTURE
MENU
CH
MUTE
PIP CH
SOURCE
CC
CLOCK
ITR/REC
HOME
HOME
PERSONAL
VIDEO
MOVIES
INCR. SURR.
PROGRAM LIST
SURF
OPEN/CLOSE
POWER
DN
A/CH
PIP
M LINK
VOL
STATUS/EXIT
TUNER A/B
OK
6
7
9
10
RECORD
PERSONAL
ADD DELAY
1 2 3 4 5 6 7 8
DELETE STEP
VCR
POWER/STBY
PLAY
STOP
FF/FORWARD
REW/REVERSE
RECORD
PERSONAL
ADD DELAY
1 2 3 4 5 6 7 8
DELETE STEP
RECORDING
VCR - POWER/STBY
8
6
9
RECORD
PERSONAL
ADD DELAY
1 2 3 4 5 6 7 8
DELETE STEP
RECORDING
VCR
POWER/STBY
PLAY
STOP
FF/FORWARD
REW/REVERSE
RECORD
PERSONAL
ADD DELAY
1 2 3 4 5 6 7 8
DELETE STEP
10 SEC
RECORD
PERSONAL
ADD DELAY
1 2 3 4 5 6 7 8
DELETE STEP
RECORDING
DELAY - 10 SEC
11
P
ROGRAMMING
Y
OUR
P
ERSONAL
M
ACRO
18
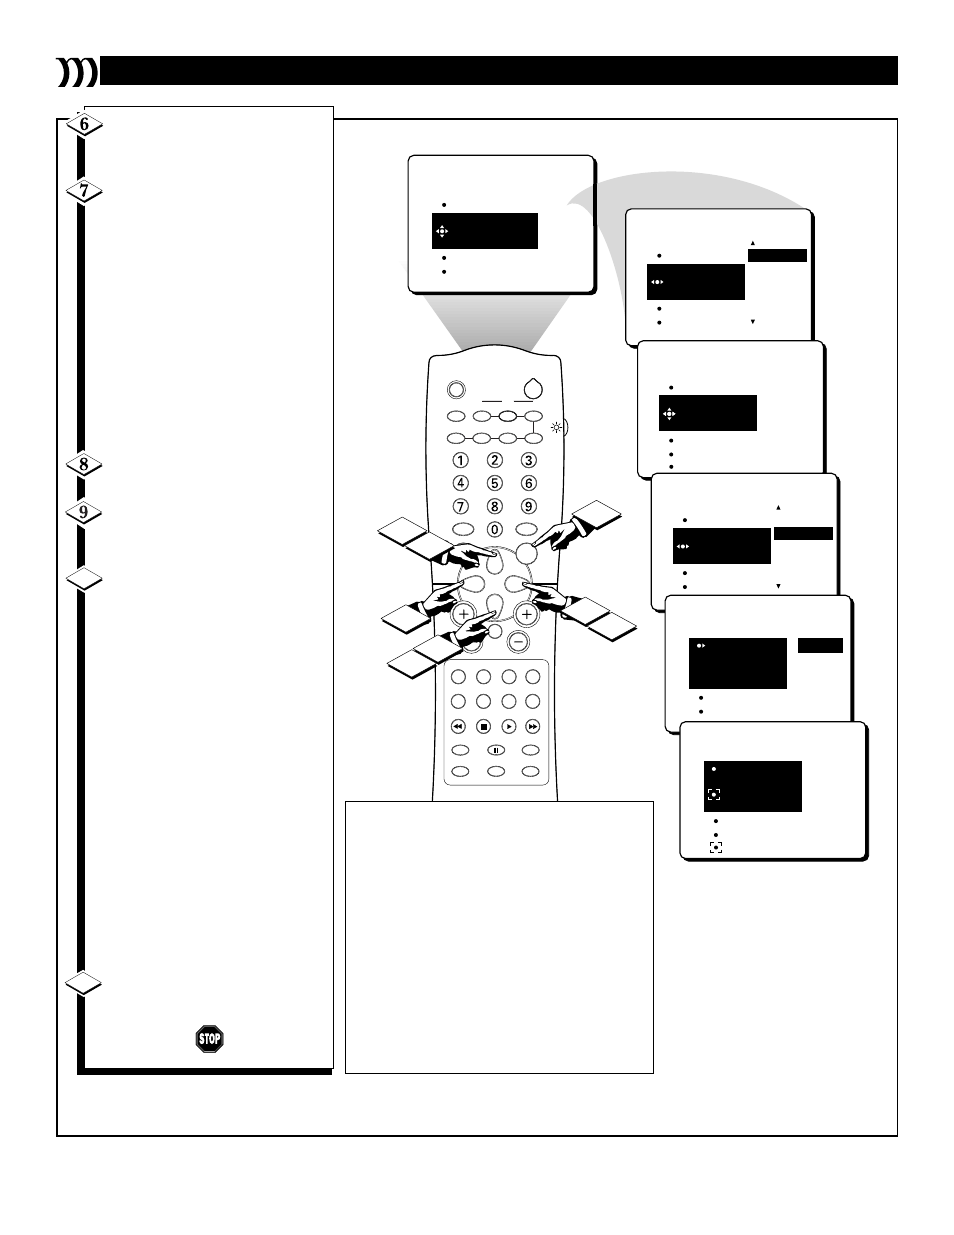
NOTE: The numbers located at the bot-
tom of the screen represent each step (func-
tion) that you program into your PERSON-
AL macro. After the first step has been
recorded, the number 1 at the bottom of the
screen will be in red, while the second
number will appear in orange to show that
the second step (function) is the next to be
recorded. The other unrecorded steps
(functions) will appear in white. As each
step (function) is recorded, its correspon-
ding number at the bottom of the screen
will be shown in red.
Press the CURSOR DOWN or
CURSOR UP button to highlight
the action you want to record.
Press the CURSOR RIGHT
button to record the function in
your PERSONAL macro.
“RECORDING” will flash at the
bottom of the screen.
NOTE: A default delay time of
two seconds will occur between
each function when the Personal
macro is activated. You can choose
to add delay time between the exe-
cution of one function and another.
Follow steps 8–10 to add a delay
between macro functions.
Press the CURSOR UP button
until ADD DELAY is highlighted.
Press the CURSOR RIGHT or
CURSOR LEFT button to
increase or decrease the delay time.
Press the CURSOR DOWN
button to record the delay time you
have chosen. After the delay has
been recorded, the next step num-
ber at the bottom of the screen will
be highlighted in orange to show
that it is the next one to be record-
ed.
NOTE: Repeat steps 6 and 7 to
record other functions for the
source/accessory device. After you
have recorded all of the functions
you want for the source/accessory
device, you can press the
SOURCE button on the TV
remote control to select another
source/accessory device, and then
follow steps 6–7 again to record
functions in your PERSONAL
macro.
Press the M LINK button to
remove the menu from the screen.
10
11