42 timer recording – Philips DVDR72-99 User Manual
Page 42
42 Timer Recording
1
2
3
4
5
6
7
8
0
9
I
I
MONITOR
TV / DVD
T / C
PLAY MODE REC. MODE
SELECT
OK
DISC
SYSTEM
MENU
CH
CH
TIMER
FSS
RETURN
CLEAR
TV VOLUME
PLAY
STOP
AUDIO
PAUSE
REC/OTR
STANDBY
1
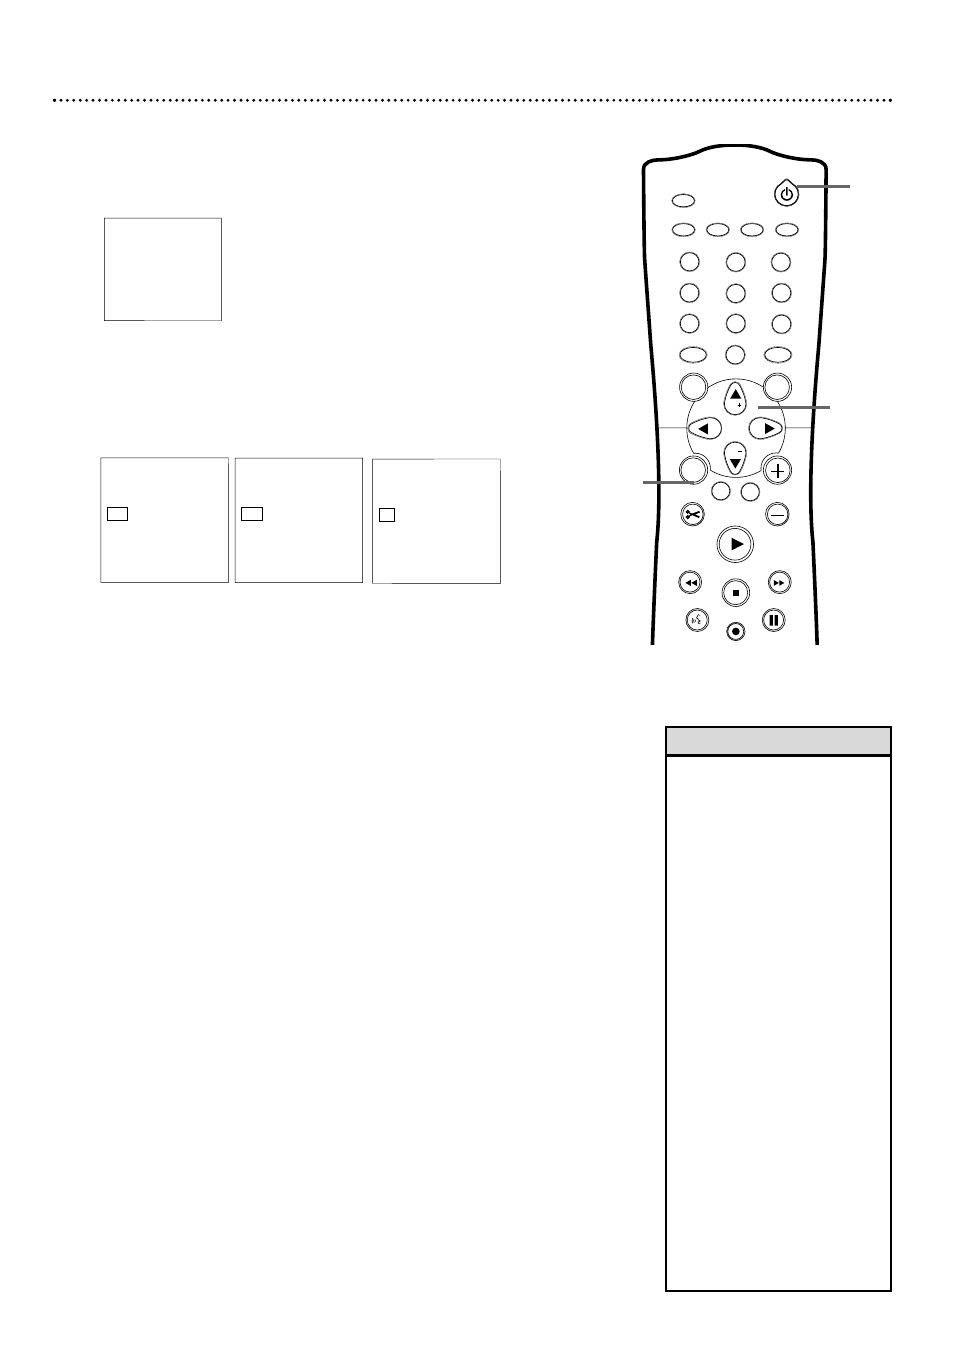
Press TIMER.
2
Press CH-9 to select Timer Programming, then press :.
3
Date will be selected. Press CH+8 or CH-9 to enter the month and
date you want the recording to start.
Press SELECT repeatedly to choose: the date (timer recording will
occur once on the day you choose); Mo-Fr (timer recording will occur every
weekday at the same time); or a day of the week (for example, Mo for
Monday; timer recording will occur every Monday at the same time). When
the date is correct, press :.
4
Ch. (channel) will be selected. Press CH+8 or CH-9 to enter the chan-
nel you want to record, then press :.
If you are using a Cable Box/Satellite Receiver, enter channel 3 or 4 (the out-
put channel of your Cable Box/Satellite Receiver) or the EXT channel (that
corresponds to the jacks to which you connected the Cable Box/Satellite
Receiver). Set the channel you want to record at the Cable Box/Satellite
Receiver. Leave it on for the recording.
5
Start will be selected. Press CH+8 or CH-9 to enter the time at
which you want recording to begin - in hours and minutes.
Press SELECT repeatedly to choose AM or PM.
When the Start time is correct, press :.
6
End will be selected. Press CH+8 or CH-9 to enter the time at which
you want recording to stop. Press SELECT repeatedly to choose
AM or PM.When the End time is correct, press :.
7
Rec Mode (Record Mode) will be selected. Press CH+8 or CH-9 to
choose a recording speed: M1, M2x, M4, or M6. See page 49.
8
Check your timer information. If something is incorrect, press ; or : to
choose the incorrect data. Use CH+8 or CH-9 to enter the correct data.
9
When the information is correct, press OK. Stored will appear at the
bottom of the screen, then the Timer menu will reappear.“Switch off; timer
recording” will be highlighted in red at the bottom of the screen.This is a
reminder to turn off the DVD Recorder so the recording can occur.
10
Press TIMER to remove the menu.
11
Put a recordable DVD+RW or DVD+R in the Recorder. Press
STANDBY y
y
to turn off the Recorder. For the timer recording, the
Recorder will turn itself on, record, then turn itself off when finished.A red
light will encircle the Record I button on the Recorder during recording.
If you plan to play a DVD+R on another DVD Player, finalize the Disc. Follow the
steps on page 52.
• You can enter the Date, Channel,
Start, and End information with
the Number buttons. Enter chan-
nel numbers as a three-digit
number. For example, for channel
15, press 0,1,5.
• Press STANDBY y on the
remote to turn off the Recorder
and stop a timer recording that is
in progress.
• You cannot select Timer
Programming if six recordings are
set. Delete a recording, then set a
new one. See page 44.
• Set a Timer recording and turn
off the Recorder five minutes
before the recording will start.
• Set the timer recording one
minute ahead of the program’s
start time.This helps ensure the
entire program is recorded.The
Disc needs about 30 seconds to
prepare for recording.
• You cannot change channels dur-
ing recording.
• To edit your recordings, see page
51. Editing changes may not be
accessible when you play the
Disc on other Players.
• TIMER will appear on the display
panel if a Timer Recording is set.
Helpful Hints
Timer
K
VCR Plus+ system
uB
Timer Programming
B
L
Timer List
To exit
Press TIMER
Timer
Timer Programming
Rec
Date
Ch. Start
End
Mode
10/24 122 09:00AM 09:30AM M1
Mo-Fr/Weekly
To store
Press SELECT
Press OK
Timer
Timer Programming
Rec
Date
Ch. Start
End
Mode
Mo-Fr 122 09:00AM 09:30AM M1
Mo-Fr/Weekly
To store
Press SELECT
Press OK
Timer
Timer Programming
Rec
Date
Ch. Start
End
Mode
Th 122 09:00AM 09:30AM M1
Mo-Fr/Weekly
To store
Press SELECT
Press OK
Press SELECT once.
Recording will happen one
time on the day you chose.
Press SELECT again.
Recording will happen every day,
Monday-Friday, starting on the
day you chose.
Press SELECT again.
Recording will happen on the same
day every week, starting the day you chose.
2-9
11
1,10