Warning – Brinkmann Series 6419 User Manual
Page 11
L
LIIG
GH
HT
TIIN
NG
G IIN
NS
ST
TR
RU
UC
CT
TIIO
ON
NS
S::
F
Fo
ollllo
ow
w tth
he
e iin
ns
sttrru
uc
cttiio
on
ns
s e
ex
xa
ac
cttlly
y..
1
1.. O
OP
PE
EN
N T
TH
HE
E G
GR
RIIL
LL
L L
LIID
D b
be
effo
orre
e a
atttte
em
mp
pttiin
ng
g tto
o lliig
gh
htt a
a b
bu
urrn
ne
err s
so
o tth
ha
att ffu
um
me
es
s d
do
o n
no
ott a
ac
cc
cu
um
mu
ulla
atte
e iin
ns
siid
de
e
tth
he
e g
grriillll.. A
An
n e
ex
xp
pllo
os
siio
on
n c
co
ou
ulld
d o
oc
cc
cu
urr iiff g
grriillll lliid
d iis
s d
do
ow
wn
n..
2
2.. C
Ch
he
ec
ck
k tth
ha
att a
allll b
bu
urrn
ne
err c
co
on
nttrro
oll k
kn
no
ob
bs
s a
an
nd
d tth
he
e c
cy
ylliin
nd
de
err v
va
allv
ve
e a
arre
e ttu
urrn
ne
ed
d tto
o tth
he
e "
"O
OF
FF
F"
" p
po
os
siittiio
on
n..
3
3.. T
Tu
urrn
n o
on
n tth
he
e ffu
ue
ell s
su
up
pp
plly
y b
by
y rro
otta
attiin
ng
g tth
he
e c
cy
ylliin
nd
de
err v
va
allv
ve
e k
kn
no
ob
b c
co
ou
un
ntte
err--c
cllo
oc
ck
kw
wiis
se
e tto
o ffu
ullll o
op
pe
en
n..
4
4.. D
DO
O N
NO
OT
T s
stta
an
nd
d w
wiitth
h h
he
ea
ad
d,, b
bo
od
dy
y,, o
orr a
arrm
ms
s o
ov
ve
err tth
he
e g
grriillll w
wh
he
en
n lliig
gh
httiin
ng
g..
L
LIIG
GH
HT
TIIN
NG
G T
TH
HE
E M
MA
AIIN
N B
BU
UR
RN
NE
ER
RS
S::
1. Open lid before lighting burner.
2. Make sure all control knobs are in the "OFF" position.
3. Select the burner to be lit. Push and turn the control knob of that
burner to the "HIGH" position.
4. Press the electronic igniter and hold for 3 – 5 seconds to light burner.
5. If ignition does NOT occur in 5 seconds, turn control knob to "OFF",
wait 5 minutes to allow gas to dissipate and repeat lighting
procedure.
6. Repeat steps 3 – 5 for lighting each burner. Always use electronic
igniter for lighting each burner. If burner does not ignite using the
push-button igniter, wait 5 minutes, see "Match Lighting the Main
Burners" section.
7. To turn off, turn each control knob clockwise until it locks in the "OFF" position. This does not turn off
the gas flow from the cylinder.
Note:
If burner does not light or flame is too low, you may have spider or other insect blockage in
burner, or the flow limiting device has been activated. See "Burner Assembly/Maintenance"
under Proper Care and Maintenance, or "Regulator Resetting Procedure" under Connecting LP
Cylinder and Hose/Regulator to Grill.
M
MA
AT
TC
CH
H L
LIIG
GH
HT
TIIN
NG
G T
TH
HE
E M
MA
AIIN
N B
BU
UR
RN
NE
ER
RS
S::
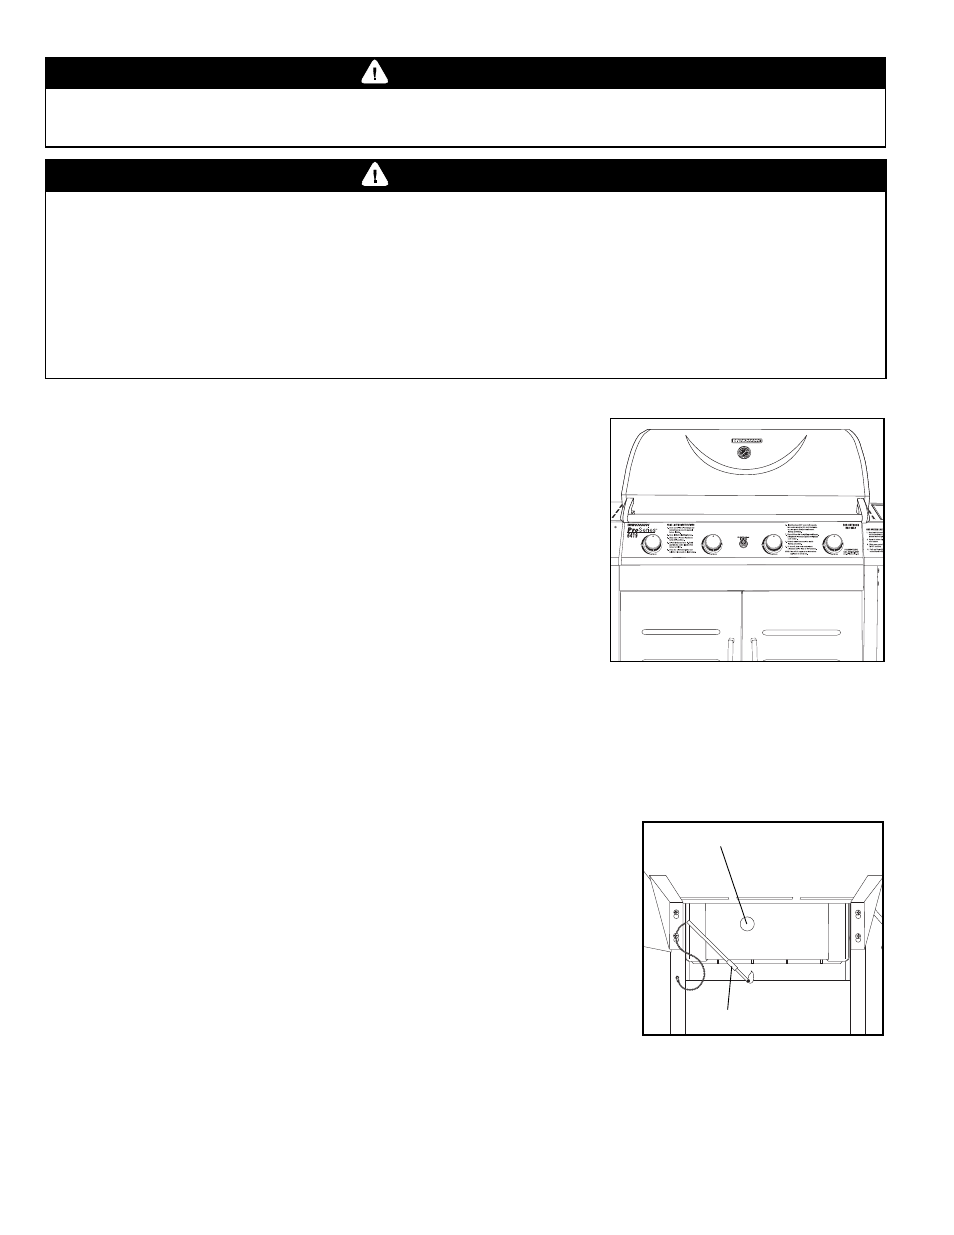
1. Open lid before lighting.
2. Turn the burner control knobs to "OFF".
3. Place a paper match in the end of the matchlighter. Strike the
match and place through lighting hole in the left hand side of the
grill to approximately 1/2" (1 to 2 cm) from the burner.
4. Turn on the F
FA
AR
R L
LE
EF
FT
T burner control knob to the "HIGH"
position. The burner should light within 5 seconds.
5. If the burner does not light, turn the control knob to "OFF" and
wait 5 minutes for gas to dissipate and repeat lighting procedure.
6. Once lit, light adjacent burners in sequence by pressing in and rotating the control knob to
the "HIGH" position.
7. If the burner does not light within the first few attempts of match lighting, there is a problem with the
gas supply. Turn off the gas at the burner a
an
nd
d cylinder. D
DO
O N
NO
OT
T attempt to operate the grill until the
problem is found and corrected. See "Trouble Shooting" section of this manual.
WARNING
10
WARNING
R
Re
ea
ad
d,, u
un
nd
de
errs
stta
an
nd
d a
an
nd
d ffo
ollllo
ow
w a
allll w
wa
arrn
niin
ng
gs
s a
an
nd
d iin
ns
sttrru
uc
cttiio
on
ns
s c
co
on
ntta
aiin
ne
ed
d iin
n tth
hiis
s m
ma
an
nu
ua
all.. D
DO
O N
NO
OT
T s
sk
kiip
p
a
an
ny
y o
off tth
he
e w
wa
arrn
niin
ng
gs
s a
an
nd
d iin
ns
sttrru
uc
cttiio
on
ns
s c
co
on
ntta
aiin
ne
ed
d iin
n tth
he
e p
prre
ec
ce
ed
diin
ng
g s
se
ec
cttiio
on
ns
s o
off tth
hiis
s m
ma
an
nu
ua
all..
Lighting Hole
Matchlighter