Installation instructions (continued), Caution – Bloomfield 9102A User Manual
Page 8
INSTALLATION INSTRUCTIONS (continued)
6
CAUTION:
Electric Shock
Hazard
Brewer must be properly
grounded to a reliable earth
ground to prevent possible
shock hazard. Do not assume a
plumbing line will provide such a
ground. Electrical shock may
cause serious injury.
IMPORTANT:
Initial set-up must be performed
by a qualified installer or
qualified service technician.
Improper set-up will damage the
brewer and void the warranty.
IMPORTANT:
Complete water line installation
before connecting brewer to
electrical power.
MAKE SURE THE FRONT
PANEL "TANK HEATER"
SWITCH IS IN THE OFF
POSITION BEFORE
CONNECTING BREWER TO
ELECTRICAL POWER.
DO NOT turn the TANK
HEATER switch ON until the
water tank is filled. Heating
element must be completely
submerged in water at all times.
Damage to the brewer caused
by operating the heating
elements dry is NOT covered by
warranty.
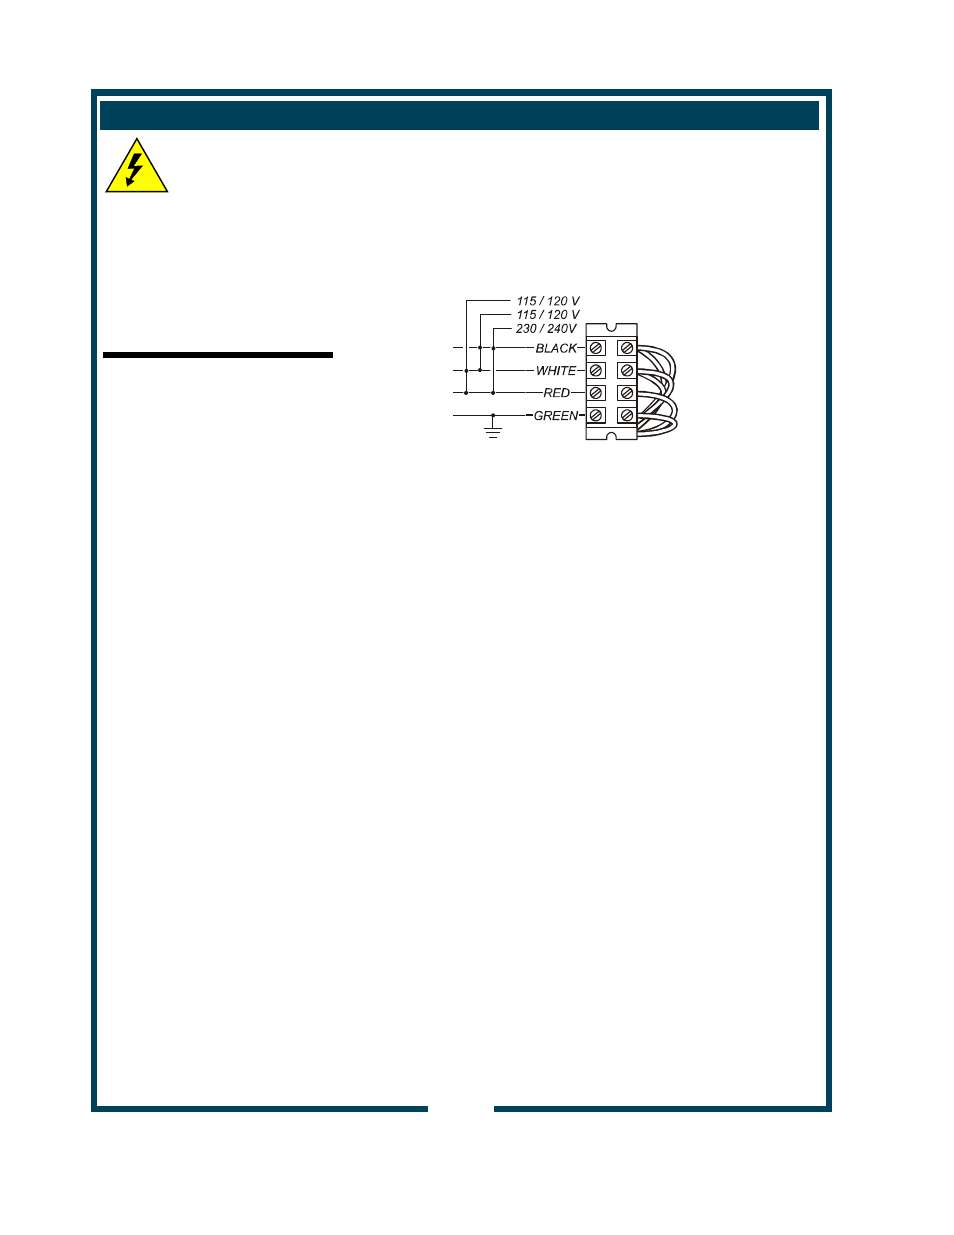
ELECTRICIAN’S INSTALLATION INSTRUCTIONS
Refer to Electrical Specifications, page 1.
Brewer requires a dedicated single-phase circuit:
Model 9102A 120 Volt AC, 50/60 Hz 1ø 20 Amps
NEMA 5-15R receptacle
Model 9104A 120/240 Volt AC, 50/60 Hz 1ø 30 Amps
3-Wire (L1, L2, Neutral) + Ground
Fig. 4 Model 9104A Terminal Block
INITIAL SET-UP INSTRUCTIONS
Plumber’s and Electrician’s installation procedures must be
completed before proceeding with the set-up.
Be sure all electrical connections are secure, and that all
plumbing connections are secure and leak-proof.
1. CHECK BREWER FOR PROPER CONFIGURATION
Make sure spray disk gasket is in place INSIDE of spray
head.
Make sure spray disk is properly installed.
Check hot water faucet for proper operation.
2.
FILL WATER TANK
Be sure POWER SWITCH and TANK HEATER switch are
OFF, then connect brewer to electric power.
Insert an empty brew chamber under the brew head. Place
an empty satellite in position. Pour fresh cold water into the
POUR-OVER OPENING until water flows from the brew
basket.
3. CHECK HEATING
Turn POWER SWITCH ON, then press TANK HEATER
switch ON. Water in tank will heat to brewing temperature in
approximately 30 minutes. When the water temperature
reaches the brew temperature setpoint, the READY-TO-
BREW light will glow.
Hold a suitable container under the HOT WATER FAUCET,
then open the faucet . Continue drawing water until all
trapped air is expelled.
663 76061 Ow
ners
M
a
n
ual for
910
2A
S
ingle Satellite Bre
w
er