4 system startup, 1 wallmount startup checklist, System startup – Bard TCS22-***-003 User Manual
Page 25: Wallmount startup checklist
2100-444-003A
Page 19
3.4
System Startup
3.4.1 WALLMOUNT STARTUP CHECKLIST
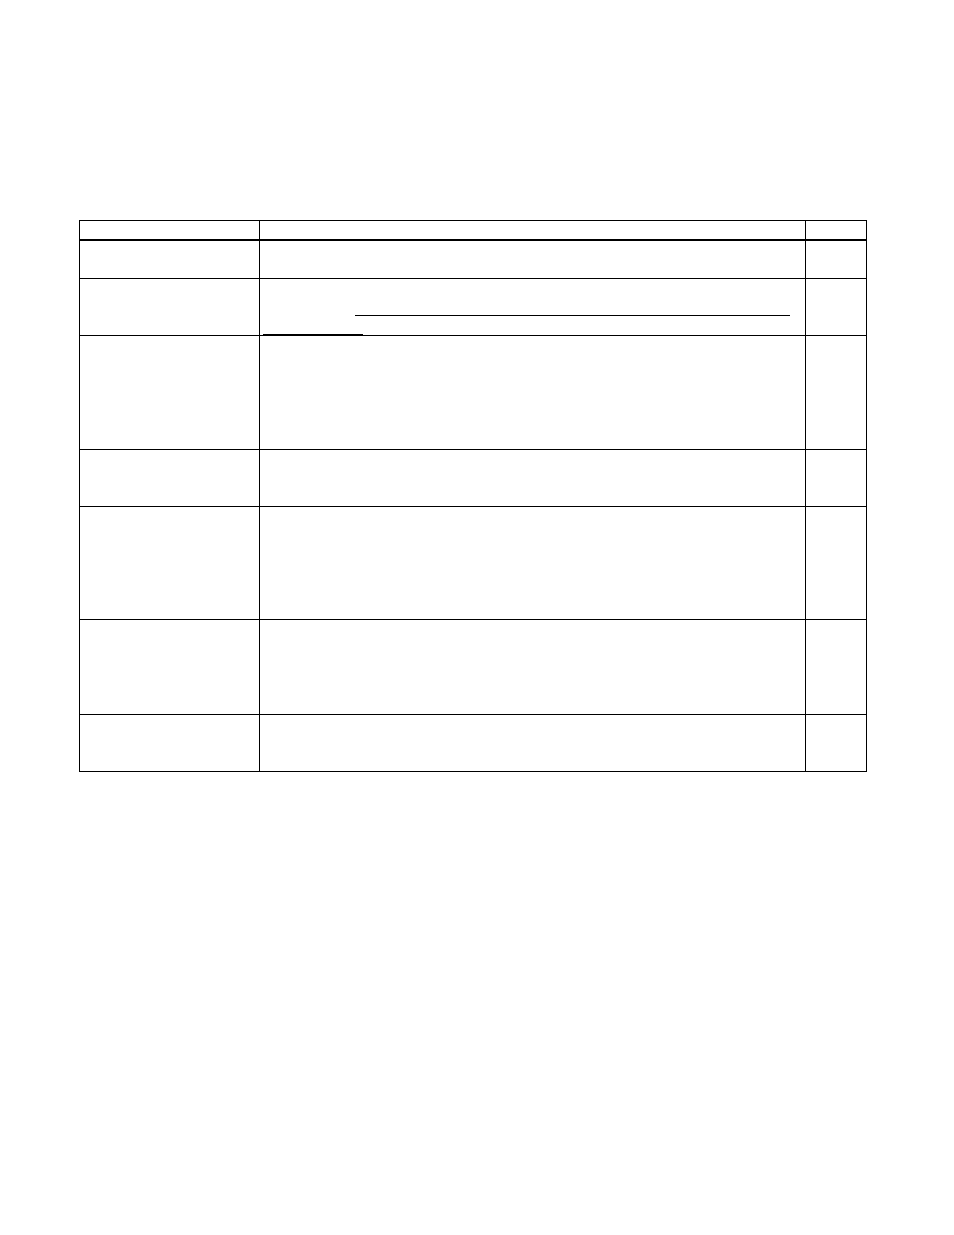
Operation Procedure
Bypassing TCS22
Controller
Disconnect power to the TCS22. Unplug the plug in connectors J4 and
J5 from the controller
Apply power to both
Wall-mounts
Follow recommended startup procedure in the WallMount
installation
instructions. Compressor damage could occur if startup procedures are
not followed.
Compressor Test
Connect jumper wire on A/C unit low voltage terminals from R to Y
and observe Compressor operation (There will be a Time delay
between the installation of the jumper and the starting of the
Compressor. The Compressor Time Delay relay will determine the
time delay period.). After the Compressor starts, the jumper wire can
be removed.
Blower Test
Connect a jumper wire on A/C unit low voltage terminals R to G and
observe Blower operation (The Blower will continue to run for One (1)
minute after the jumper is removed).
Economizer Test
Connect a jumper wire on A/C unit low voltage terminals R to G and
observe Blower operation. After Blower operation is confirmed, the
Economizer can be tested. Leave the jumper in place from the previous
step. Connect a separate jumper on the A/C unit low voltage terminals
from E to F and observe the Economizer operation (Never connect
power to terminals E or F).
Heater Test
Connect a jumper wire on A/C unit low voltage terminals R to W1.
The Heating contactor will engage when the jumper is connected. The
Blower will also operate while this jumper is in place. To check the
operation of the Heater, you will have to check the Discharge Air
temperature of the A/C unit.
Disconnect Power to
WallMount
Air-
Conditioners
Disconnect power to WallMount
air conditioners. Reconnect plug-in
connectors J4 and J5 to the controller. Go to TCS22 Startup Checklist