4water connection, 5insertion into a row of kitchen units, Putting into operation – Liebherr CBNPes 3967 PremiumPlus BioFresh NoFrost User Manual
Page 12: 4 water connection, 5 insertion into a row of kitchen units
WARNING
Risk of injury due to the door dropping out!
If the bearing parts are not screwed into place firmly enough,
the door may drop out. This may lead to severe injuries. What
is more, the door may not close and therefore the appliance
may fail to cool properly.
u
Screw the turn hinges firmly into place with 4 Nm.
u
Check all of the screws and retighten if necessary.
4.4 Water connection
WARNING
Danger of electric shock!
u
Disconnect the appliance by unplugging it before you
connect it to the water line.
u
Shut off the water supply before you connect the water feed
lines of the IceMaker.
u
The connection to the drinking water system may be carried
out only by a qualified gas fitter and plumber.
WARNING
Risk of poisoning!
u
The water quality has to comply with the drinking water ordi-
nance of the respective country (e.g. 98/8
u
Connect to the drinking water supply only.
u
The IceMaker serves exclusively for making ice cubes in
household quantities and has to be operated with water suit-
able for the purpose.
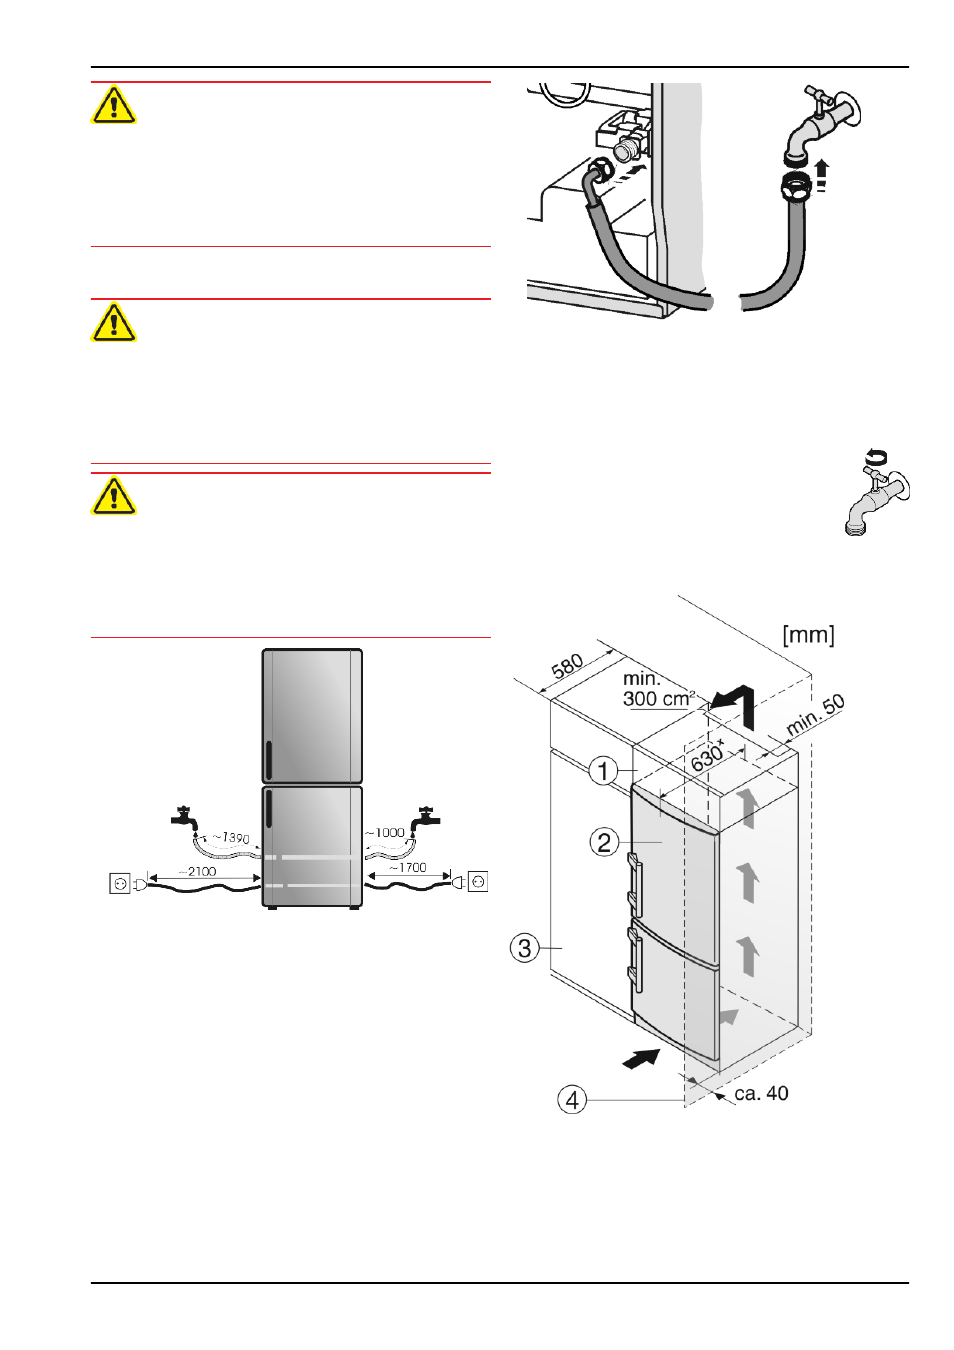
Fig. 24
- The water pressure has to be between 0.15 MPa and
0.6 MPa (1.5 bar - 6 bar).
- The water supply to the appliance must be via a cold water
pipe which withstands the operating pressure and complies
with the hygiene regulations.
Use the accompanying stainless steel hose (1.5 m). Do not
reuse old hoses. A 3 m hose is available from the customer
service department and has to be fitted by an expert.
In the hose connecting piece is a sieve with seal.
- Between the hose and the domestic water connection there
has to be a stopcock to interrupt the water supply in case of
need.
- All the fixtures and fittings used for water supply have to
comply with the applicable regulations of the respective
country.
- Do not damage or kink the water inlet pipe when installing
the appliance.
Fig. 25
u
Connect the straight part of the accompanying stainless
steel hose to the stopcock.
The solenoid valve is at the bottom back of the appliance. It
has a metric R3/4 connecting thread.
u
Connect the angled part of the stainless steel hose to the
solenoid valve.
u
Open the stopcock of the water supply and
check that the entire water system is leakproof.
Before initial use:
u
Have the water pipe bled of air by the proper
expert.
4.5 Insertion into a row of kitchen units
Fig. 26
(1) Stack cabinet
(3) Kitchen cabinet
(2) Appliance
(4) Wall
x
For appliances supplied with wall spacers, the measurement
increases by 35 mm (see 4.2) .
The appliance can be inserted into a row of kitchen units. To
match the appliance
Fig. 26 (2)
to the height of the row of units,
a suitable stack cabinet
Fig. 26 (1)
can be fitted above the
appliance.
Putting into operation
12
* Depending on model and options