4 installing the input module, Installing the input module, Kit installation (detailed) – Barco GALAXY NW-12 User Manual
Page 16
3. Kit installation (detailed)
Image 3-15
PMP: front fixing screws
6. install the input module into the projector (see concerning chapter)
3.2.4
Installing the input module
Necessary tools
Torx screwdriver T10
How to install the input module?
1. Put the connector next to its correct position and plug in the connectors:
-
J15: power supply from connector 6 on the power box
-
J19: IC2 to connector J320 on the desktop input
-
J23; I2C from connector 13 on the power box
-
J14: sync from connector J4 on the engine controller
-
J22: I2C to connector J5 on the engine controller
-
J11: ethernet wire from the front panel
-
J2 and J3 on the LVDS interface (which is mounted on the PMP): data from connectors J200 and J300 on the desktop input
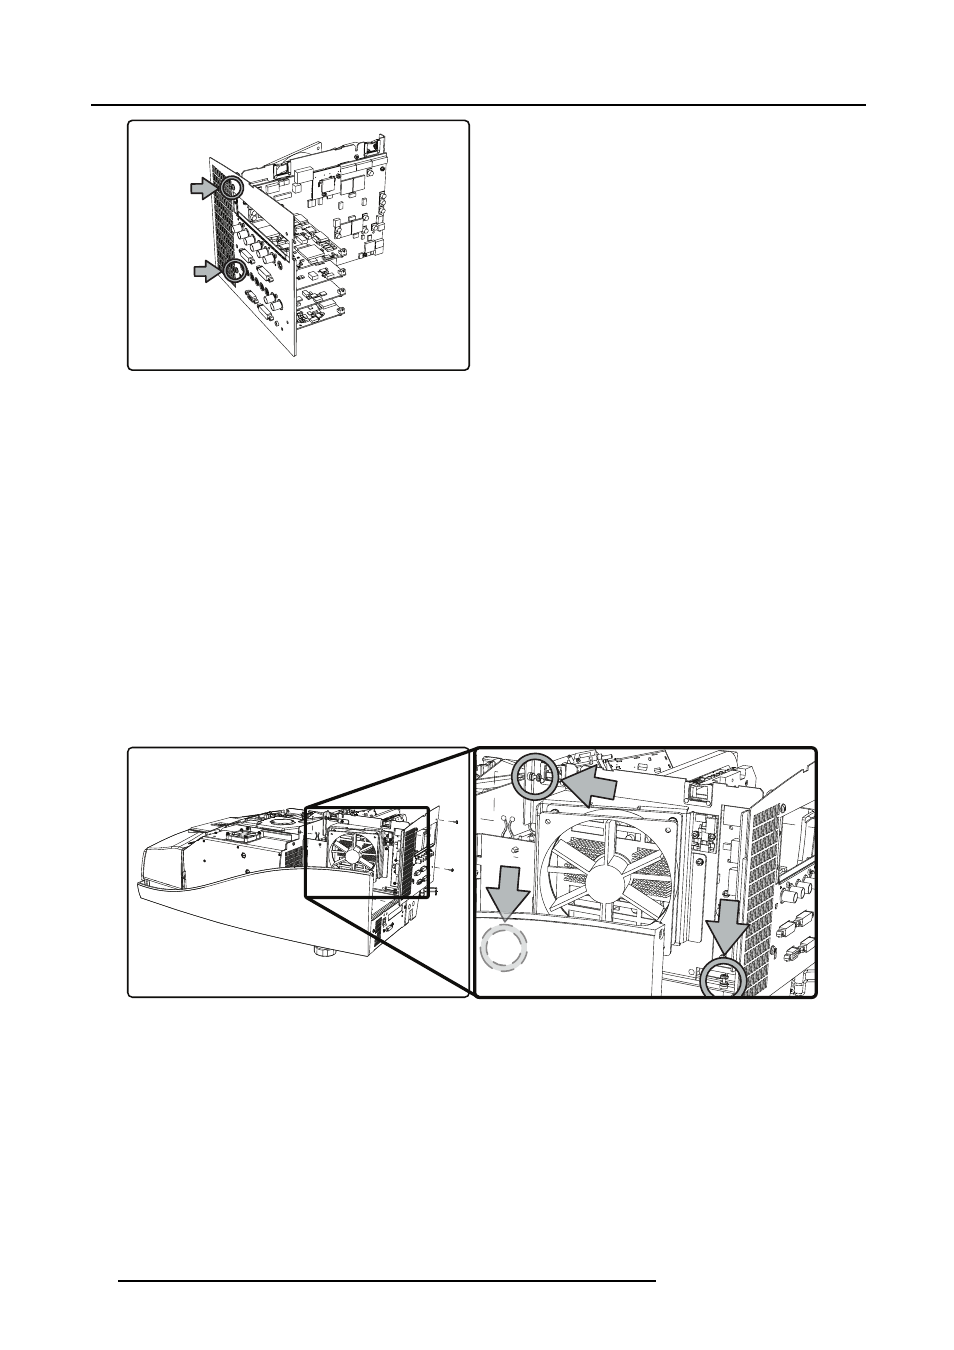
2. Lower the input module until it is in its final position and fix it using three fixing screws
Image 3-16
Input module: fixing screw chasis
3. Fix the front plate of the input module using two screws
12
R59770498 PMP KIT 28/02/2011