Caution, Installation ć step by step, Check list before using the dryer – Bosch WTA 4400 US User Manual
Page 11: Preparing to transport the dryer ć step by step
11
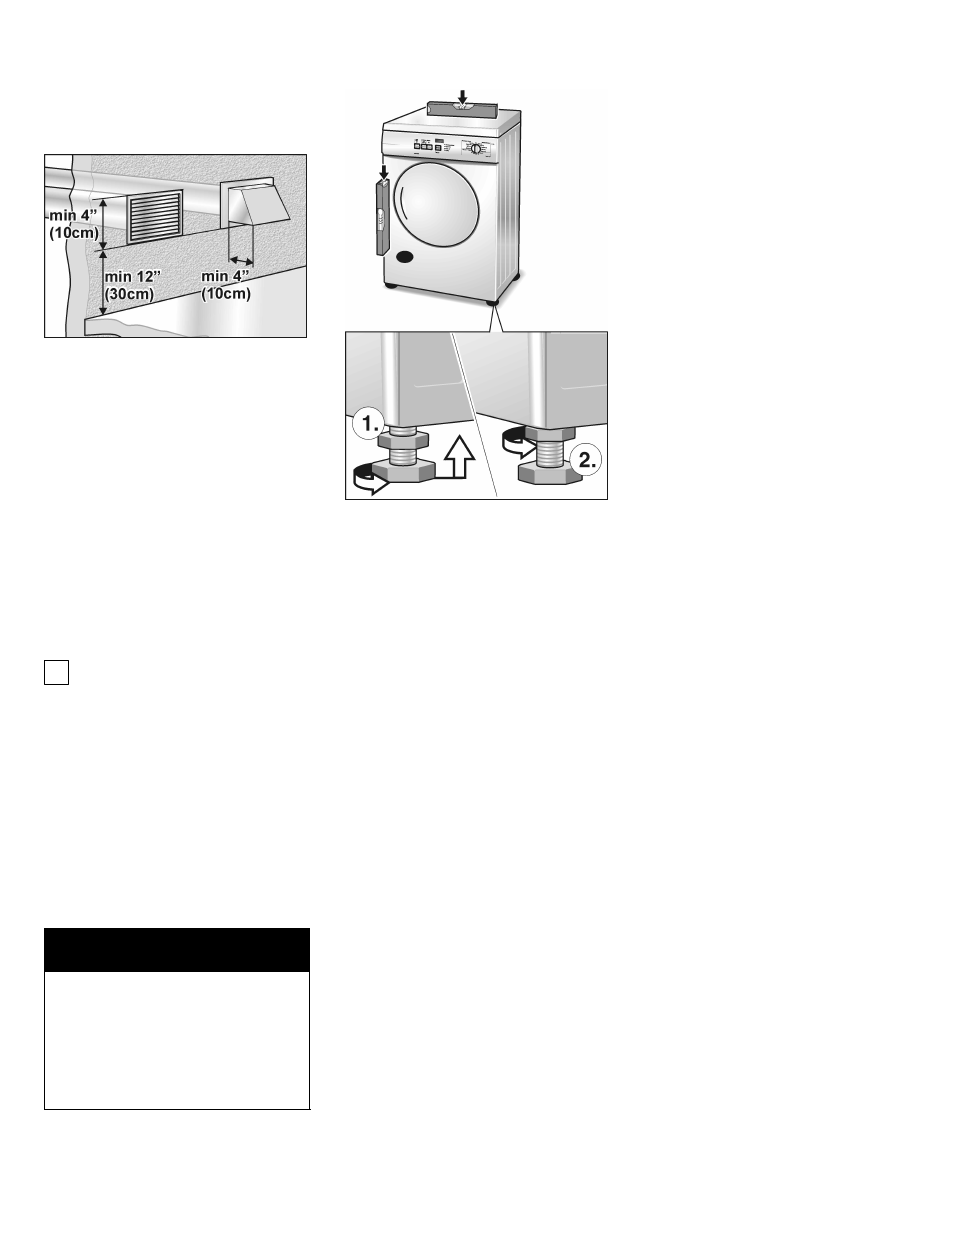
To avoid exhaust restriction, the
outlet must be a minimum of
12 inches (30 cm) above ground
level or any other obstructing
surface.
Installation ć
step by step
1. Unpack the dryer.
2. Remove all objects from the
drum.
3. Check the dryer for visible
damage.
4. Position the dryer near the
installation location.
5. If required, have the power
supply cord fitted by an
electrician (see page 8).
i
If space is very restricted, it is
recommended to fit the
exhaust air duct to the dryer
before the dryer is moved to its
final installation location.
6. Connect the exhaust air duct to
the exhaust air outlet on the
dryer. Fix the air duct with duct
clamp.
7. Move the dryer to its final
location and align.
d
CAUTION
d
Do not slide dryer across the
floor if heightĆadjustable feet
have been extended. Feet and/or
dryer base may be damaged if
dryer is slid across floor with
heightĆadjustable feet extended.
8. Position and then level the
dryer
.
The dryer should be level with
all four feet firmly on the
ground. The dryer must not
wobble. If the dryer is not level
or if it does wobble, the feet
must be adjusted. Adjust the
heightĆadjustable feet until the
dryer does not rock and is level,
both frontĆtoĆback and
sideĆtoĆside.
9. Insert plug into the wall
receptacle.
Check list before
using the dryer
1. Check that steps 1-9 have
been implemented properly.
2. Ensure that the dryer is
connected to the power supply.
3. Read the operating instructions
to understand how your dryer
operates.
4. Conduct an appliance test:
q Check that the drum is
empty.
q Close the dryer door.
q Switch the dryer to "Extra
Dry" and then press the
Start button.
q After 3-5 minutes switch the
dryer to "Off" and open the
door.
5. If the interior of the dryer feels
warm, the dryer has been
connected properly.
6. If the dryer does not work,
switch the dryer to "Off".
Look in the troubleshooting
section (page 22) of the
OPERATING INSTRUCTIONS
and find the problem.
Preparing to transport
the dryer ć step
by step
1. Rotate the program selector
to "Off".
2. Pull out the power supply plug.
3. Disconnect the exhaust air duct
from the exhaust air outlet on
the dryer.
4. Place any accessories in the
drum.
5. Close the door and secure with
adhesive tape.
6. Screw the heightĆadjustable
feet of the dryer into the
housing to prevent them from
being damaged during
transportation.