Din rear-mount, Installation – Pioneer DEH-P70BT User Manual
Page 10
9
Installation
DIN Rear-mount
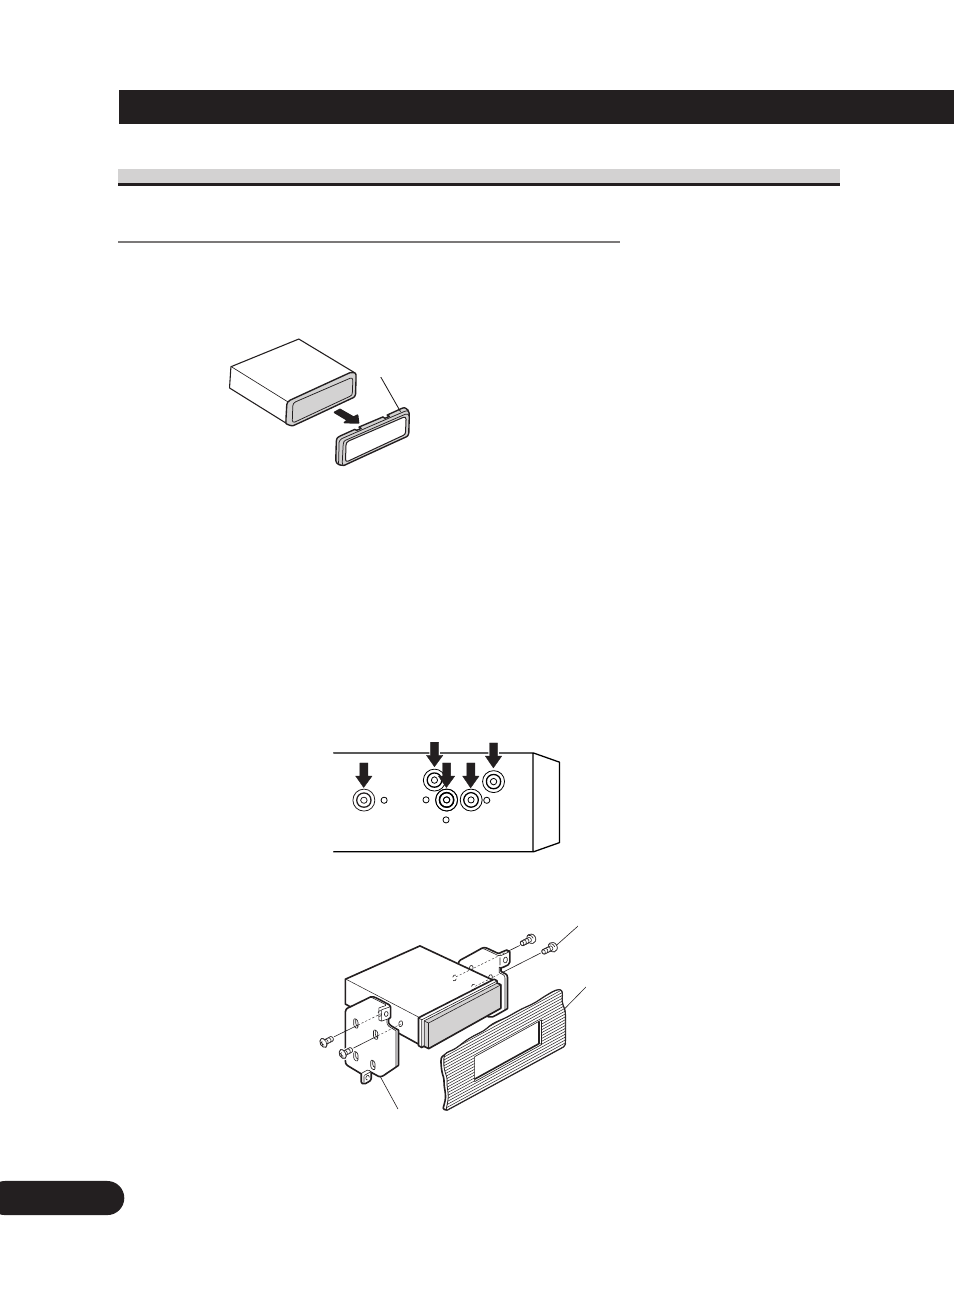
Installation using the screw holes on the side of the unit
1. Remove the frame. (Fig. 7)
Fig. 7
2. Fastening the unit to the factory radio mounting bracket.
(Fig. 8) (Fig. 9)
Select a position where the screw holes of the bracket and
the screw holes of the head unit become aligned (are fit-
ted), and tighten the screws at 2 places on each side. Use
either truss screws (5
× 8 mm) or flush surface screws
(5
× 9 mm), depending on the shape of the screw holes in
the bracket
.
Fig. 8
Fig. 9
11
13
12
10
ENG/MASTER 96 INST
10
Frame
To remove the frame, extend top and
bottom of the frame outwards in
order to unlock it. (When reattaching
the frame, point the side with a
groove downwards and attach it.)
• It becomes easy to remove the
frame if the front panel is released.
Screw
Dashboard or Console
Factory radio mounting bracket
- DEH-50UB EN (77 pages)
- DEH-4000UB ES (8 pages)
- DEH-P85BT (72 pages)
- DEH-P85BT (144 pages)
- DEH-3900MP (8 pages)
- DEH-3900MP (60 pages)
- DEH-P5100UB (8 pages)
- DEH-P5100UB (66 pages)
- DEH-3700MP (84 pages)
- DEH-3700MP (6 pages)
- DEH-P7600MP (132 pages)
- DEH-P9300R (112 pages)
- DEH-P9300R (8 pages)
- DEH-4000UB (73 pages)
- DEH-P6300R (26 pages)
- DEH-P6300R (140 pages)
- DEH-P6300R (52 pages)
- DEH-3400R (6 pages)
- DEH-3400R (124 pages)
- DEH-3700MP (90 pages)
- DEH-P8100R (82 pages)
- DEH-P4100R (100 pages)
- DEH-P7900UB (8 pages)
- DEH-P7900UB (52 pages)
- DEH-P7900UB (142 pages)
- DEH-2700R (116 pages)
- DEH-2700R (6 pages)
- DEH-3110 (52 pages)
- DEH-3110 (4 pages)
- DEH-P3500MP (92 pages)
- DEH-P3500MP (8 pages)
- DEH-P7400MP (112 pages)
- DEH-P7400MP (52 pages)
- DEH-2330R (30 pages)
- DEH-2330R (86 pages)
- DEH-2330R (6 pages)
- DEH-2330R (6 pages)
- DEH-1530R (128 pages)
- DEH-1530R (6 pages)
- DEH-2130R (80 pages)
- DEH-1400R (112 pages)
- DEH-1400R (6 pages)
- DEH-P6400R (96 pages)
- DEH-P6400R (52 pages)
- DEH-1600R (63 pages)