02 connecting up, Rear panel connections, Front panel connections – Pioneer RCS-55 User Manual
Page 39: Connecting up, Connecting up 02, Chapter 2
Connecting up
02
39
En
English
Chapter 2
Connecting up
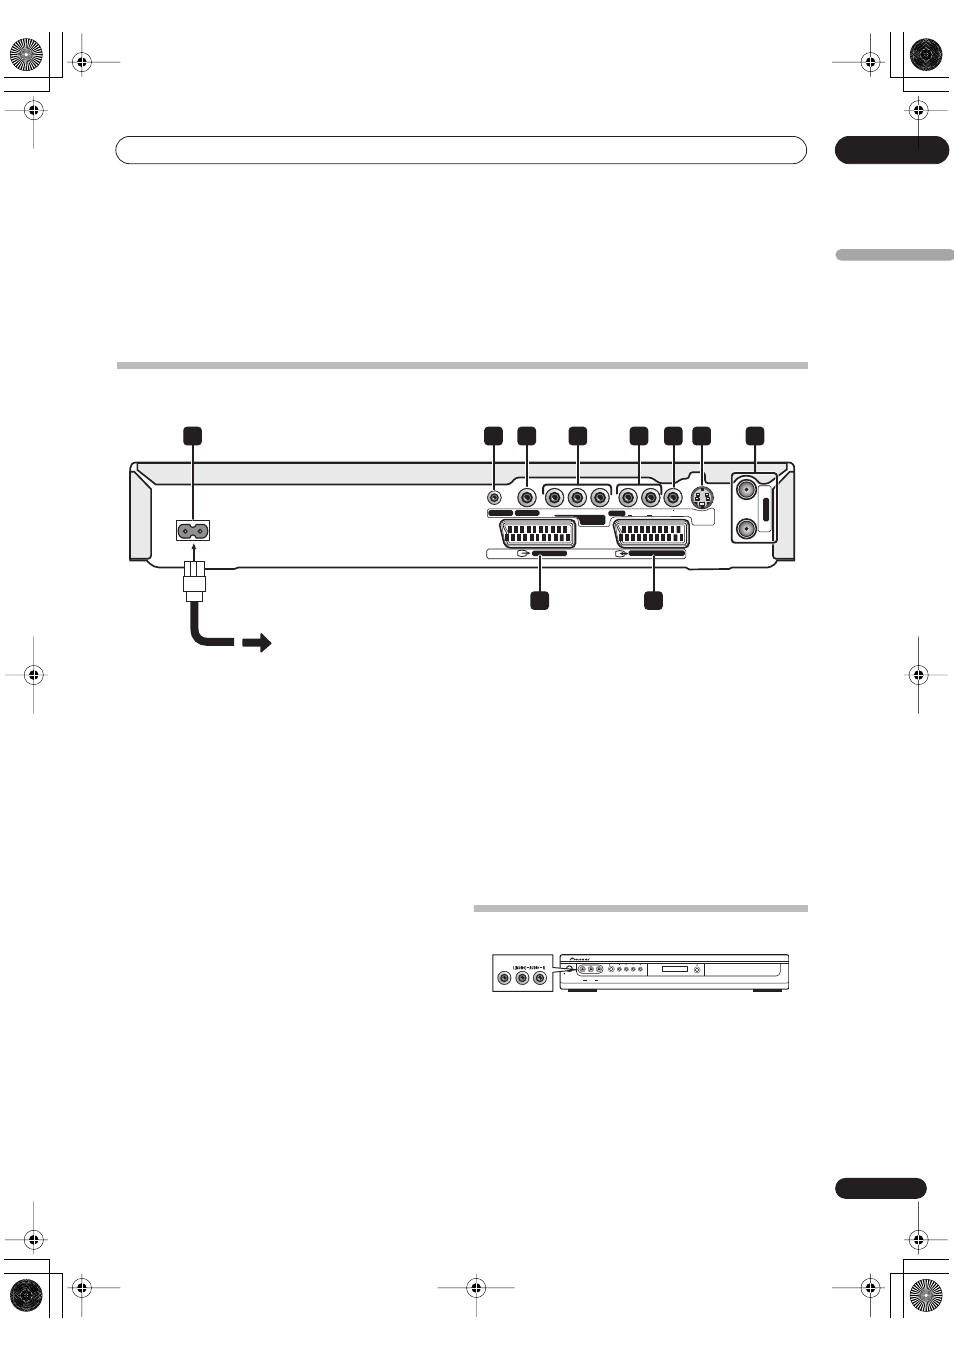
Rear panel connections
1
AC IN
Connect to a power outlet using the supplied power cable
only.
2
CONTROL IN
Connect to the
CONTROL OUT
terminal of the receiver
subwoofer.
3
COAXIAL DIGITAL OUT
Connect to the
DVD/DVR1
coaxial jack on the receiver
subwoofer.
4
COMPONENT VIDEO OUT
A high-quality video output for connecting to a TV or
monitor with a component video input.
5
Analog audio output (AUDIO OUTPUT)
Stereo analog audio output for connection to your TV or
AV receiver.
6
Composite video output (VIDEO OUTPUT)
Standard video output for connection to your TV or AV
receiver.
7
S-video output (S-VIDEO OUTPUT)
S-video video output for connection to your TV or AV
receiver.
8
ANTENNA IN/OUT
Connect your TV antenna to the
ANTENNA IN
jack. The
signal is passed through to the
ANTENNA OUT
jack for
connection to your TV.
9
AV2 (INPUT 1/DECODER) AV connector
Audio/video input/output SCART-type AV connector for
connecting to a VCR, or other equipment with a SCART
connector. The input accepts video and S-video. See
AV2/
L1 In
on page 82 for how to set this up.
10 AV1•RGB-TV AV connector
Audio/video output SCART-type AV connector for
connecting to a TV or other equipment with a SCART
connector. The video output is switchable between video,
S-video and RGB. See
AV1 Out
on page 82 for how to set
this up.
Front panel connections
On the left side of the front panel there is a second audio/
video input, consisting of a standard (composite) video
jack, and stereo analog audio jacks.
AC IN
IN
OUT
R
Y
P
B
P
R
L
AUDIO
VIDEO
S-VIDEO
OUTPUT
DIGITAL OUT
CONTROL IN
COMPONENT
VIDEO OUT
AV 1
・RGB - TV
AV 2 (INPUT 1 DECODER)
ANTENNA
1
3
2
4
5
6
7
8
9
10
STANDBY/ON
REC
VIDEO
INPUT 2
L(MONO)
AUDIO R
VIDEO
DVR-230_UK.book Page 39 Thursday, July 7, 2005 3:15 PM