Transfer the voice files to your pc – Olympus LS-3 User Manual
Page 89
89
5
EN
Tr
a
n
sf
e
r t
h
e vo
ic
e f
ile
s t
o
y
o
u
r P
C
Folder A
Folder B
Folder C
Folder D
Music
LS_3
Recorder
Folder A
Folder B
Folder C
Folder D
Music
Recorder
Windows
Removable
Disk
Macintosh
Untitled
Folder E
Folder E
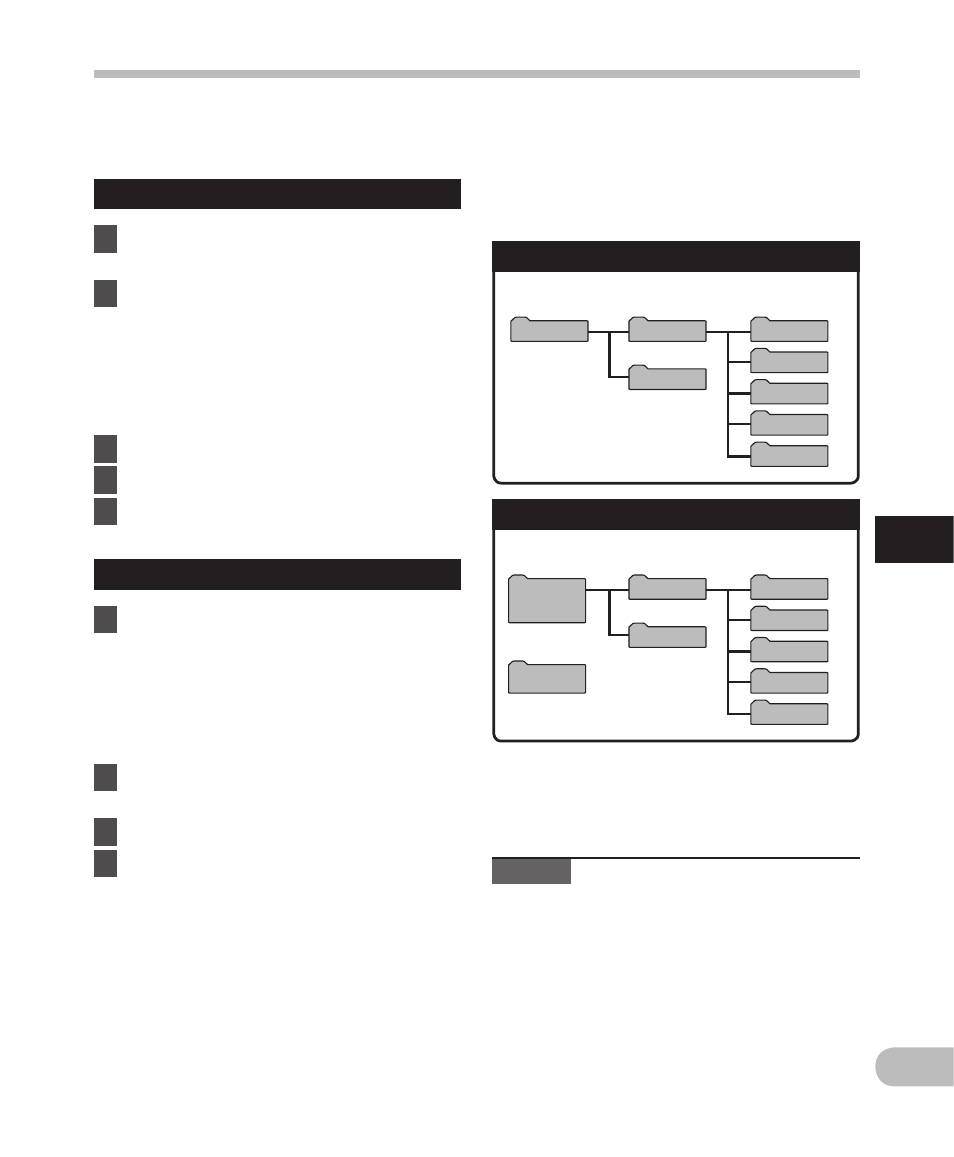
Transfer the voice files to your PC
The 5 voice folders of this recorder are named as [Folder A], [Folder B], [Folder C], [Folder D]
and [Folder E]. The recorded voice files are saved in these folders.
Windows
1
Connect the recorder to your PC
(
☞ P.87).
2
Open the Explorer window.
• When you connect the recorder to
Windows and open [My Computer],
it will be recognized by the drive
name of the product name. Inserting
a microSD card will allow you to use it
as [Removable Disk].
3
Open the product name folder.
4
Copy the data.
5
Disconnect the recorder from the
PC (
☞ P.88).
Macintosh
1
Connect the recorder to your PC
(
☞ P.87).
• When you connect the recorder to
Mac OS, it will be recognized by the
drive name of the product name
on the desktop. If a microSD card is
inserted, [Untitled] will be displayed.
2
Double-click the product name
icon on the desktop.
3
Copy the data.
4
Disconnect the recorder from the
PC (
☞ P.88).
Notes
• While transmitting data, [Busy] is
displayed, and the LED indicator light
flashes. NEVER disconnect the USB cable
while the LED indicator light is flashing. If
you do, the data will be destroyed.
• In the Mac OS operational environment,
WMA format files cannot be played back.
• In a Windows standard environment,
24-bit WAV-format files cannot be played.
Use “Olympus Sonority” for playback of
such files.
4 Drive names and folder names
when a PC is connected:
Built-in flash memory
microSD card
Drive name
Folder name
Drive name
Folder name