E n how to use the on screen display (osd), Color temperature window – Philips 150B User Manual
Page 15
15
E
N
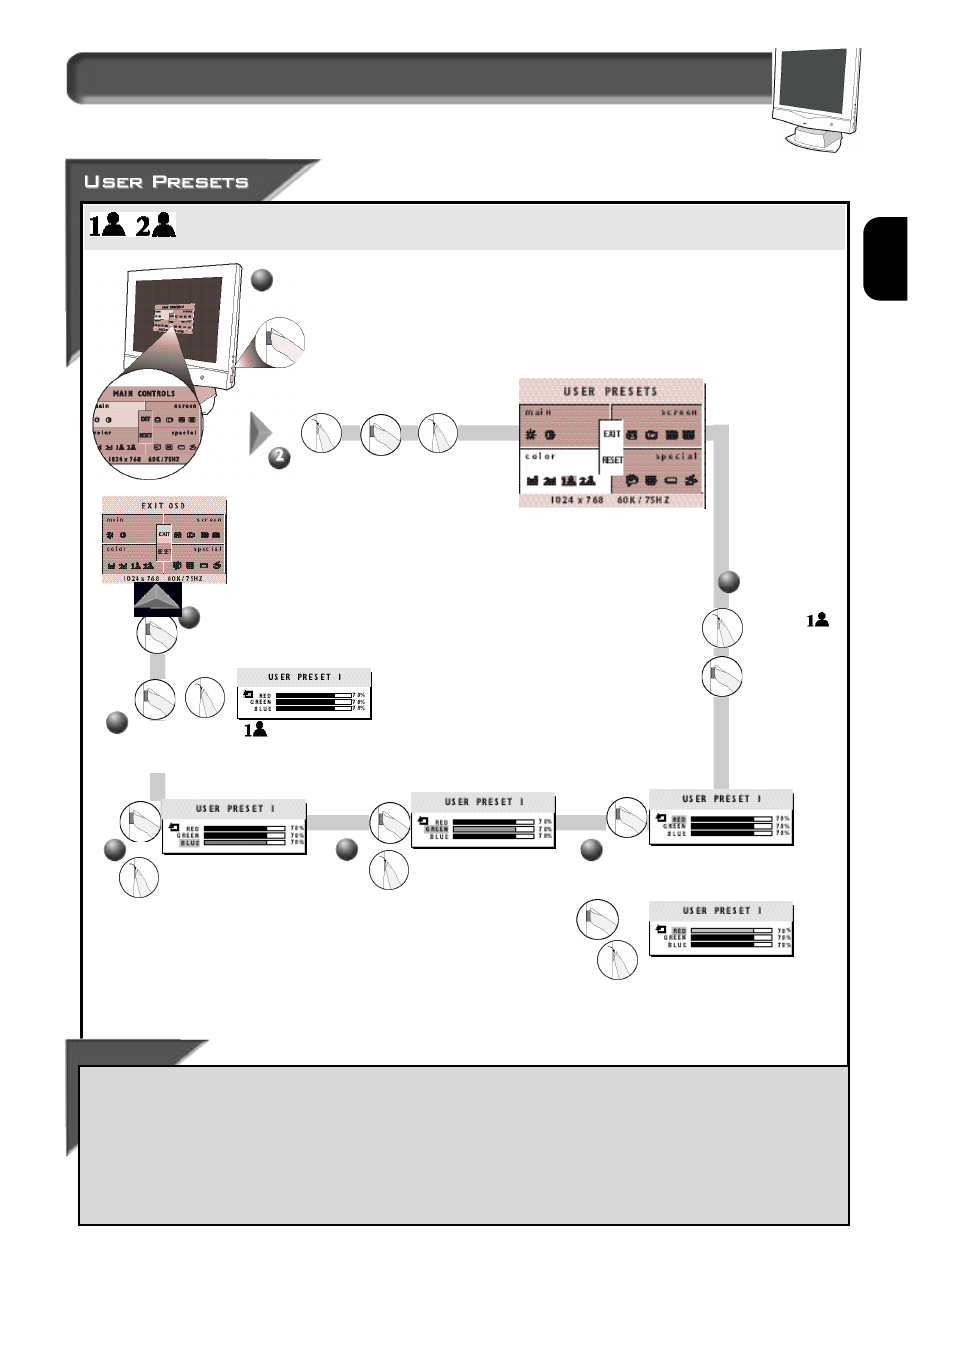
How to Use the On Screen Display (OSD)
If you need to adjust any of the two preset options (DTP or CAD/CAM), follow the steps below to modify the colors that
appear on your screen. You can make individual adjustments to each of the preset options.
Smart Help
After re t u rning to Exit . . .
. . . to continue to User Preset 2, repeat steps 3 through 7, selecting U
S E R
P
R E S E T
2 .
. . . to continue to Special Contro l s w i n d o w, t u rn the R
O TA RY
knob until S
P E C I A LC O N T R O L
W
I N D O W
is highlighted. Next, press the O
N
S
C R E E N
D
I S P L AY
button. Now, follow steps 2 - 5 under S
P E C I A L
C
O N T R O L S
on the next page.
. . .to exit the On Screen Display completely, p ress the OSD button and choose either S
AV E
or N
O
S
AV E
in setting mode, then push OSD
button to exit OSD. (See page 18 for other exit options.)
Press the OSD button.
3
To exit U
S E R
P
R E S E T
1 , press the OSD button. Next,
t u rn the R
O TA RY
knob until the E
X I T
box is highlighted.
Then, press the O
N
S
C R E E N
D
I S P L AY
b u t t o n .
1
Tu rn the R
O TA RY
k n o b until the C
O L O R
w i n d o w is highlighted. Next, press the
OSD button. Then, turn the R
O TA RY
k n o b
until U
S E R
P
R E S E T S
icon is highlighted.
Color Temperature window
4
If necessary,
t u rn the R
O TA RY
knob until
of the U
S E R
P
R E S E T S
i s
h i g h l i g h t e d .
Next, press the
O
N
S
C R E E N
D
I S P L AY
button.
First, R
E D
will be highlighted.
Next, to adjust the re d ,
p ress the OSD button again.
Then, turn the R
O TA RY
knob to
i n c rease or decrease the re d .
5
When done with red, press the
O S D button. G
R E E N
will be
highlighted. Then, turn the
R
O TA RY
knob to increase or
d e c rease the green.
When done with green, pre s s
the O S D button. B
L U E
will be
highlighted. Then, turn the
R
O TA RY
knob to increase or
d e c rease the blue.
7
You will now be back at the E
X I T
w i n d o w. See S
M A RT
H
E L P
b e l o w
for options.
8
6