Replacing the front panel board – Lenovo ThinkServer RD650 User Manual
Page 166
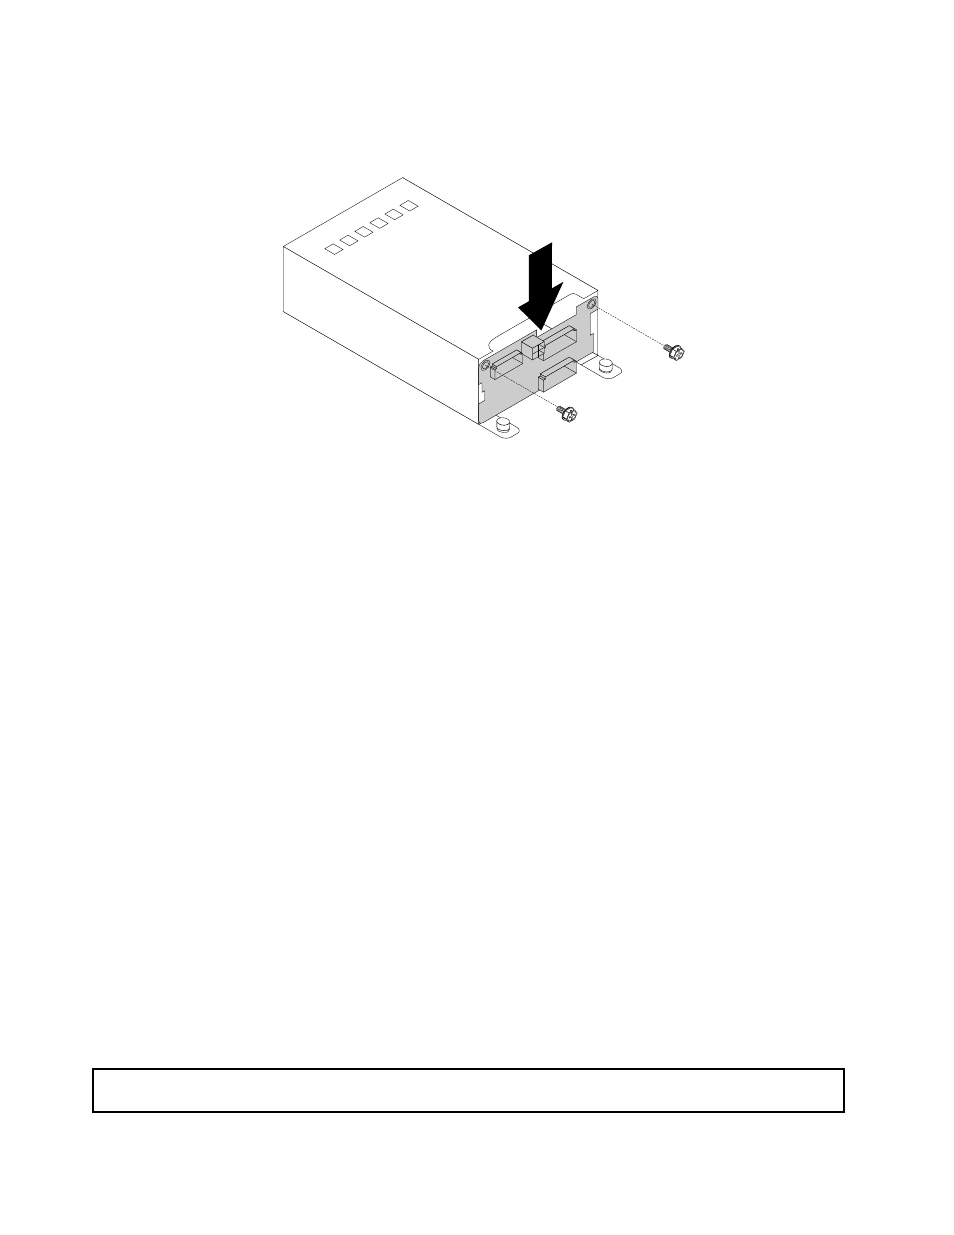
8. Note the orientation of the new backplane. Align the screws holes in the new backplane with the
corresponding ones in the cage. Then, install the two screws to secure the backplane.
Figure 140. Installing the rear backplane
9. Install the rear backplane/cage assembly to the chassis. See “Installing the rear backplane/cage
10. Reinstall all the drives and dummy trays (if any) in the rear drive assembly. See “Installing or replacing a
11. Refer to your note to connect the cables to the new backplane.
12. If you are instructed to return the old backplane, follow all packaging instructions and use any packaging
materials that are supplied to you for shipping.
What to do next:
• To work with another piece of hardware, go to the appropriate section.
• To complete the replacement, go to “Completing the parts replacement” on page 183.
Replacing the front panel board
This topic contains the following information:
•
“Replacing the front panel board for server models with 2.5-inch-drive bays and 2.5-inch/3.5-inch
•
“Replacing the front panel board for server models with 3.5-inch-drive bays” on page 154
Notes:
• The front panel board is extremely sensitive to ESD. Ensure that you read and understand “Handling
static-sensitive devices” on page 68 first and carefully perform the operation.
• Depending on the model, your server and the front panel board might look different from the illustrations
in this topic.
Replacing the front panel board for server models with 2.5-inch-drive bays and
2.5-inch/3.5-inch mixed drive bays
Attention: Do not open your server or attempt any repair before reading and understanding “Safety information”
on page iii and “Guidelines” on page 67.
152
ThinkServer RD650 User Guide and Hardware Maintenance Manual